

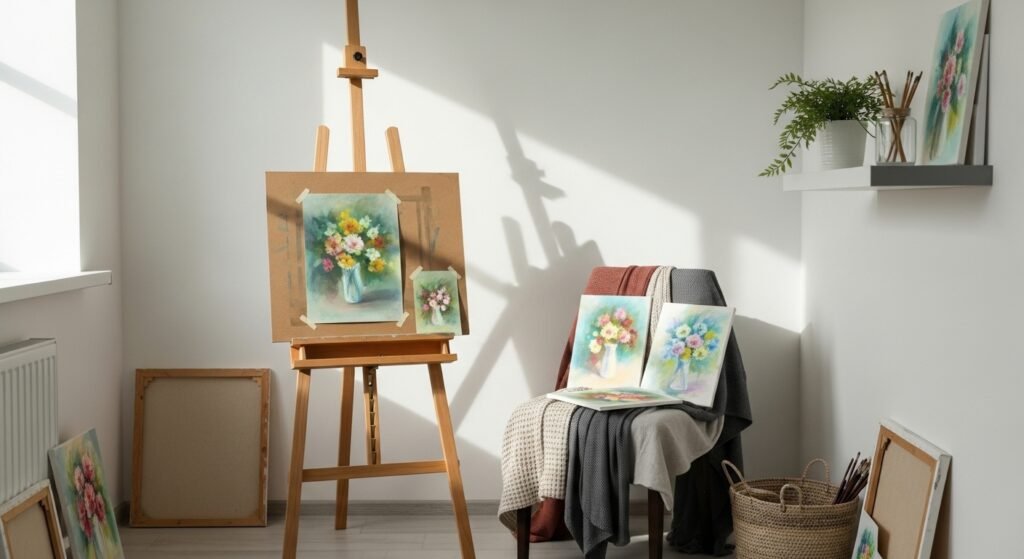
My living room had nice furniture and decent lighting but it still felt like a waiting room. Took me embarrassingly long to figure out it was missing texture. Every surface was smooth, every color was flat, and nothing invited you to actually sit down. I pulled a chair into a sunny corner, hung one pastel sketch, and suddenly I wanted to be in that room more.
These ideas lean vintage-modern with a soft, lived-in art vibe. Most items are under $50, with a few splurges around $100. Works for a corner of a living room, a tiny bedroom, or a kitchen table turned studio. Most home artists fight dust more than anything. Over half grab pencils first now. Most beginners squeeze into under 10 sq ft for setups.
Vertical Easel With Dust Catch Tray For Small Corners
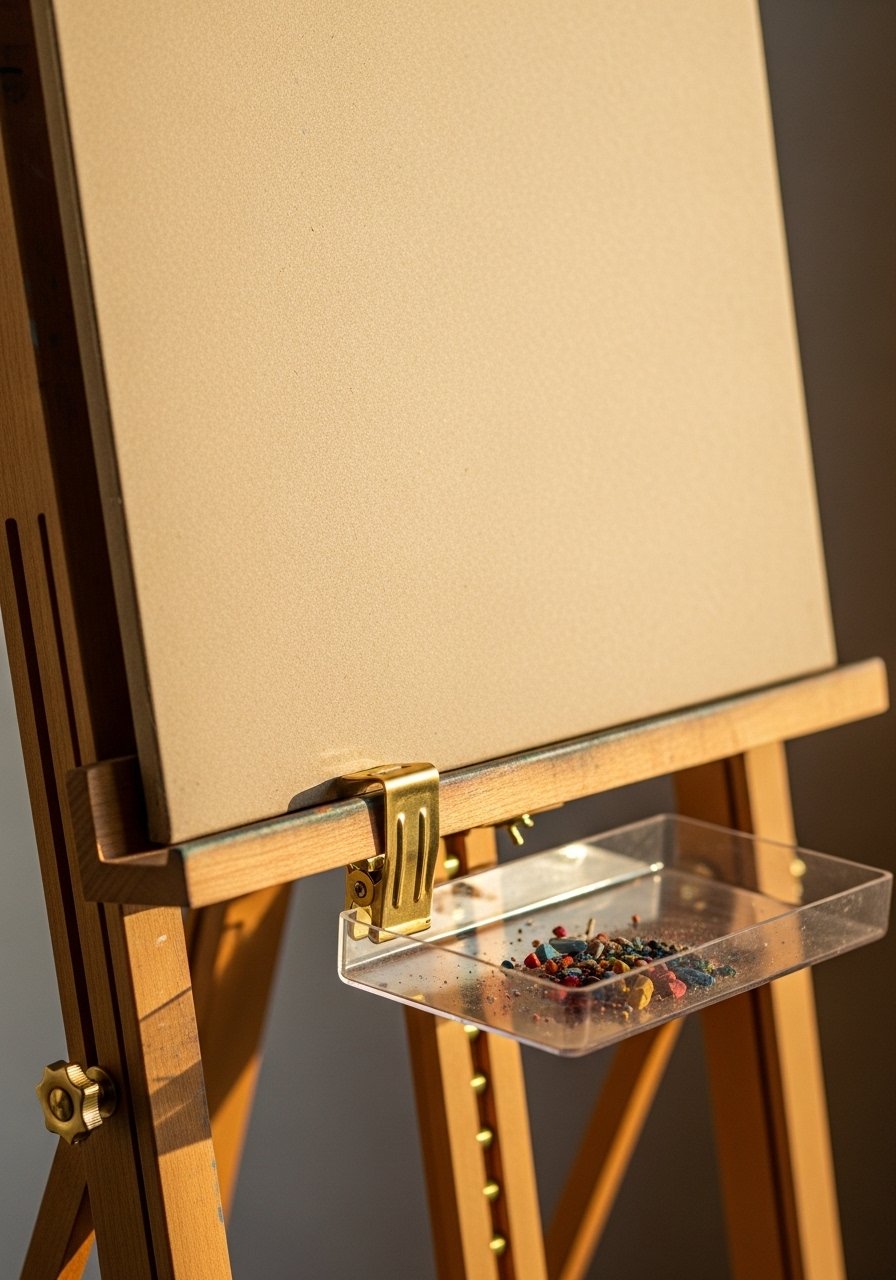
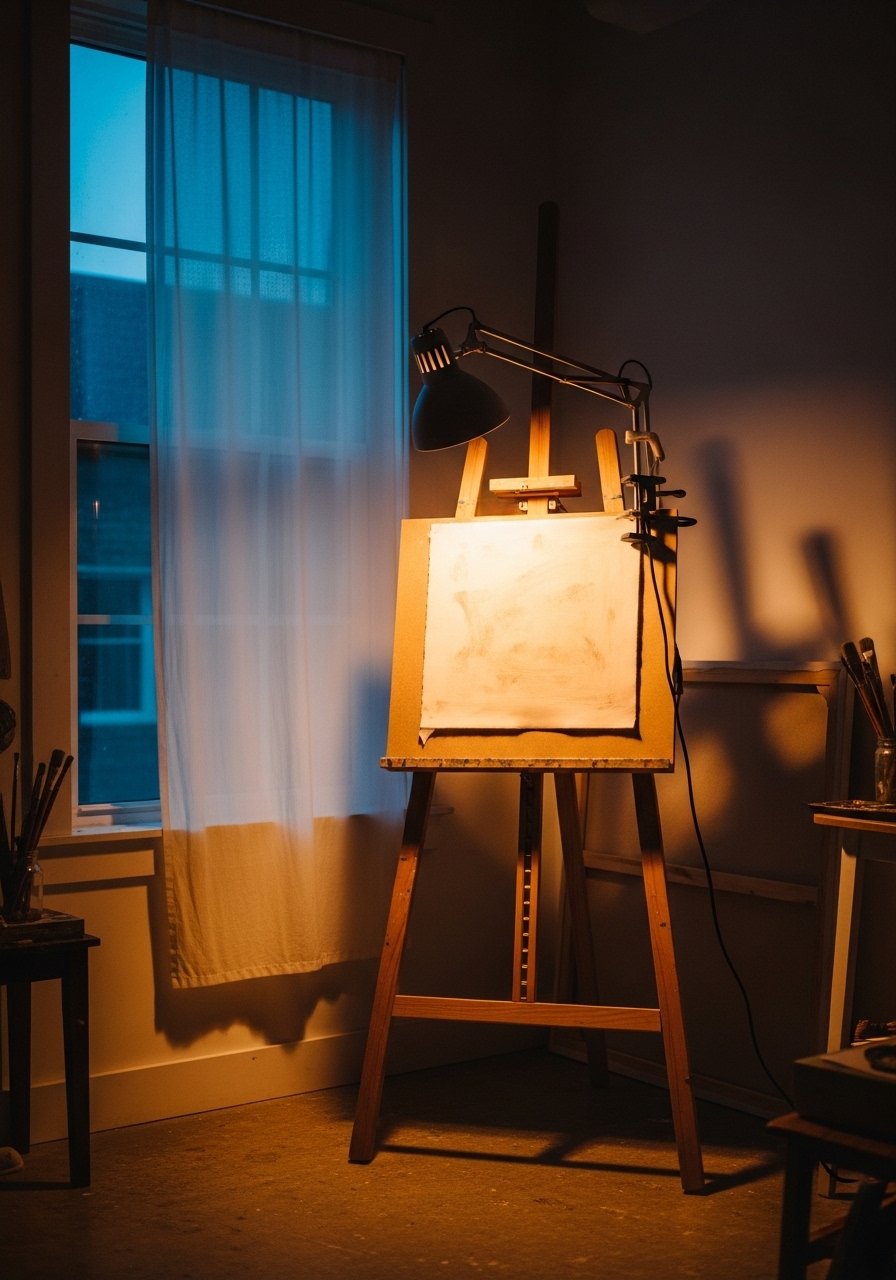
I used to work flat on a table and my colors kept going muddy. When I switched to an adjustable wooden easel and clipped a small tray under the ledge, dust fell away and layers stayed pure. For a renter-friendly option try an adjustable wooden easel that tilts from vertical to slight angle. The trick is to run 24×36 inch paper vertical, because that size gives you breathing room and keeps your strokes long and confident. Budget wise you can build this for about $60 to $120. Common mistake is clamping the tray too high so dust still falls back onto the work. Aim for the tray 4 to 6 inches below the easel ledge.
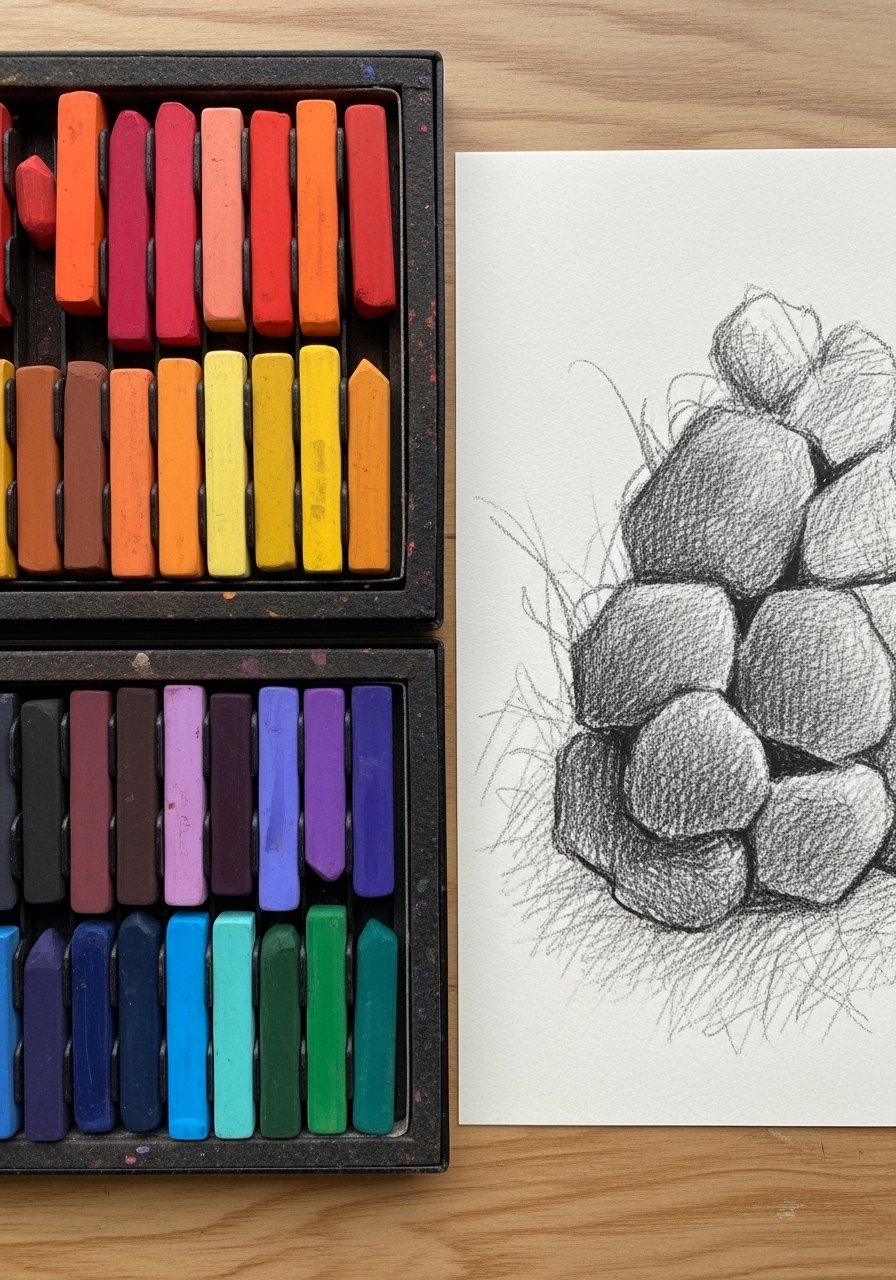
Pastel Pencil Starter Layers For Clean Underpaintings
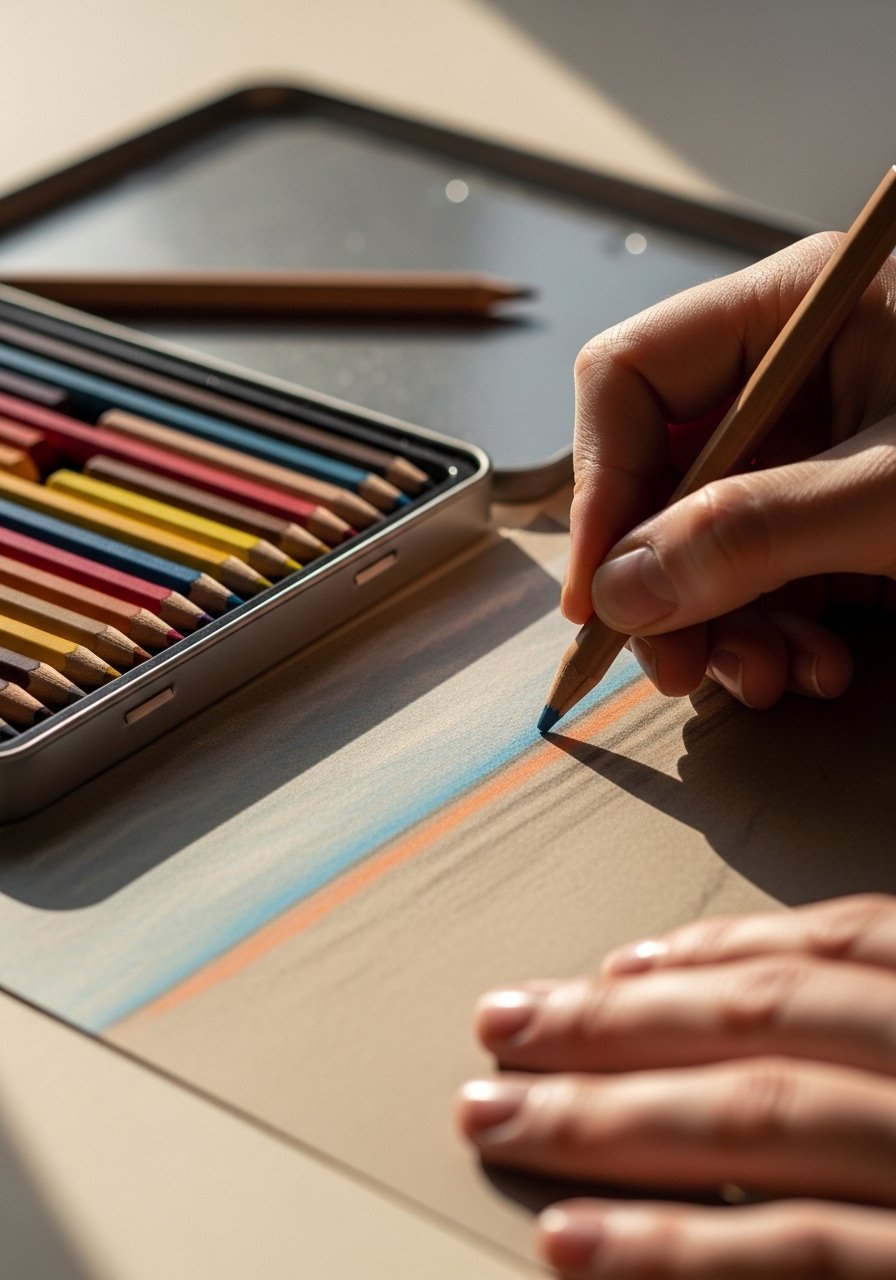
I started with full sticks and shredded my paper fast. Pastel pencils let you block in composition without a crumbly mess. Grab a set of 60 pencils if you want full coverage without constantly sharpening, like this set of pastel pencils. The rule I use is draw the main shapes with pencils, then build color in 8 to 12 light layers. Overworking the first layer is a mistake, so keep pressure light and stop when you can see the paper tooth. Practical detail most guides skip, over half grab pencils first now, so pencils are not just for sketching anymore.
Side-Stroke Broad Wash Base For Fast Backgrounds
When I want a quick background I use the side of a soft stick, not the tip. That fills areas fast and keeps sticks from grinding down oddly. Use softer brands for the base layer and switch to harder sticks for mid layers. I like a modest set around $30, something like a soft pastel set. A specific habit that helps is keeping hatching lines the same direction on the first pass, then cross-hatching later for texture. The common error is pressing too hard. Light pressure means you can layer 10 times without killing the tooth.
Hatching Texture Build-Up For Textured Modern Pieces
I learned to hatch deliberately instead of rubbing everything smooth. A single-direction hatch followed by a perpendicular pass gives you painterly depth without muddy blends. Try NuPastels or squared sticks that sharpen well. These sharpenable pastels help keep clean edges. Use uniform hatch lengths for even texture and plan 15 to 20 minutes per textured pass so you do not rush details. People often over-blend with fingers and lose the liveliness. Work with small layered builds instead, and pair this with the vertical easel idea for cleaner surfaces.
Living Plant Wall Backdrop For Inspiration And Color
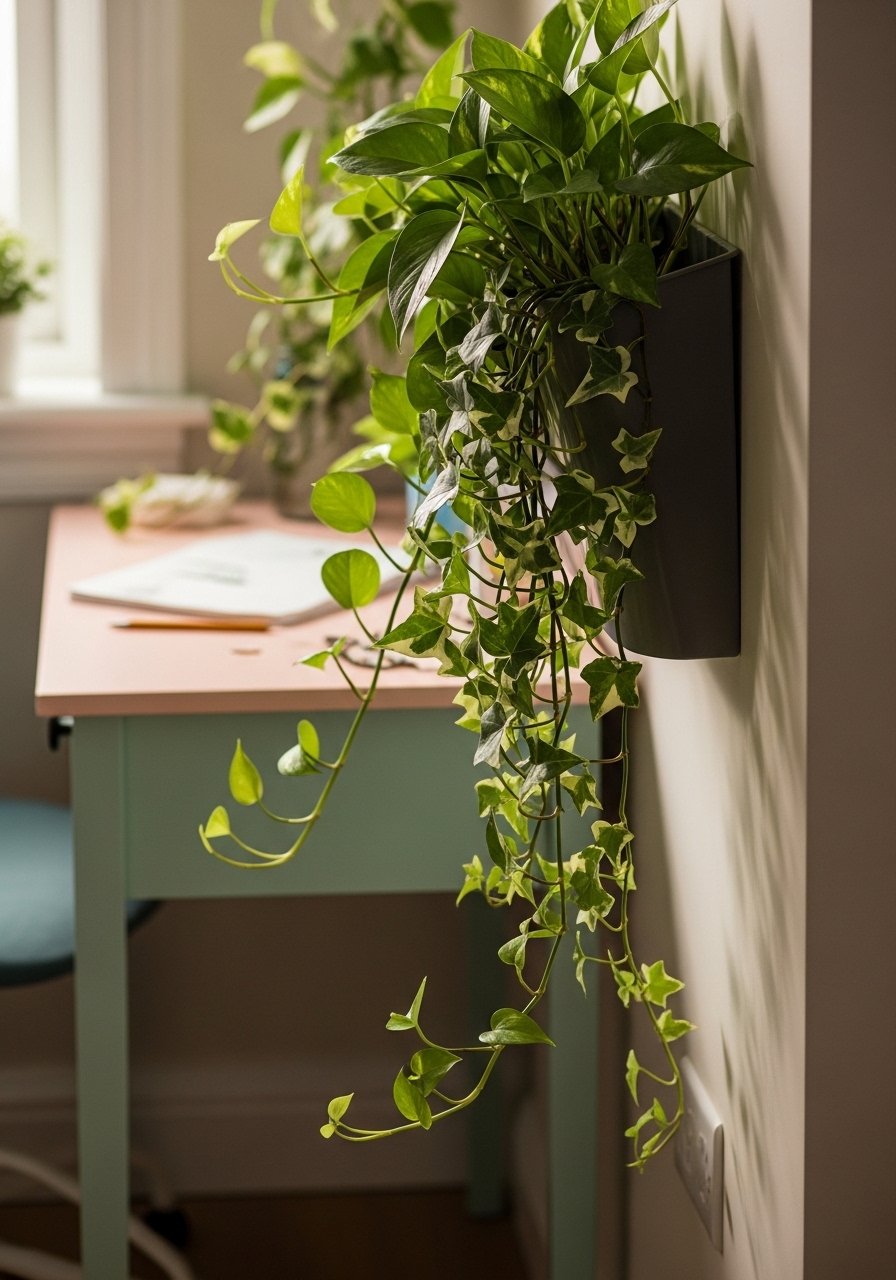
Plants lift a studio without stealing floor space. I hung pocket planters on a tension rod and suddenly everything felt fresher. For renters, use command hooks and a slim wall pocket planter to avoid drilling. A single green wall speeds up creative mood swings and gives you reference shapes for greens and light. Most people put too many small plants in one spot. One or two larger trailing plants reads cleaner. Pair this with the meditation nook if you want a calming corner before you paint.
Natural Light Plus Clamp Lamp For Accurate Colors
Colors lie under the wrong bulbs. I used to get home and see my pastels look off because I had only warm bulbs. A daylight clamp lamp fixes that and clamps to shelves or easel arms. I use an OttLite-style clamp lamp paired with sheer curtains to control glare. Test a small strip of color under both light sources before committing to a palette. A common mistake is relying on ceiling lights alone. Aim for balanced window light plus a 5000K lamp for the truest match.
Sharpened Stick Detail Work For Precise Edges
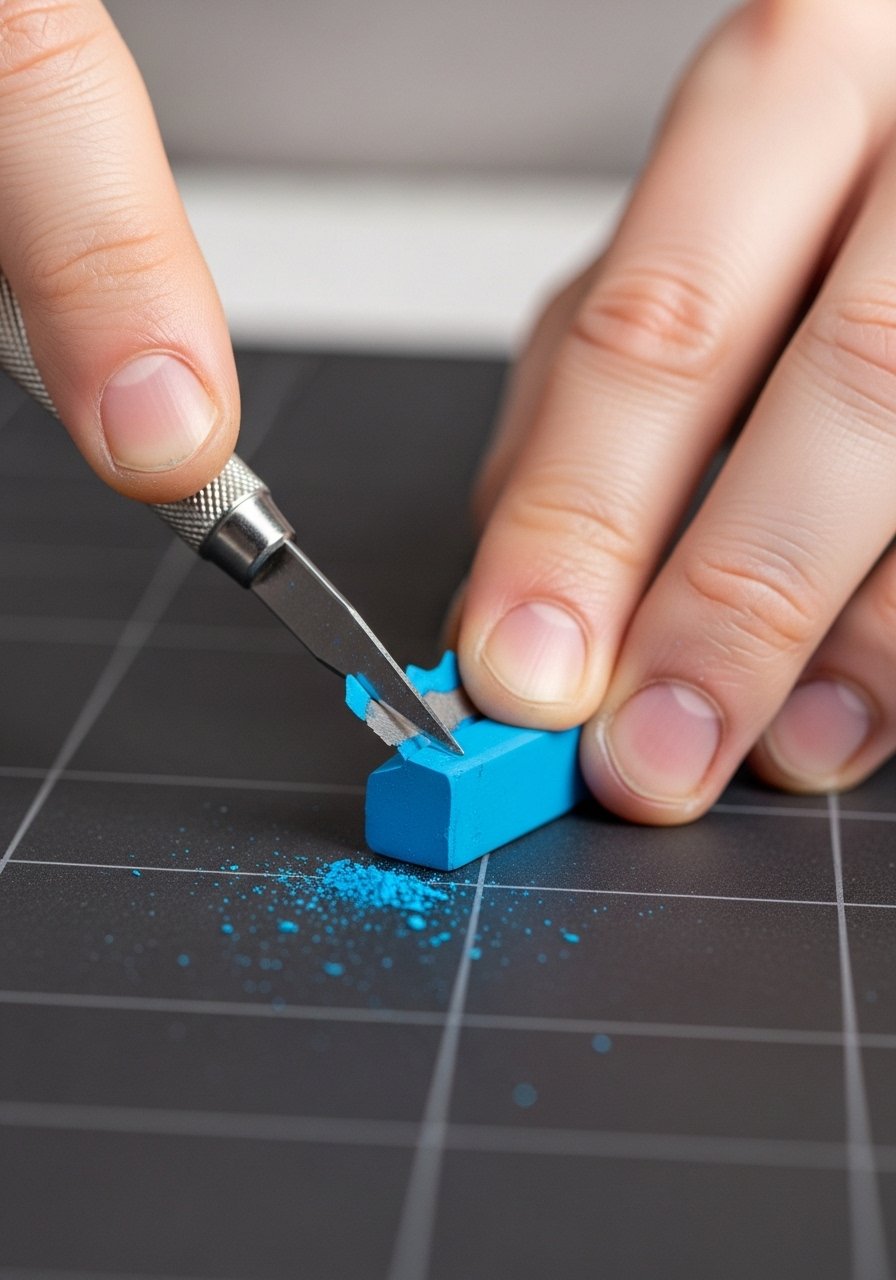
I learned to use a utility knife for points, not grinders. Knife-sharpened sticks give fine lines for hair, grasses, and lashes. A basic utility knife with extra blades plus a leather strop does wonders. The detail trick is to shave away at a 15 to 20 degree angle for a tapered point that holds up for a few strokes. Don’t try to get razor-sharp points on very soft sticks or they will crumble. I keep a small jar for shavings so my cat does not investigate dust. This is one of those pet-owner angles most guides skip.
Meditation Corner Nook For Better Focus Before Painting
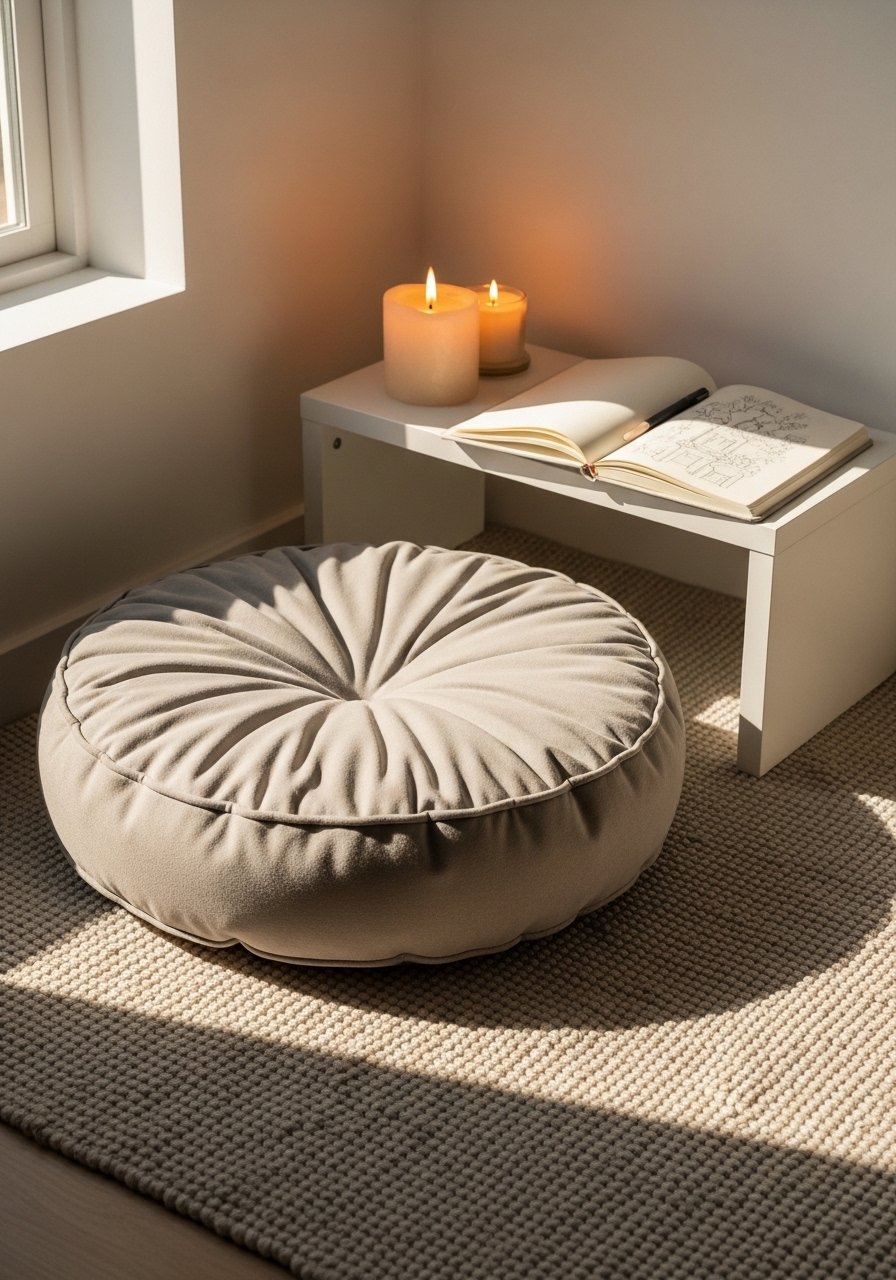
There was one week I sat down to paint and my mind raced. A five-minute sit with a little corner cushion helped more than an extra hour of technique. Make a nook with a floor cushion and a low shelf for your current sketchbook and a small plant. I use a round floor cushion that doubles as guest seating. Keep it simple and limited to three items only. The mistake is cluttering this corner with supplies. Treat it as a short pre-session reset and you will sit down with better focus.
Storage Bins Under Table For Quick Pack Away
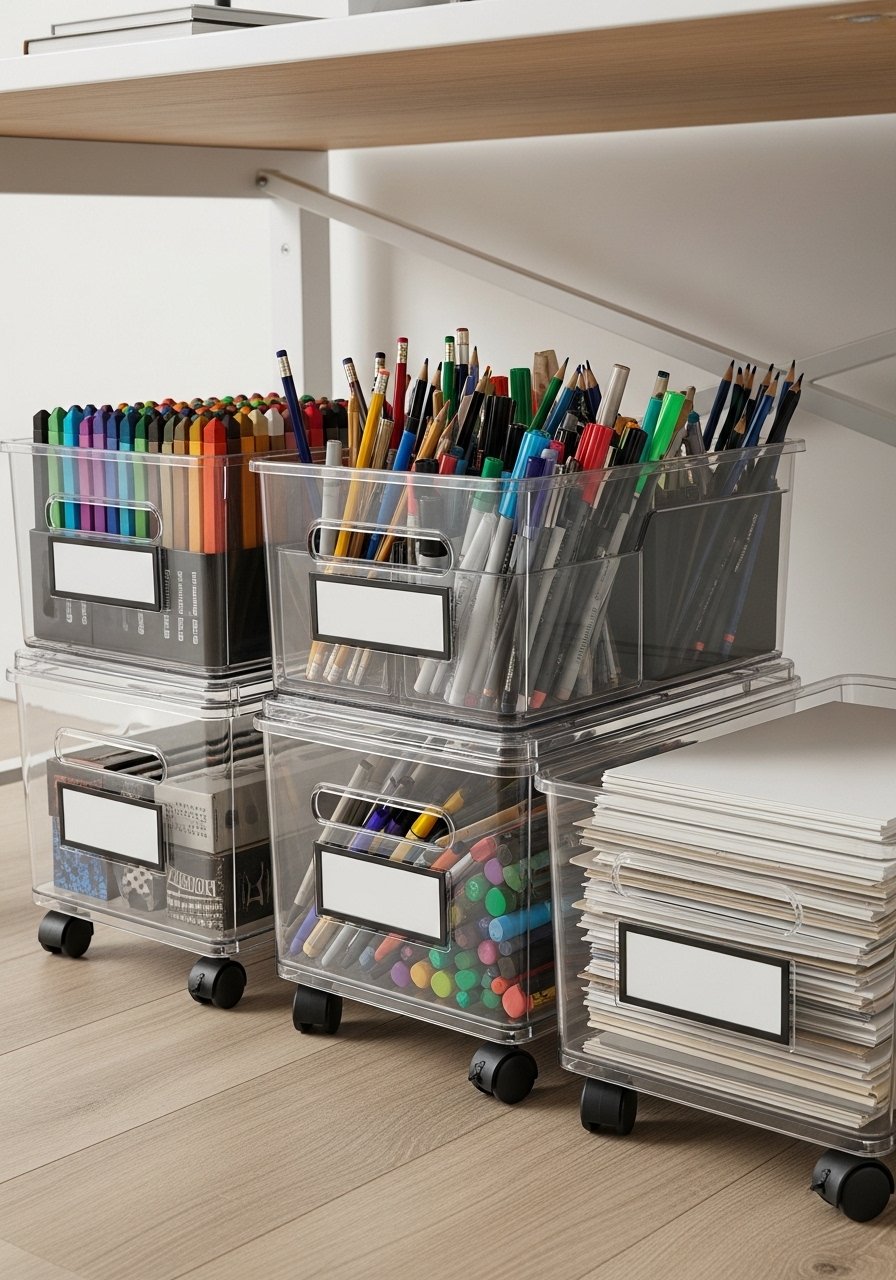
My studio doubles as a dining area so everything must be tidy fast. Clear bins on casters under the table solve that. I keep full-stick sets, pencils, and a packet of 24×36 paper in labeled bins so I can roll them out and start in under five minutes. I use clear storage bins on wheels and stack them by color family. A real detail people miss is wiping the easel ledge every 15 to 20 minutes or you will resettle dust onto the work. This storage trick plus the wipe routine cuts cleanup time in half.
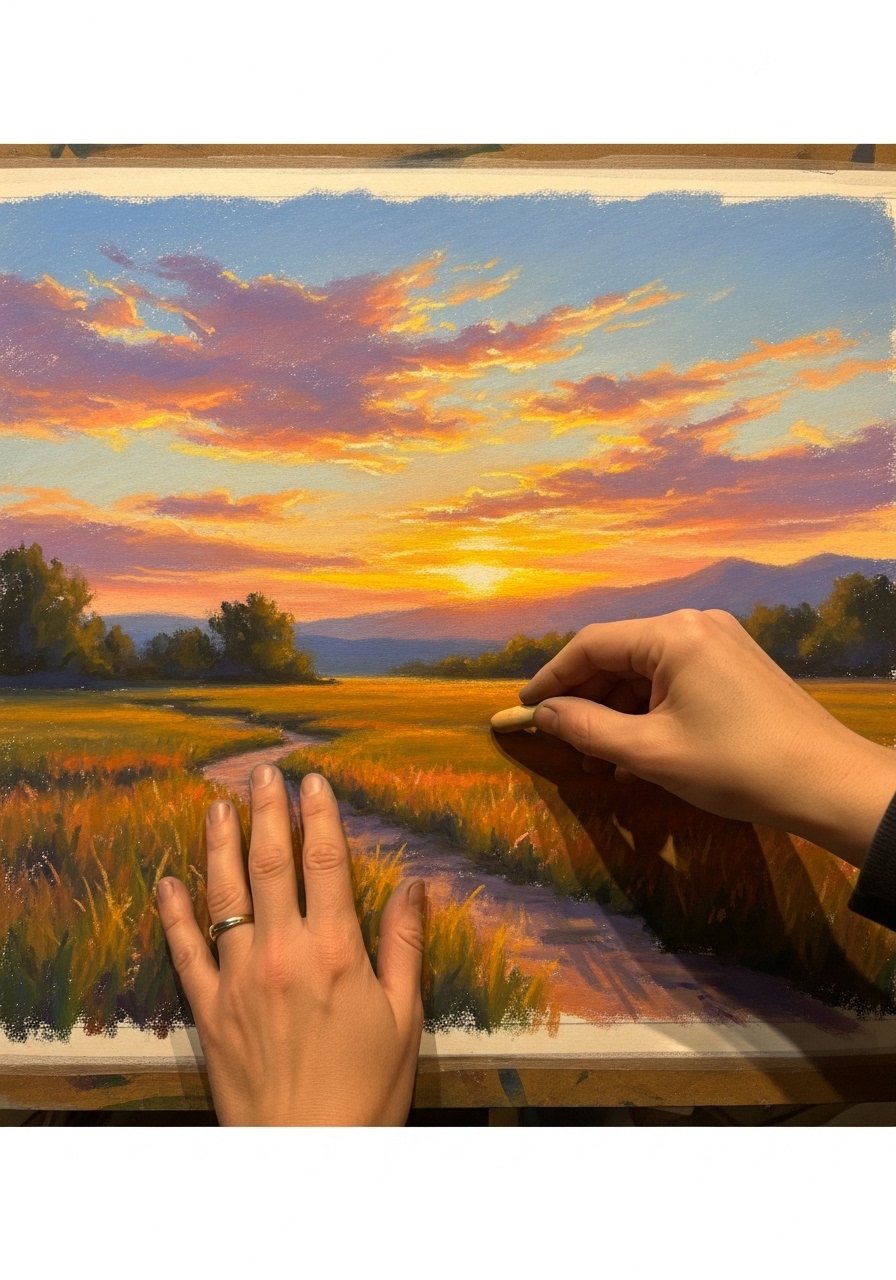
Kneaded Eraser Spot Fixes For Gentle Corrections
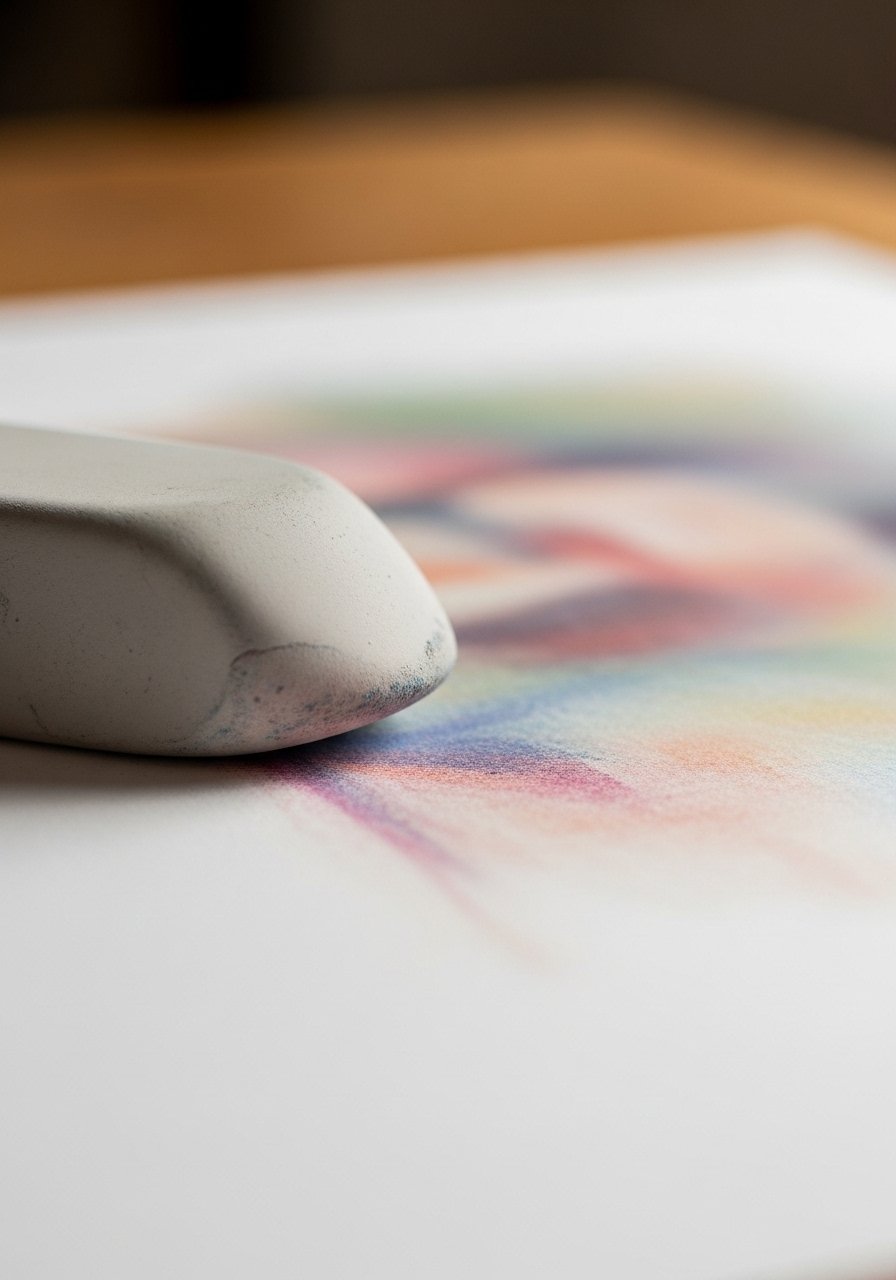
I used to panic at a wrong stroke and overwork the area. A kneaded eraser gives you control without ripping paper. Keep two on hand, one for lift and one for shaping, and use gentle dabs rather than rubs. A basic kneaded eraser pack is cheap and lasts months. The common mistake is treating it like a sandpaper. Pinch and roll, lift a little pigment, then redraw with a pencil if you need structure. Pair the eraser with pastel pencils for clean rebuilds.
Vacuum With HEPA Filter For Safe Post-Session Cleanup
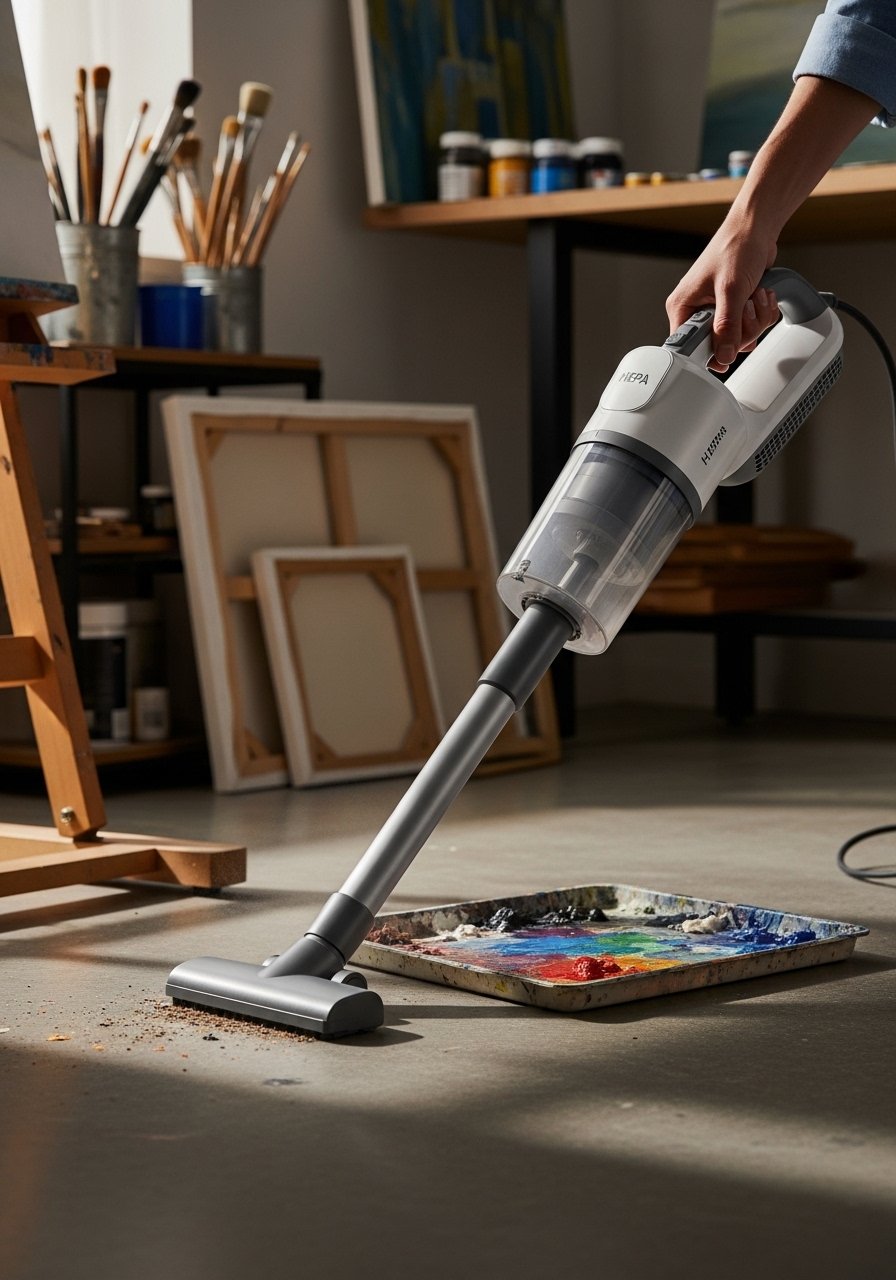
You have to clean pastels right or you will track dust through the apartment. I switched from a broom to a small HEPA handheld and it made a huge difference. Use a quick 2 to 3 minute pass over the ledge, floor, and chair after each session. I use a compact HEPA handheld vacuum that fits in a drawer. One fresh angle I add is storing a small lint roller near the easel for tabletop checks before you leave the room. Clean well and your living areas stay guest-ready.
Your Decor Shopping List
- Honestly the best $40 I have spent. Adjustable wooden easel, folds small for tight apartments
- For pencils and detail work, 60-piece pastel pencil set, good range for underlayers
- For broad washes, soft pastel set in a 24-color box, crumbly enough for blending
- For sharpening, utility knife with extra blades, keep blades sharp and safe
- For storage under tables, clear storage bins on wheels, size 12x15x8 inches recommended
- For cleanup, compact HEPA handheld vacuum, quiet and apartment friendly
- For lighting, daylight clamp lamp, 5000K bulb for accurate color checks
- For a meditation nook, round floor cushion, 24-inch diameter, removable cover, similar options at Target
Shopping Tips
- White oak beats dark wood in 2026. Design feeds have shifted completely. White oak floating shelves look current and hold plants or pastels.
- Grab velvet pillow covers for $12 each. Swap them seasonally and your whole corner reads different.
- Curtains should puddle or kiss the floor, never hang halfway up. 96-inch linen panels are right for 9-foot ceilings.
- One large plant beats five tiny succulents. If you need height try an artificial fiddle leaf fig 6ft where light is low.
- For dust control, get a small HEPA-handheld vacuum and schedule a two-minute wipe after each session.
Frequently Asked Questions
Q: Can I use pastels in a tiny apartment with no dedicated room?
A: Yes. Most beginners squeeze into under 10 sq ft for setups. Use a vertical easel and clear under-table bins. Keep a dust routine of a 2 to 3 minute vacuum and a ledge wipe every 15 to 20 minutes while working.
Q: Why do my colors look different at night?
A: Your bulbs are changing everything. Use a daylight clamp lamp around 5000K to check true colors. Also view a small swatch under both window light and lamp before finishing.
Q: My sticks crumble and I waste product. Any tips?
A: Work light and start with pencils for the underlayers. Over half grab pencils first now, because they save sticks. Use side-strokes for big areas and sharpen only when you need a point.
Q: How do I keep pastel dust away from pets?
A: Store work in a closed portfolio and put pet bowls and beds in separate zones. Use a sealed bin for leftover shavings and a HEPA vacuum after sessions. Pet-proof lids on storage bins are a small extra step that helps.
Q: Should I blend with my fingers or a tool?
A: Both, but not at once. Fingers are great for subtle smudges. Use small hatching builds when you want texture. Too much rubbing turns colors muddy, so hatch then blend selectively.
Q: What size paper do I actually need for landscapes?
A: Aim for at least 24×36 inches for comfortable landscapes. That size gives room for long strokes and prevents cramped compositions when you use side-stroke and hatching techniques.

