
Decorating kitchen shelves so they look effortlessly Pinterest-worthy can feel intimidating—but here’s the secret: it’s not about having expensive decor. It’s about layering, balance, and intention. The kitchens you save again and again all follow a few quiet rules that designers swear by.
Let’s break those rules down into clear, doable steps you can actually follow—no styling degree required.
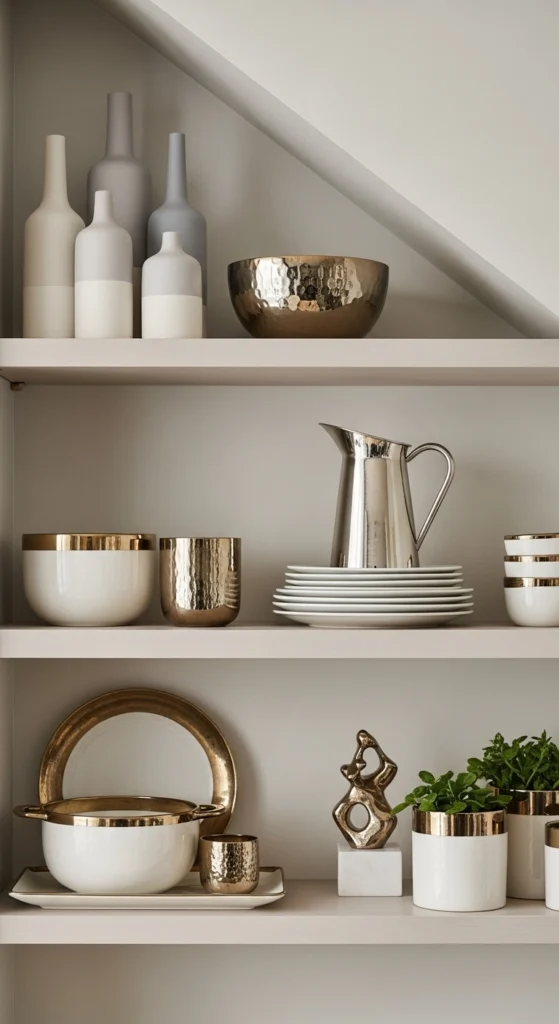
1. Start With Height Layering (The Foundation Rule)
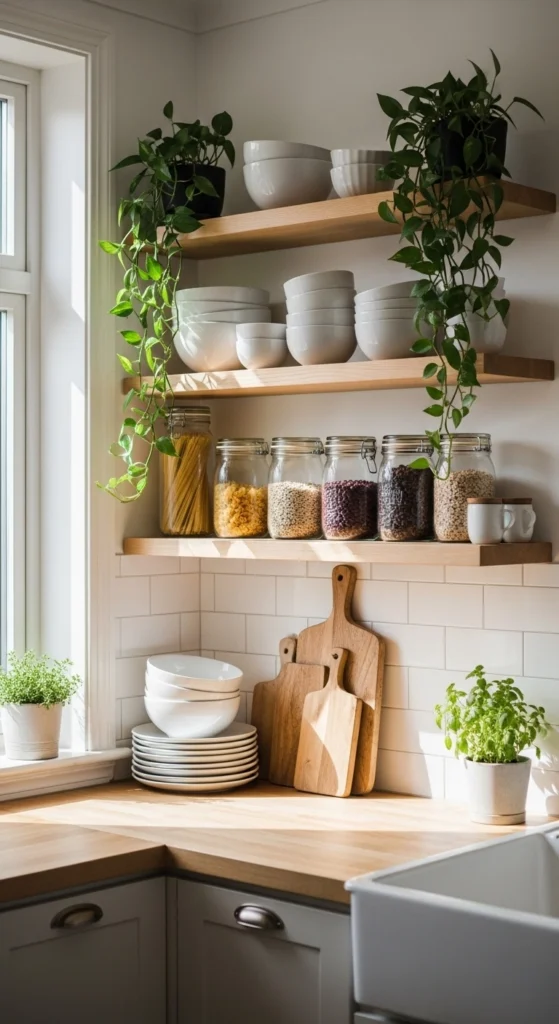
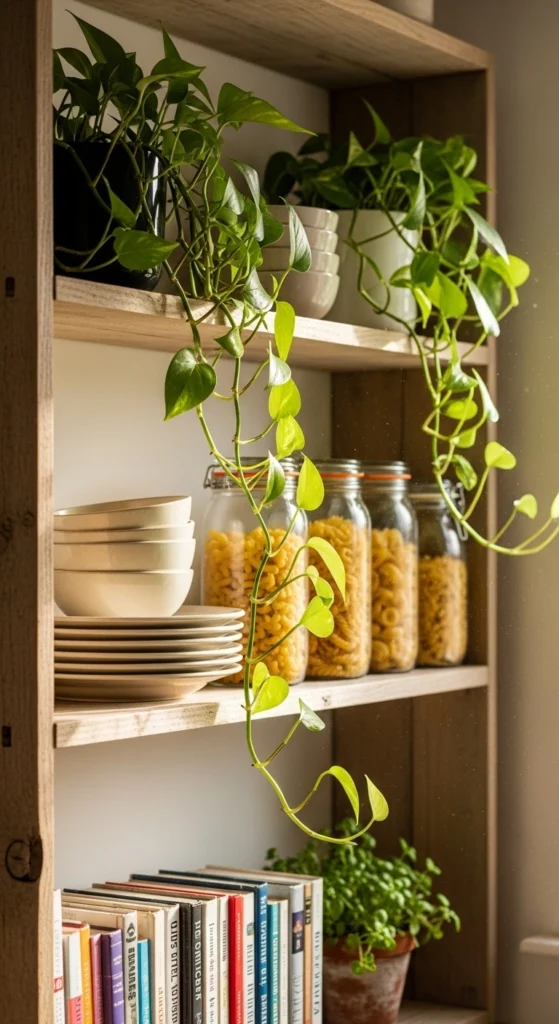
Every Pinterest-perfect shelf starts with depth. Flat shelves feel boring because everything sits at the same height. The fix? Think in layers.
Use this simple formula:
- Back: Tall items (vases, pitchers, framed art, boards)
- Middle: Medium pieces (bowls, stacked plates, jars)
- Front: Small accents (candles, salt cellars, mini plants)
This instantly creates dimension and visual interest—even if you’re using everyday items.
Pro tip: Lean items instead of hanging them. It adds height without drilling or clutter.
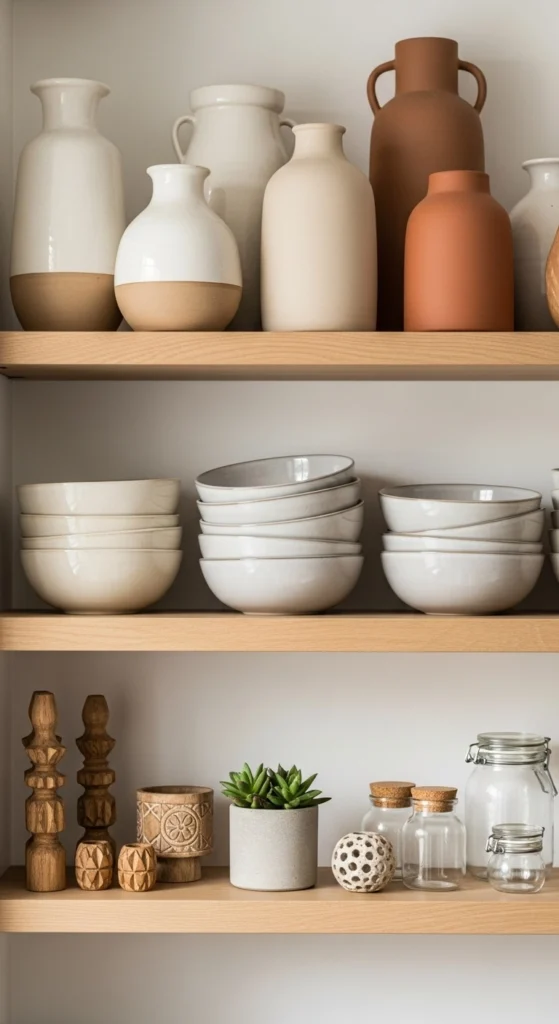
2. Use the Rule of 3s (Why Odd Numbers Work)
If shelves feel “off” but you can’t explain why, chances are symmetry is the problem. Pinterest kitchens rarely style items in pairs.
Instead:
- Group decor in 3s or 5s
- Mix shapes within the group (round + tall + flat)
- Slightly overlap items so they feel connected
This creates a natural rhythm that feels relaxed—not staged.
Quick checklist:
- ❌ Two matching jars
- ✅ Three jars in slightly different heights
3. Pick a Simple 3-Color Palette
Cohesive shelves always follow a tight color story. The easiest way to avoid visual chaos is limiting yourself to three main colors.
Popular Pinterest palettes include:
- White + wood + brass
- Blue + white + natural wood
- Green + cream + gold
Once your palette is set, filter everything through it. If it doesn’t match? It doesn’t go on the shelf.
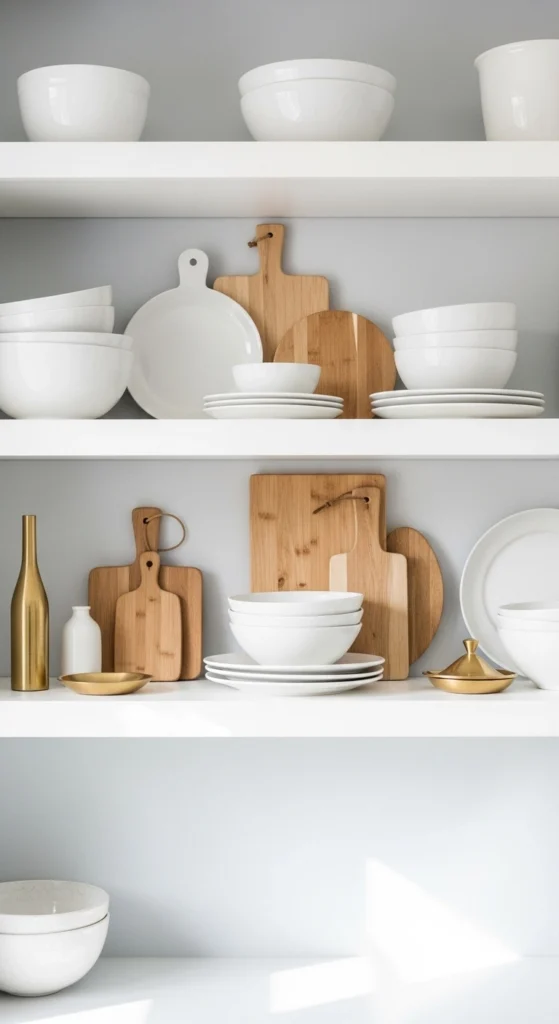
4. Make It 50% Functional (Yes, Really)
Pinterest kitchens aren’t just pretty—they’re useful. One of the biggest styling myths is that shelves should only hold decor.
Instead, aim for:
- 50% functional items
- 50% decorative accents
Think:
- Plates, bowls, mugs
- Glass spice jars
- Oil bottles, utensils
- Cutting boards
When everyday items are coordinated (matching glass jars, neutral ceramics), they become decor.
5. Add Greenery for Life and Softness
Nothing warms up shelves faster than plants. Greenery softens hard lines and adds movement.
Best shelf-friendly options:
- Trailing pothos
- Small ferns
- Herb pots
- Faux greenery for low light kitchens
Let vines drape naturally—don’t over-trim. That relaxed flow is what makes shelves feel “Pinterest real,” not showroom stiff.
6. Edit Ruthlessly (The 7–9 Item Rule)
Here’s a designer trick most people skip: remove one item after styling.
Why it works:
- Shelves over ~70% full start to feel cluttered
- Negative space lets your favorite pieces stand out
Aim for 7–9 items per shelf, max. If you’re unsure—take a photo. Clutter shows up instantly on camera.
7. Use Diagonal Balance Like a Pro
Want shelves that feel balanced but not boring? Try diagonal matching.
Place similar items on opposite corners:
- Brass item top left → brass item bottom right
- Dark ceramic on one shelf → repeat diagonally below
Your eye subconsciously reads this as harmony, even though nothing is symmetrical.
8. Layer Personality With Vintage & Seasonal Touches
Pinterest kitchens feel collected, not bought in one trip.
Easy ways to add soul:
- Thrifted ironstone pitchers
- Vintage bowls
- Old bread boards
- Seasonal swaps (lemons, winter greenery, spring florals)
You don’t need to restyle everything—just rotate one or two accents each season.
Final Takeaway: Save This Shelf Formula
If you remember nothing else, remember this:
- Layer heights
- Use odd numbers
- Stick to 3 colors
- Mix function with beauty
- Leave breathing room
That’s the real Pinterest formula—and it works in any kitchen.
✨ Save this guide for your next kitchen refresh and try one shelf at a time. You’ll be shocked how fast it comes together.