

I had three countertops that felt like bad ideas in search of a purpose. I stacked jars on top of jars and added plants in every corner. It looked busy, not curated. The moment I cleared one counter and forced myself to leave empty space, the rest finally made sense.
I tried copying perfectly even shelf stacks, then tried matching everything, then tried cluttering with useful stuff. The version that stuck was simpler. Fewer pieces, a couple of deliberate textures, and a rule about spacing that I use now all the time.
Step 1: Strip the counters and keep 60 percent clear
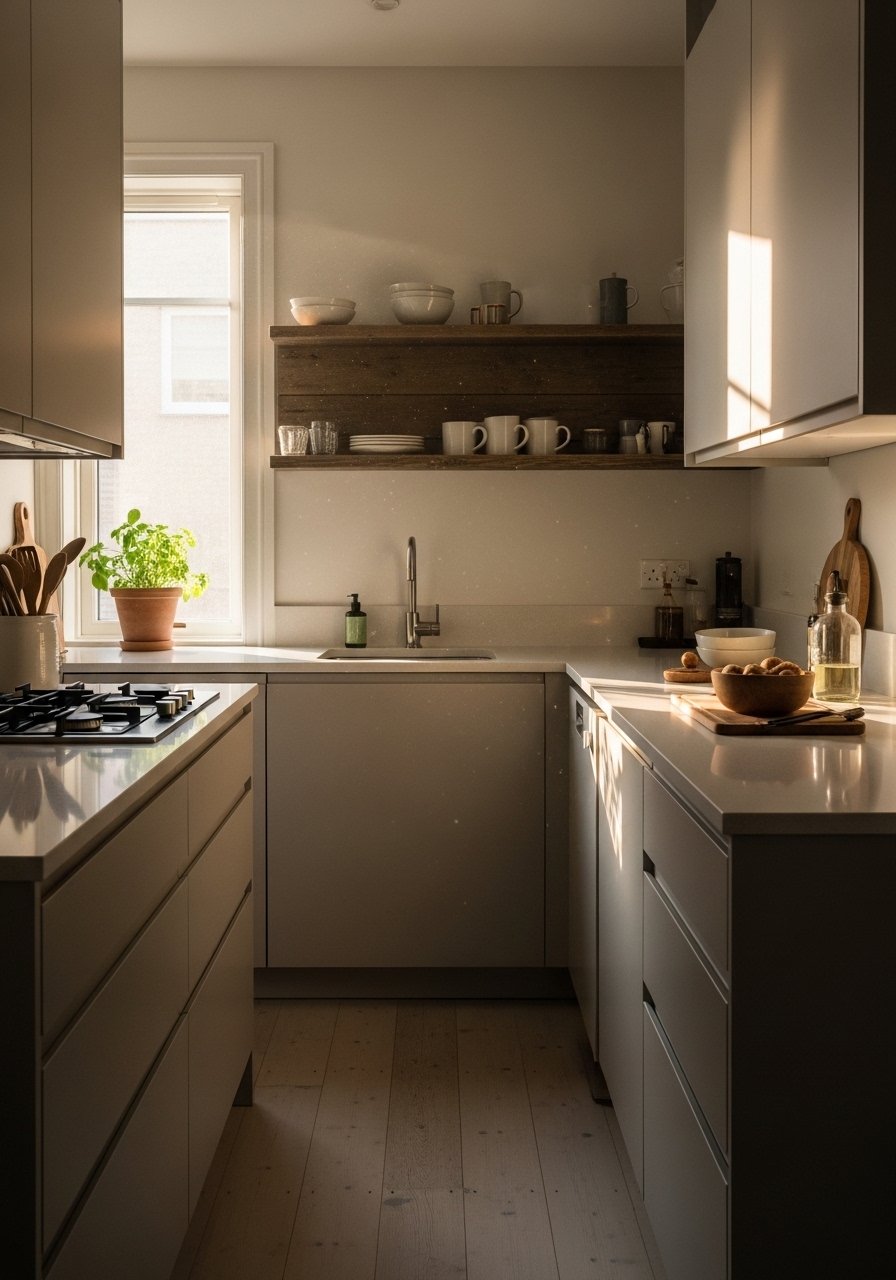
Pull everything off the counter. Yes, everything. Wipe the surface so you can see how the light behaves. I aim for about 60 percent of the main prep counter to be empty. That was hard at first because I felt wasteful putting things away, but the breathing room changes the whole feel.
Choose one small tray, about 12 inches across, to corral daily items. A ceramic utensil jar and a small oil bottle sit on it, cool to the touch and slightly weighted, which grounds the vignette. Mistake to avoid: clustering too many tall things next to each other. Keep one tall item, one medium, and one small.
Step 2: Build a simple three-piece vignette on the work surface
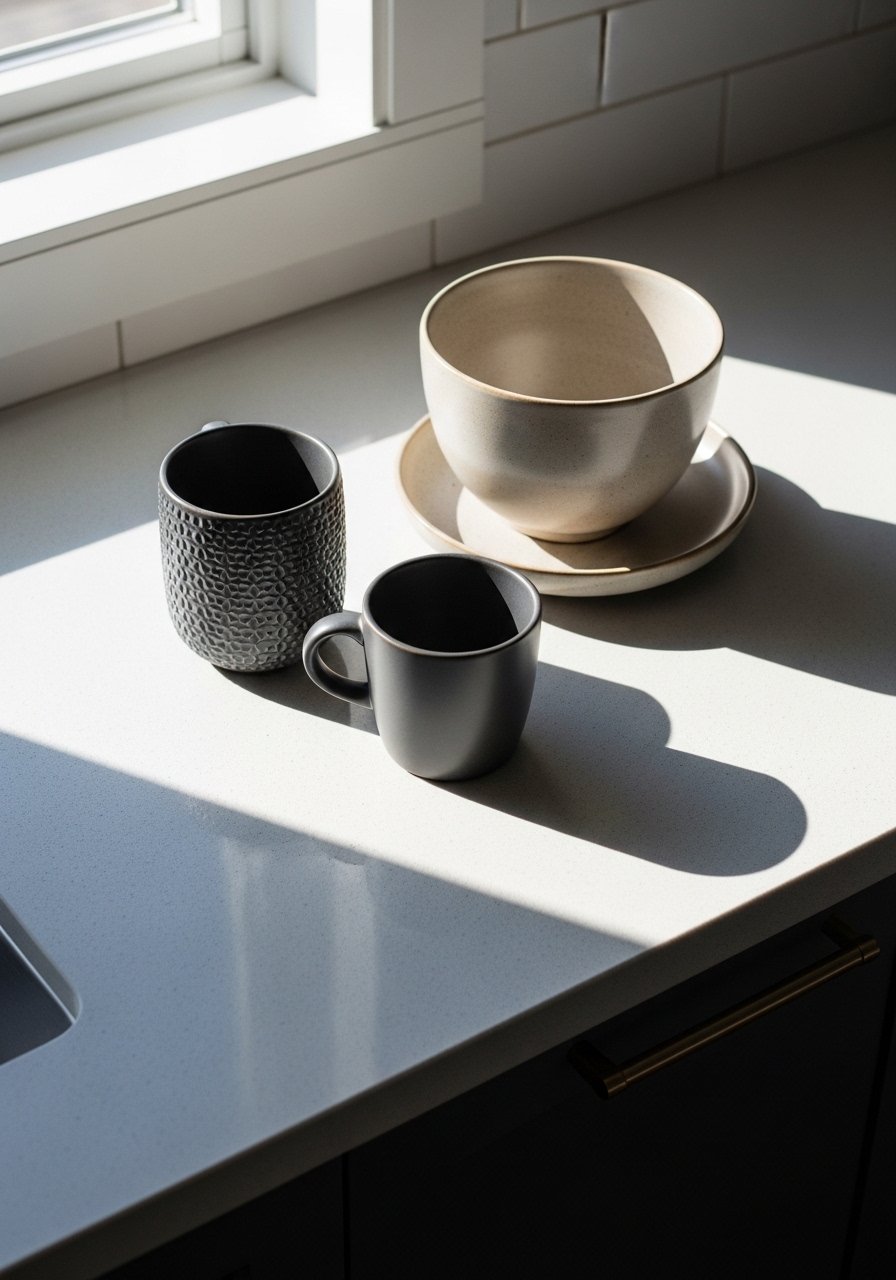
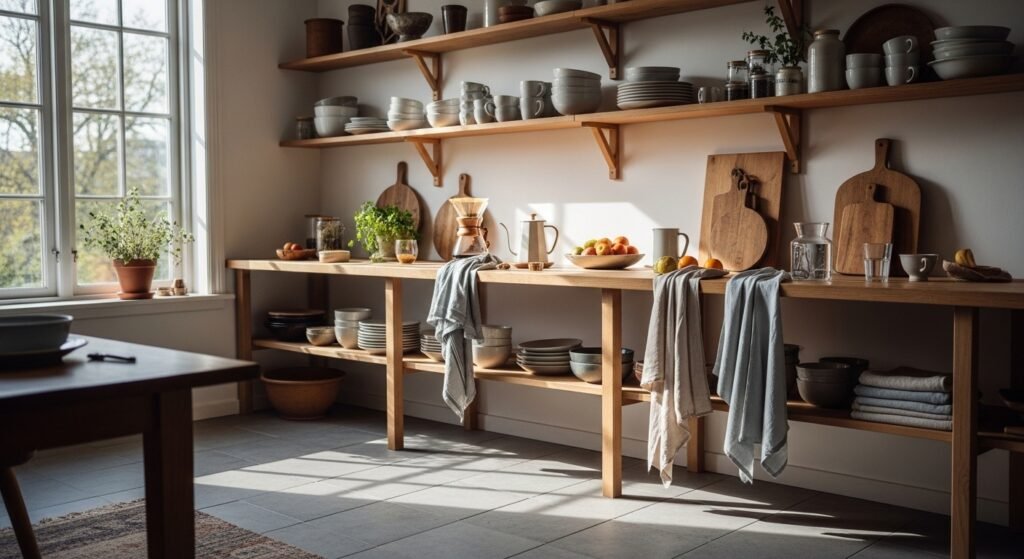
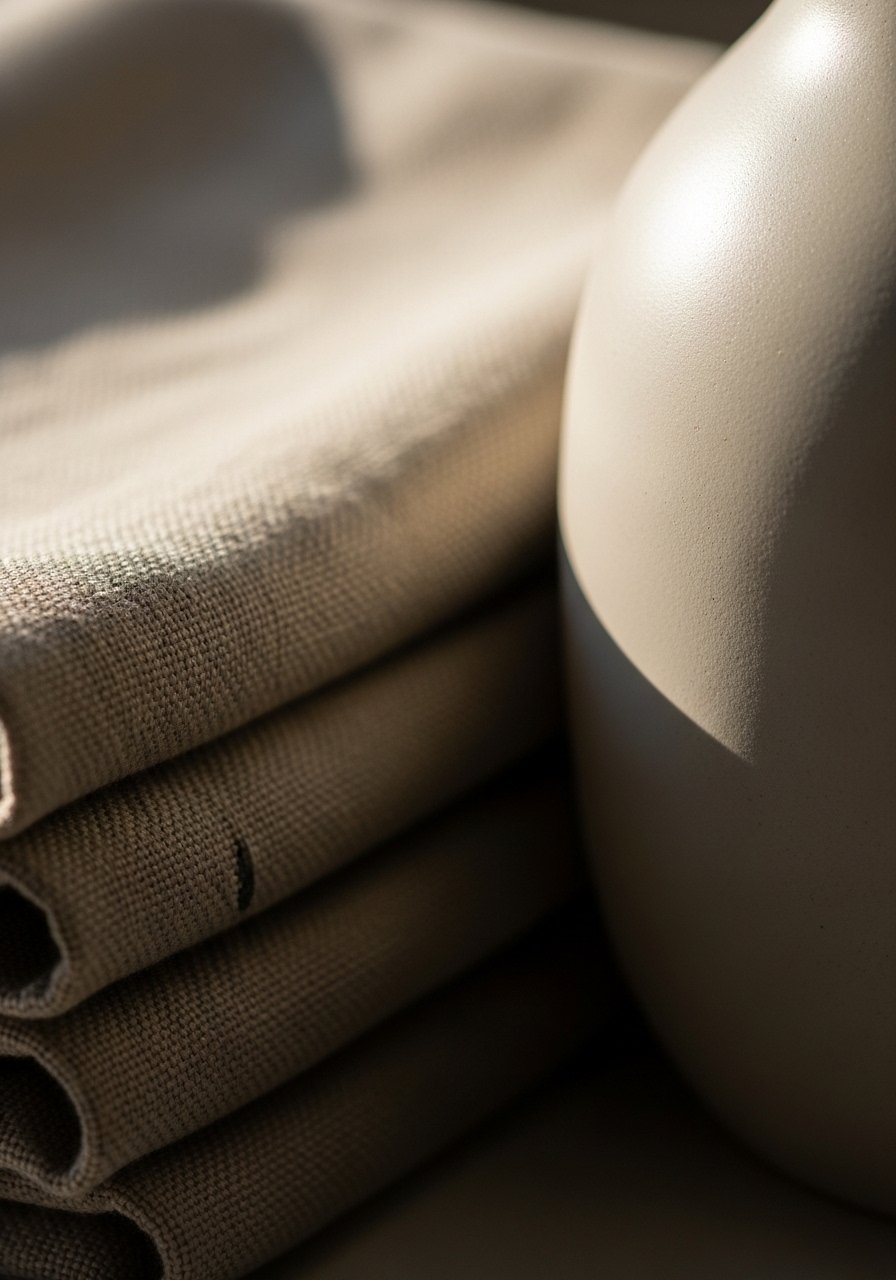
Most people pile items around the sink. Try placing a trio instead. Use odd numbers, usually three or five pieces. For counters, pick a vase about 10 to 14 inches tall, a wooden cutting board roughly 12 by 18 inches, and a small stack of folded linen towels. Leave about 2 to 3 inches between each object so the eye can rest.
The first time I did this, I grabbed glossy plastic containers and it looked cheap. Swapping to a matte ceramic vase and a rough-hewn board gave the arrangement real presence, the vase feeling cool, the board solid and warm in your hands. If you have pets, skip low ceramics on the floor.
Step 3: Edit open shelves by anchoring one side and leaving negative space
Most people start by lining shelves with plates, which creates uniform sameness. Instead, anchor one side with a large item that takes up about 60 to 70 percent of the shelf height, like a tall stack of bowls or a large vase. Then balance the rest with smaller clusters, keeping roughly one third of the shelf empty.
Texture matters here. Mix smooth ceramic with nubby linen and raw wood. I learned this after three bad attempts where everything looked like it belonged to the same factory. Common mistake: lining items in perfect rows. Asymmetry and breathing space make shelves feel intentional, not staged.
Step 4: Add soft textiles and a live plant for warmth and movement
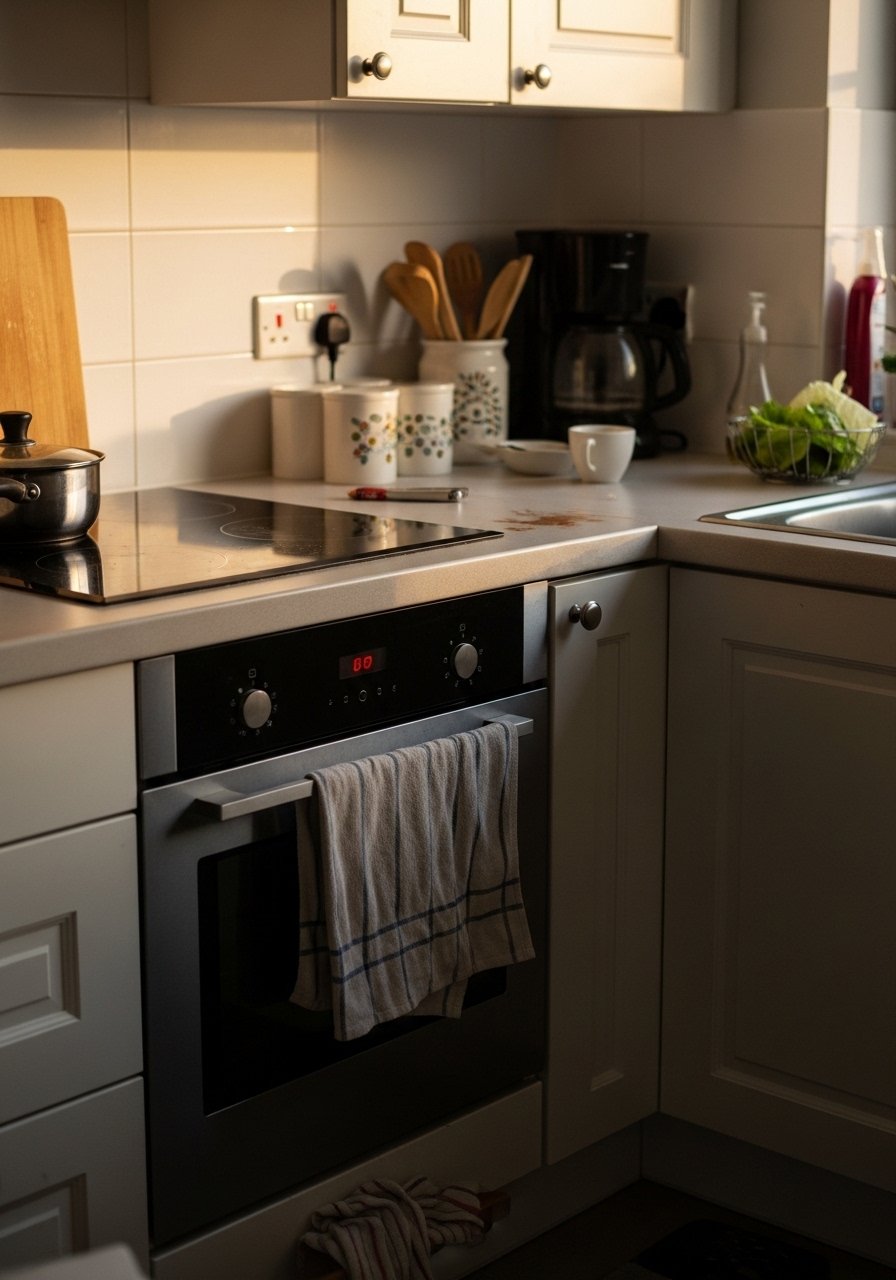
This is the step where the kitchen starts to feel lived-in. Add one folded dish towel on a lower shelf, a small jute mat under the toaster, or a single boucle stool pad for the barstool. Textiles should be soft, slightly rumpled, not ironed flat, so they read as used.
Introduce a plant about 6 to 10 inches tall for counters or a trailing variety on a higher shelf. The leaves bring in a soft green and a light scent when you water them. I almost skipped plants because I killed the first two, but a hardier pothos fixed that problem.
Step 5: Edit, walk away, and live with it for a week

This is the part where you will want to add more stuff. Do not. Step back, walk away for ten minutes, come back and you'll see it differently. After a few days you will know what is missing or what is too much. I made this mistake early on by restyling every afternoon and ended up with a cluttered mess.
Use a quick formula for edits. Remove one item from each cluster, then remove one more from the whole kitchen. If something feels useful but ugly, swap it for a version in natural materials. My partner knocked over my first vase twice. Now I use weighted ceramics that feel solid in my hands and stay put.
What to Grab for a Simple Kitchen Refresh
12-inch round serving tray, rattan-edge, natural ($20-35). I keep one in Step 1 and Step 2 for corralled vignettes.
Matte ceramic vase, 12-inch ($18-30). For Step 2, cool to the touch and looks grounded.
Wood cutting board, 12×18-inch, acacia ($25-45). Dual purpose in Step 2 and Step 5.
Set of linen dish towels, natural, 18×28-inch ($15-25). Used folded on shelves in Step 4.
Jute placemat, 14-inch round ($8-15). Texture under small appliances in Step 4.
Ceramic utensil jar, matte white, 5-inch diameter ($12-20). Keeps tools looking intentional in Step 1.
Small potted pothos, 6-inch nursery pot ($10-18). For Step 4, easy and forgiving for beginners.
Weighted oil dispenser, 12-ounce glass ($14-22). Practical and pretty on a tray in Step 1.
Why Your Counters Still Look Cluttered After Styling
If your counters still feel cluttered after styling, you probably forgot to make one spot the focus. Kitchens need a primary vignette and then pockets of emptiness. Another problem is mixing too many finishes. Stainless steel with glossy plastic with shiny ceramic can fight for attention. Pick two finishes and stick to them for most visible items.
A quick test: close your eyes, open them, and squint. The thing that reads first is your anchor. If nothing reads first, you have too many objects. Remove anything under five inches tall and see how the balance shifts.
Making This Work in a Small Kitchen
Small kitchens need scale adjustments and strict editing.
- Choose a tray no larger than 10 to 12 inches for compact counters. It keeps things from spreading.
- Use vertical space with a 10 to 14-inch vase or narrow stack of bowls to add height without taking depth.
- Keep 50 to 60 percent of the primary prep surface clear so you can cook.
If you rent and cannot replace hardware, swap in textiles and a lightweight vase instead. Tiny changes make the room feel calmer without permanent alterations.
What This Looks Like After a Week with Kids and a Dog
Expect the first week to be a reality check. Spills happen, small hands move things, and dogs nudge the lower shelf. My setup survived better when I moved breakable items higher and used weighted ceramics. The towels I left unfolded once, and they looked charmingly used the next morning.
After seven days you will know which items get used daily and which only gather dust. Let function win in those cases. Swap fragile decor for one practical object that also looks nice, like the weighted oil dispenser from the shopping list.
Start With One Counter Corner
Pick one corner of a single counter and style only that. Put down the tray from the shopping list, add a tall vase, a wooden board, and one folded linen. Leave the rest of the counter empty. Edit twice over three days. The low-commitment start gives you a clear before and after, and it builds the confidence to do more.
It will feel a little odd at first, because our instinct is to fill every gap. Trust the empty spaces. After a week you will have a simple, intentional kitchen that handles daily life without looking like a set.

