


I had a bar cart and a full counter and nothing felt calm. I kept piling things in the same corner because I was afraid of empty space. For two months it just looked busy, not intentional. I finally realized the problem was how the pieces related to one another, not the pieces themselves.
I tried matching everything first. Then I tried only full sets. Both looked flat. The approach that worked for me was to pick a neutral palette, stop overfilling, and force myself to edit in stages. You will touch, move, and live with it before it clicks.
Step 1: Clear a Zone and Decide How Much to Fill
Pull everything off the counter. Yes, everything. Give yourself a clean plane and pick one zone to style, about one third to two thirds of the counter length. I aim for the grouping to take up near 60 percent of the chosen zone, leaving breathing room at both ends.
Start with one anchor piece, like a cutting board or a tray. The cutting board will be warm in your hands, the grain catching light. Mistake people make is fearing empty space and crowding the whole counter. I did that three times before I learned to stop.
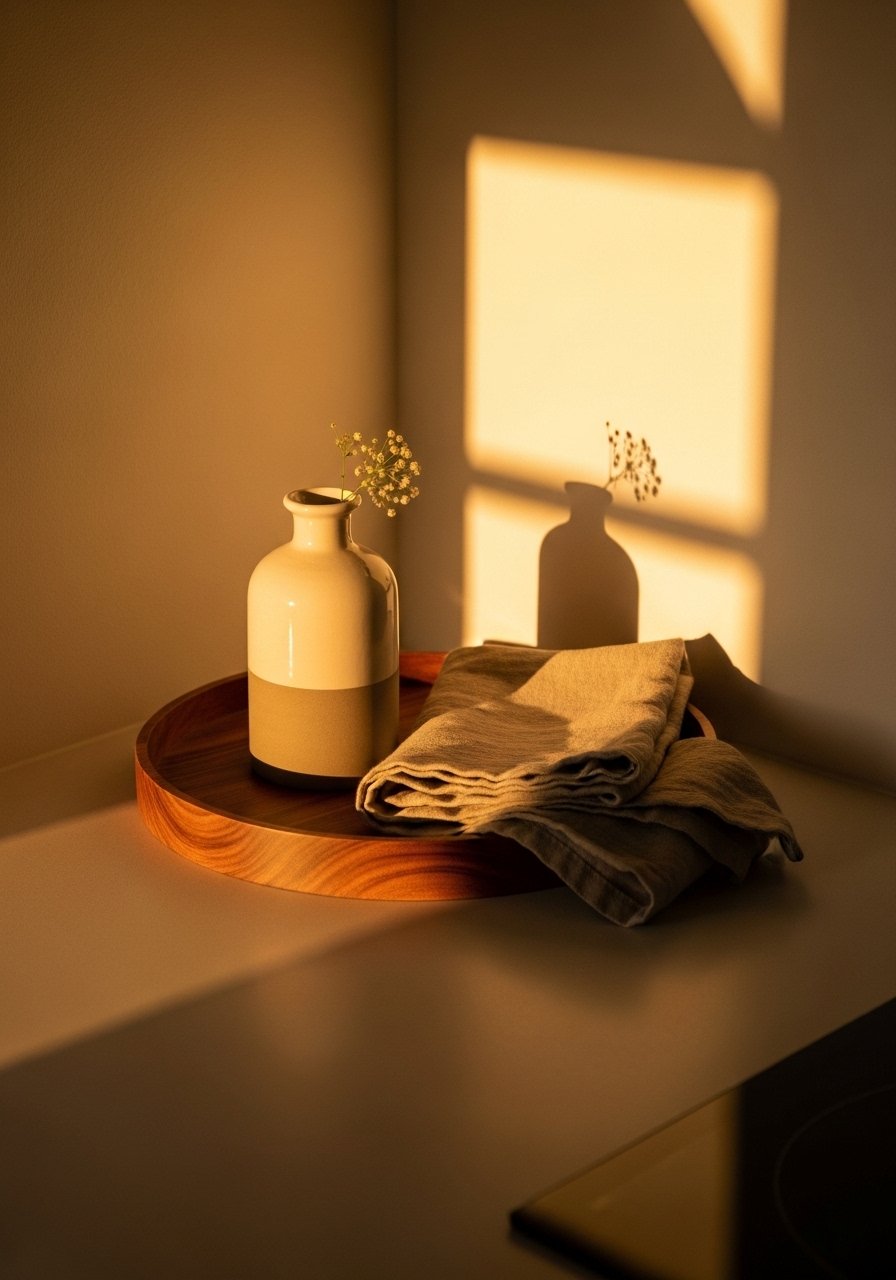
Step 2: Place a Tall, Textured Anchor

Most people start with the biggest item. That is backwards. Begin with one tall object, roughly two to three times the height of nearby items. A matte ceramic vase that feels cool to the touch gives vertical drama without color. If you have open shelves, let the tall piece sit at one end or slightly off center.
I used a white matte vase set I liked, but the first one I bought was too glossy and felt cheap in hand. The right texture matters more than matching colors.
Step 3: Anchor the Group with a Tray and Layer Low Items
This is the step where it starts to actually look styled instead of cluttered. Place a tray or shallow board under a cluster of two to four items to give them a shared base. Aim for one large item, two medium items, and one small object in the tray. The tray should cover about half to two thirds of your group area.
A wood tray adds warmth and feels slightly rough compared with smooth ceramics. My first attempt used no tray and everything slid around when the toaster was used. It annoyed me until I added a simple acacia tray and the whole scene settled.
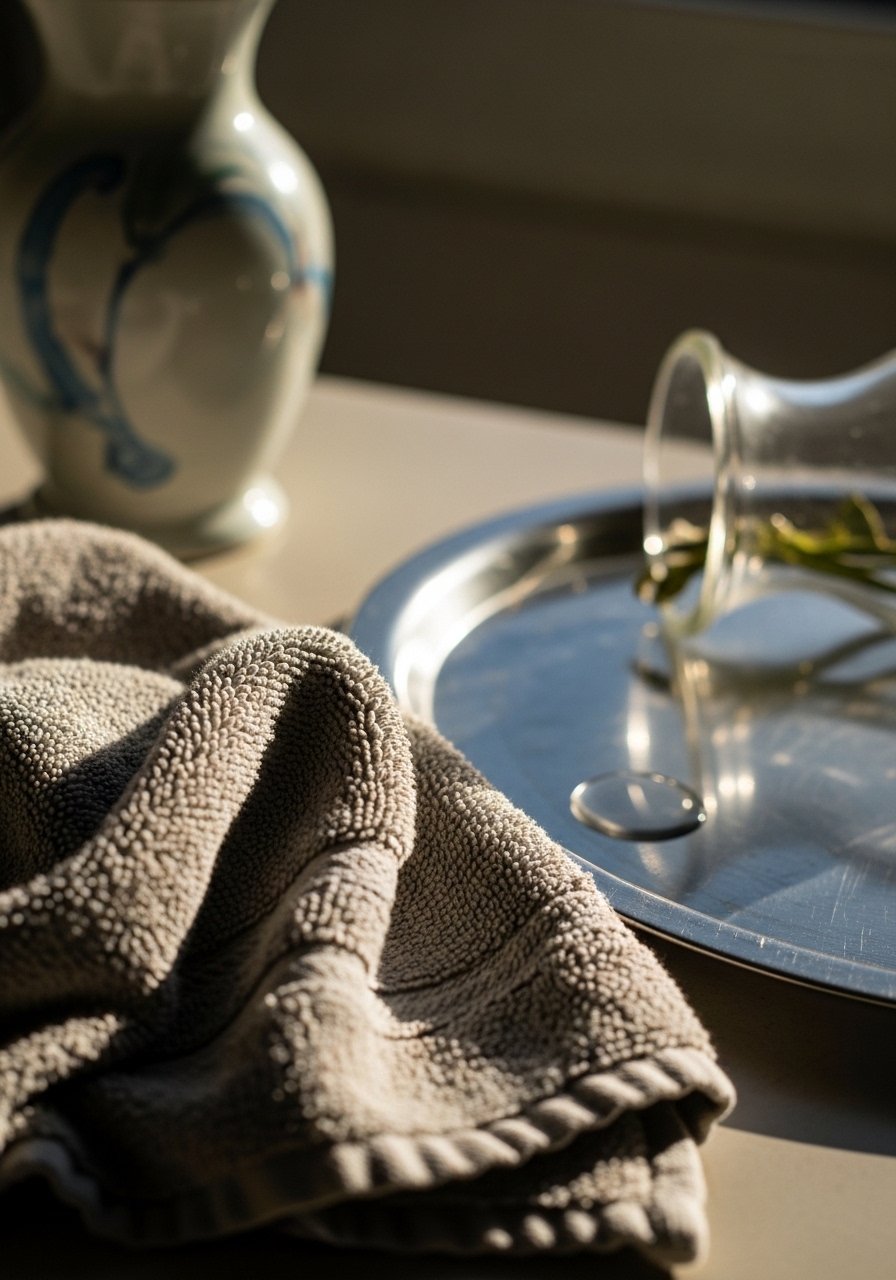
Step 4: Layer Soft Textiles and Small Functional Pieces
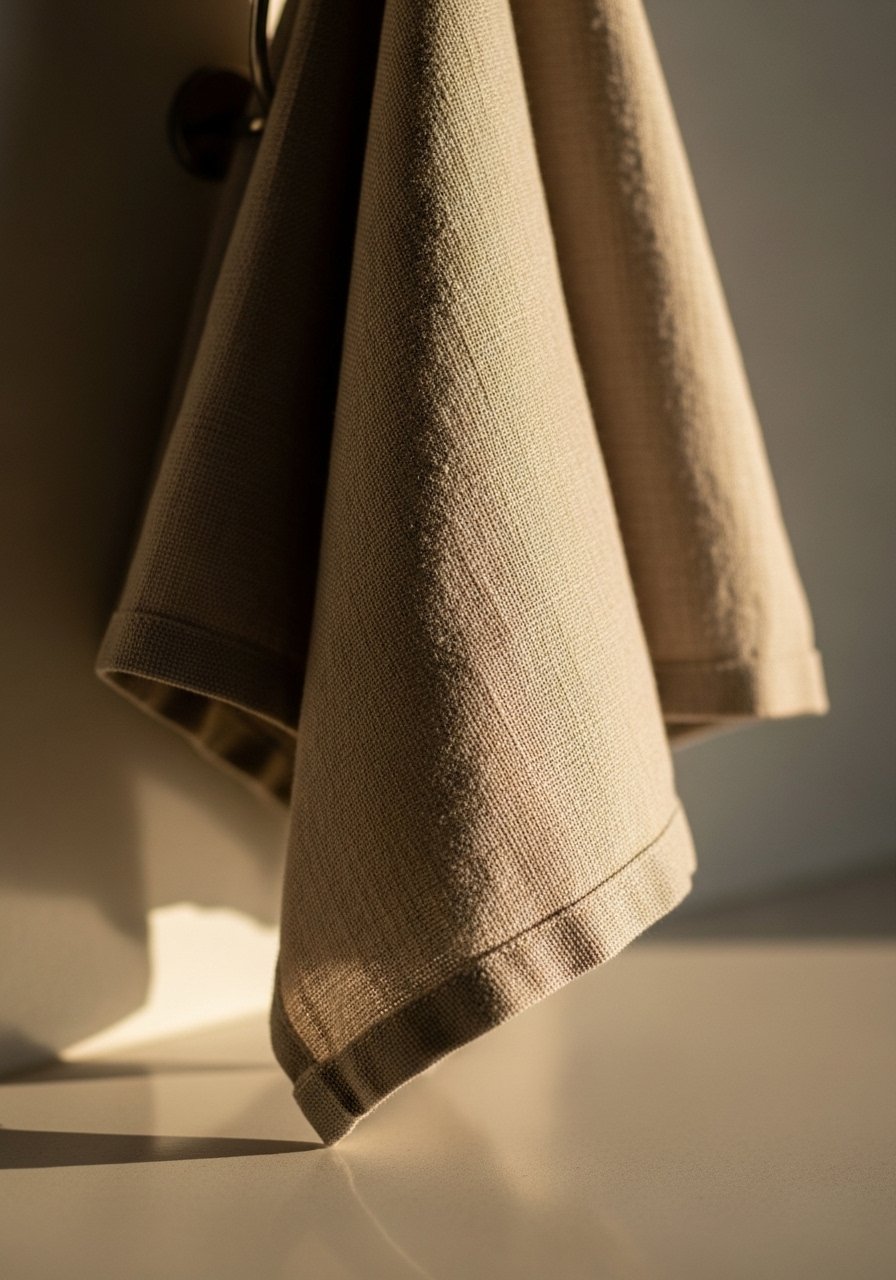
The feeling of a kitchen changes most when you add textiles. A folded linen dish towel, a small hand towel on a hook, or a 50×60 throw on a nearby stool softens the hard surfaces. Linen will feel slightly scratchy then soften after a wash. Keep textiles to one or two textures only, for example linen plus jute.
I once brought in four patterned towels and it read like a shop display. Narrowing to neutral linen stopped the visual noise and made the ceramics and wood stand out.
Step 5: Edit, Live With It, Then Tweak
Step back and live with the arrangement for a few days. Leave 2 to 3 inches between groups where possible, and make sure about 30 to 40 percent of the surface remains empty. My partner hated my asymmetric shelf layout at first. After a week he admitted it looked better.
Common mistakes here are over-accessorizing and constant fiddling. Put a timer for ten minutes and resist the urge to keep moving things. You will notice what actually works once people use the space.
Your Neutral Kitchen Accessory Checklist
- Small acacia serving tray, 16×12 inches ($25-45). Use in Step 3 as a base for grouped items. Warm wood grain feels good in the hand.
- Matte ceramic vase set, three pieces, white ($20-40). For Step 2. The matte surface is cool to touch and absorbs light.
- Linen dish towels, natural, set of 4 ($18-30). For Step 4. Slightly scratchy at first, they soften with use.
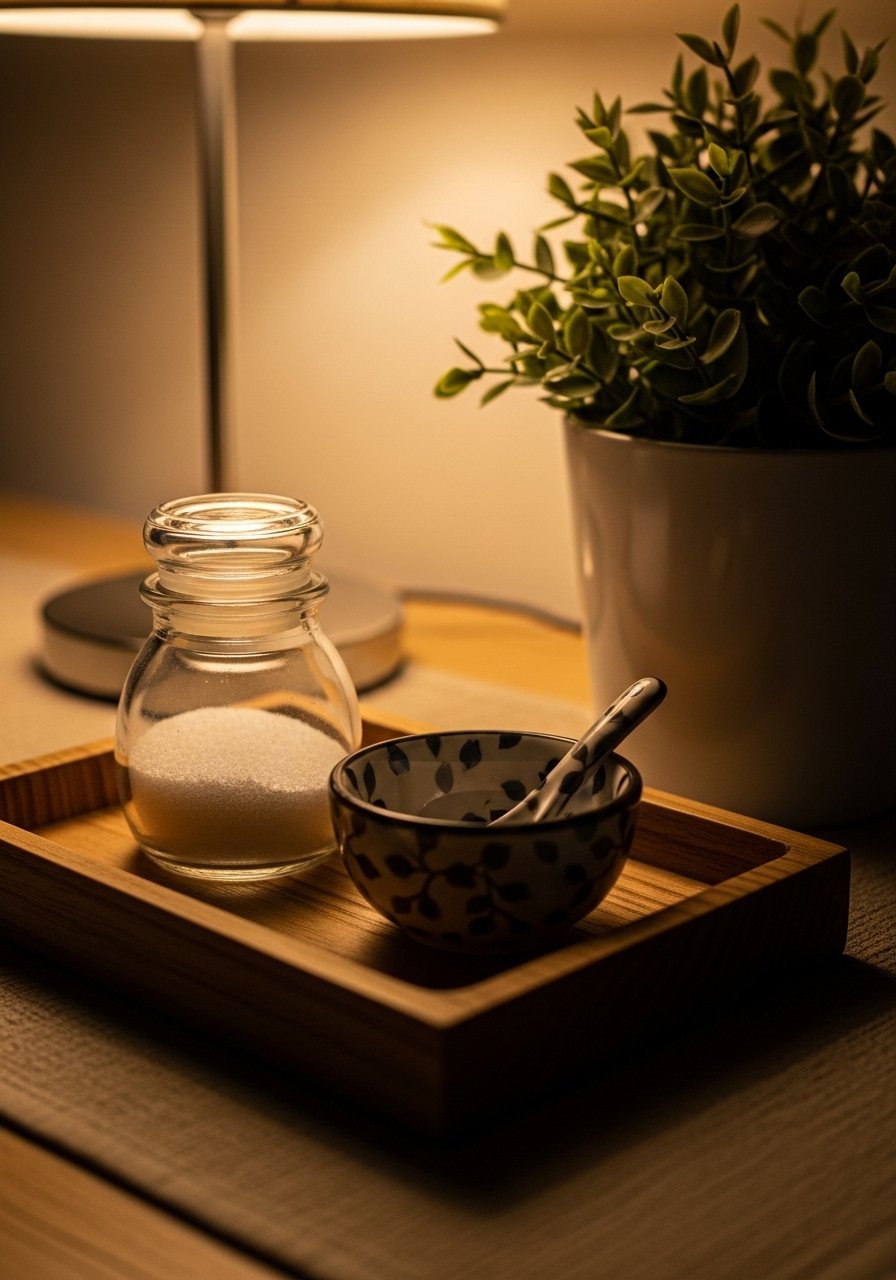
- Small salt cellar with spoon, stoneware ($12-20). For Step 3, a tactile tiny bowl you will reach for.
- Jute runner, 2×6 feet ($35-70). For Step 4 if you have a kitchen bench. Adds nubby texture. Similar at Target.
- Bamboo cutting board, 12×8 inches ($15-30). For Step 1. The warm grain anchors a group and shows use over time.
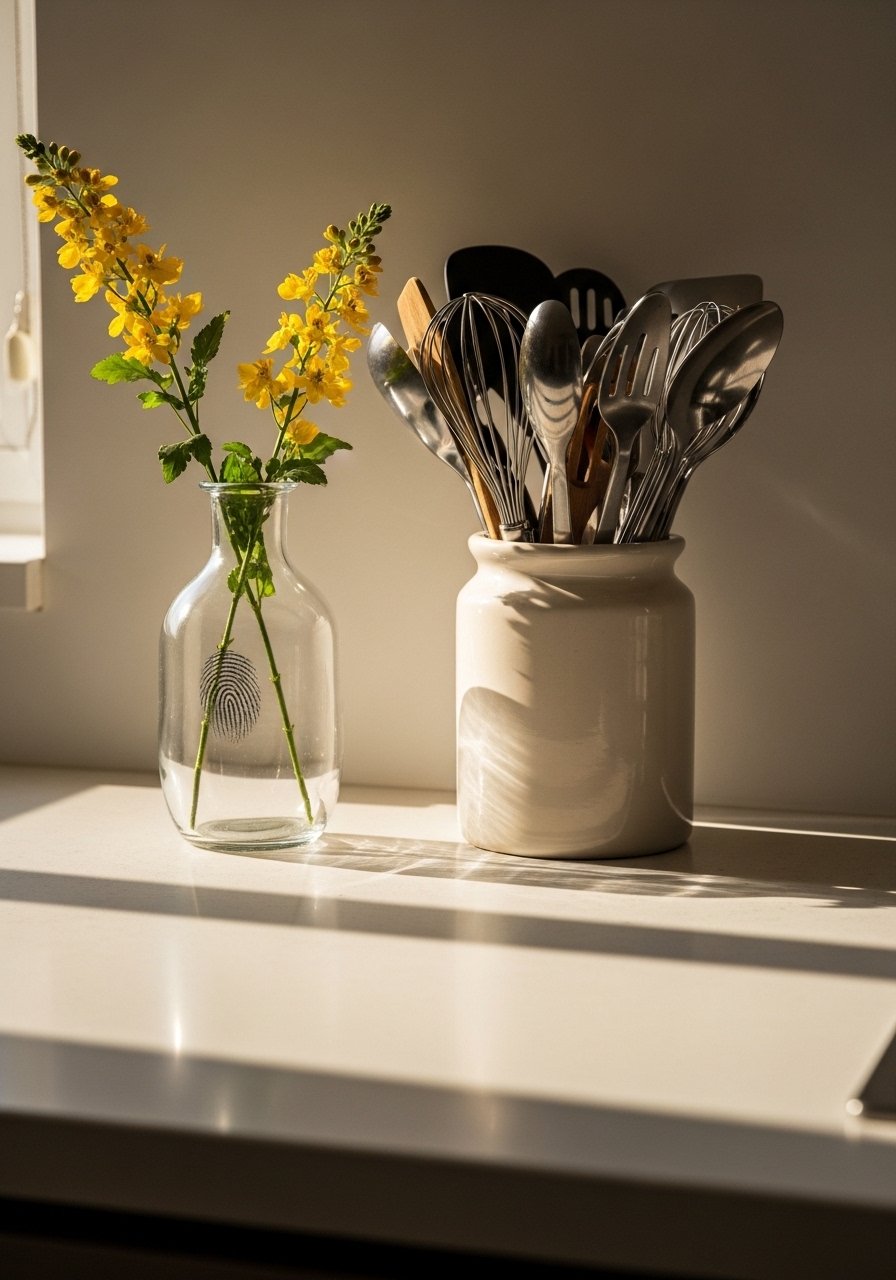
- Ceramic utensil jar, matte glaze, 5-inch diameter ($18-28). For Step 5, functional and sculptural.
- Small potted plant or dried stems, neutral pot, 4-6 inches ($10-25). For Step 2, adds life without loud color.
Why Your Counters Still Look Cluttered After Styling

If the counter feels cluttered after styling, you likely skipped the edit or used too many small objects. Small things multiply visually. Fix it by removing half the smalls, grouping what is left on a tray, and keeping one item taller than the rest. Another common mistake is mixing more than three textures on a single plane. Keep to two textures on the counter, like wood plus matte ceramic, and save others for open shelves.
I once left all the packaging out thinking it was useful. Hide what you do not use daily.
Making This Work in a Small Kitchen
Scale down. If your countertop depth is only 18 inches, choose a tray no larger than 12×8 inches and keep the anchor piece under 12 inches tall. Use vertical space by mounting a small rail for towels or hanging a shallow shelf 6 to 8 inches off the wall. Swap a large cutting board for a slim, vertical one tucked against the backsplash. These adjustments keep the space usable and visually calm.
My tiny kitchen forced me to adopt fewer pieces, which ended up looking more intentional.
What It Looks Like After a Week with Real Life
After a week you will see fingerprints, a tilted utensil jar, and a towel that has wandered. That is okay. The goal is a lived-in look, not perfection. Expect to move one object, replace a plant, or swap a towel texture after a few uses. If you have kids or pets, raise fragile pieces to the top shelf and use heavier items on counters.
My roommate knocked over a jar twice and then stopped when I moved it two inches left. Small changes solve most real-life issues.
Start With One Countertop Corner
Pick one corner and style it using the 60 percent grouping idea. Add a tall anchor, a tray with two to three items, and one textile. Start small and keep the rest of the counter clear for daily use.
You will feel better after the first edit. If you want a low-commitment start, grab a linen dish towel and a small acacia tray, put them together, and see how the space breathes. I started the same way and kept tweaking until it felt calm.

