

I’d had a kitchen that felt closed-in and a little cold. Cabinets hid everything. The countertop looked heavy. Floating shelves seemed like a quick fix, but I was worried about clutter and a messy look.
I learned to treat shelves like a frame, not a dumping ground. Small changes made the room feel warm, intentional, and like a place I actually want to cook in.
How to Decorate a Kitchen With Floating Shelves
This is the method I use every time a kitchen feels unfinished. You’ll learn how to choose placement, create visual rhythm, and mix practical items with pretty ones. It’s calm, approachable styling aimed at an organic modern or simple farmhouse look that actually holds up to daily life.
What You'll Need
- 24-inch reclaimed wood floating shelf, walnut finish (~$35–80)
- Hand-thrown ceramic canister set, white glaze, 3-piece (~$30–60)
- Acacia wood cutting board, 18×12 inches (~$35–70)
- Small terracotta planter set, 4-inch (~$12–22)
- Neutral linen tea towels, set of 4, stone color (~$15–30)
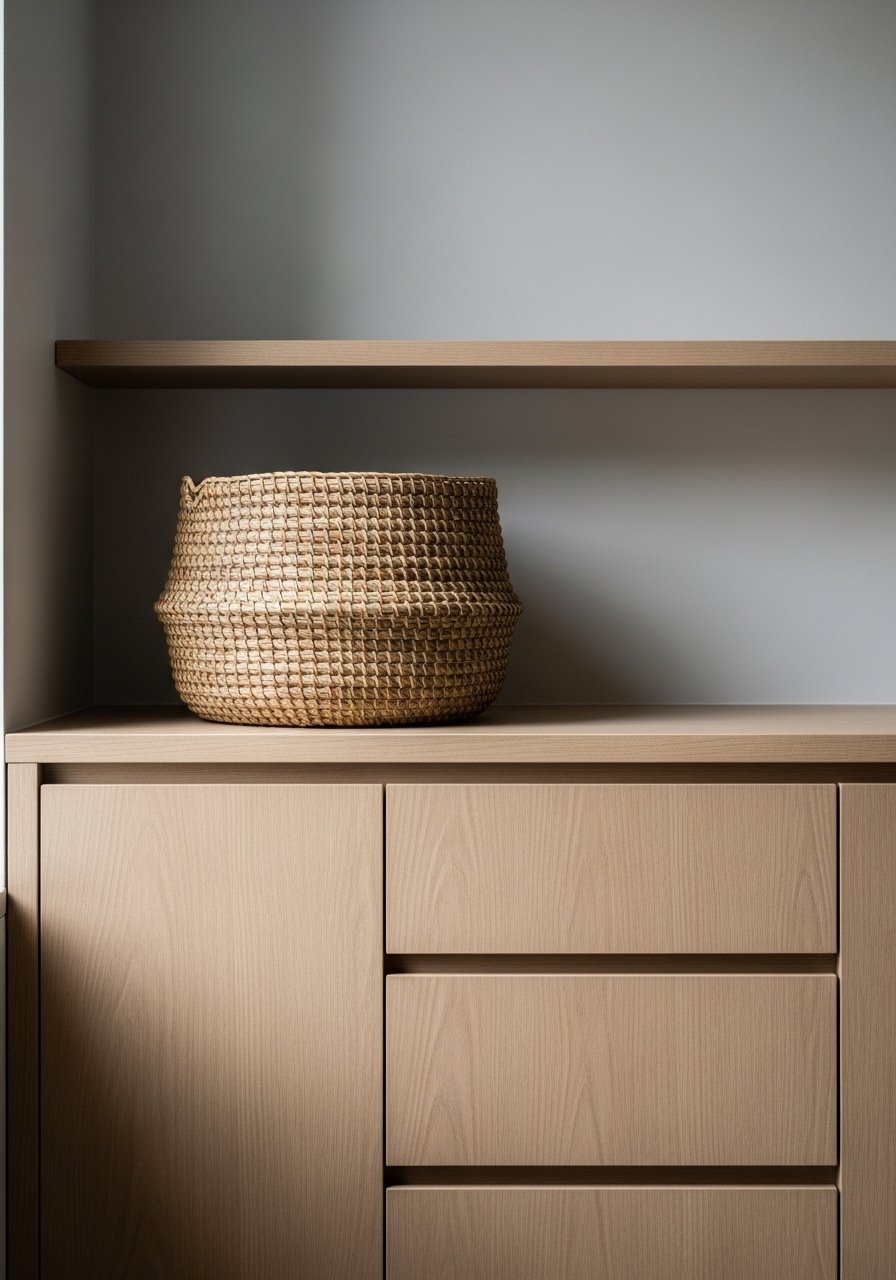
- Woven seagrass storage basket, medium (~$20–45)
- Warm white LED strip light, dimmable, 6ft (~$12–30)
- Set of ceramic nesting bowls, neutral glaze, 4-piece (~$25–60)
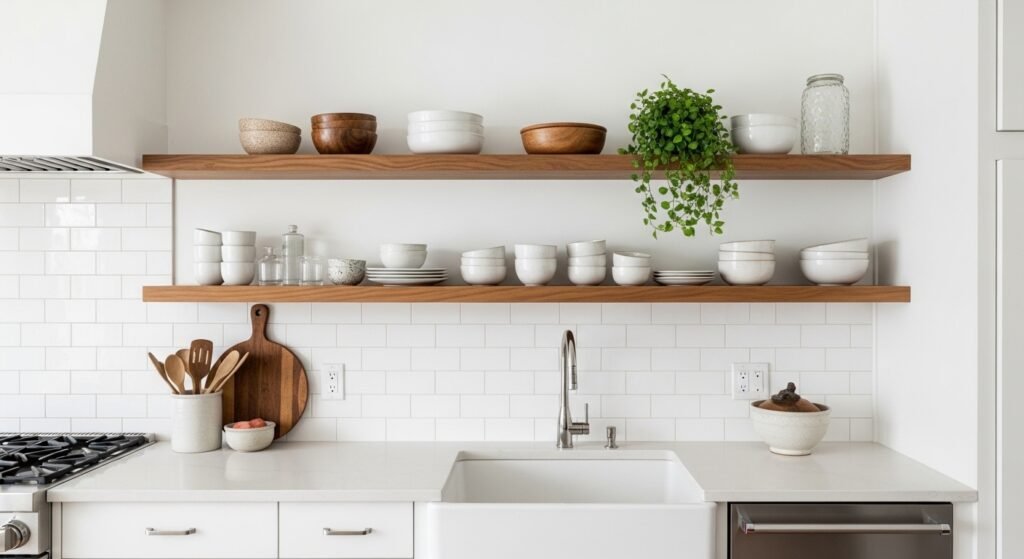
Step 1: Pick the right wall and shelf scale
I start by standing back and looking for horizontal lines to match. I either align shelves with the bottom of upper cabinets or center them on a blank wall. The visual change is immediate—the shelf now feels anchored to the room, not floating randomly.
People often miss scale. A single long shelf across a blank wall reads cleaner than multiple tiny ones. Small mistake: installing shelves too close together. Give each shelf breathing room.
Step 2: Create an anchor at each end
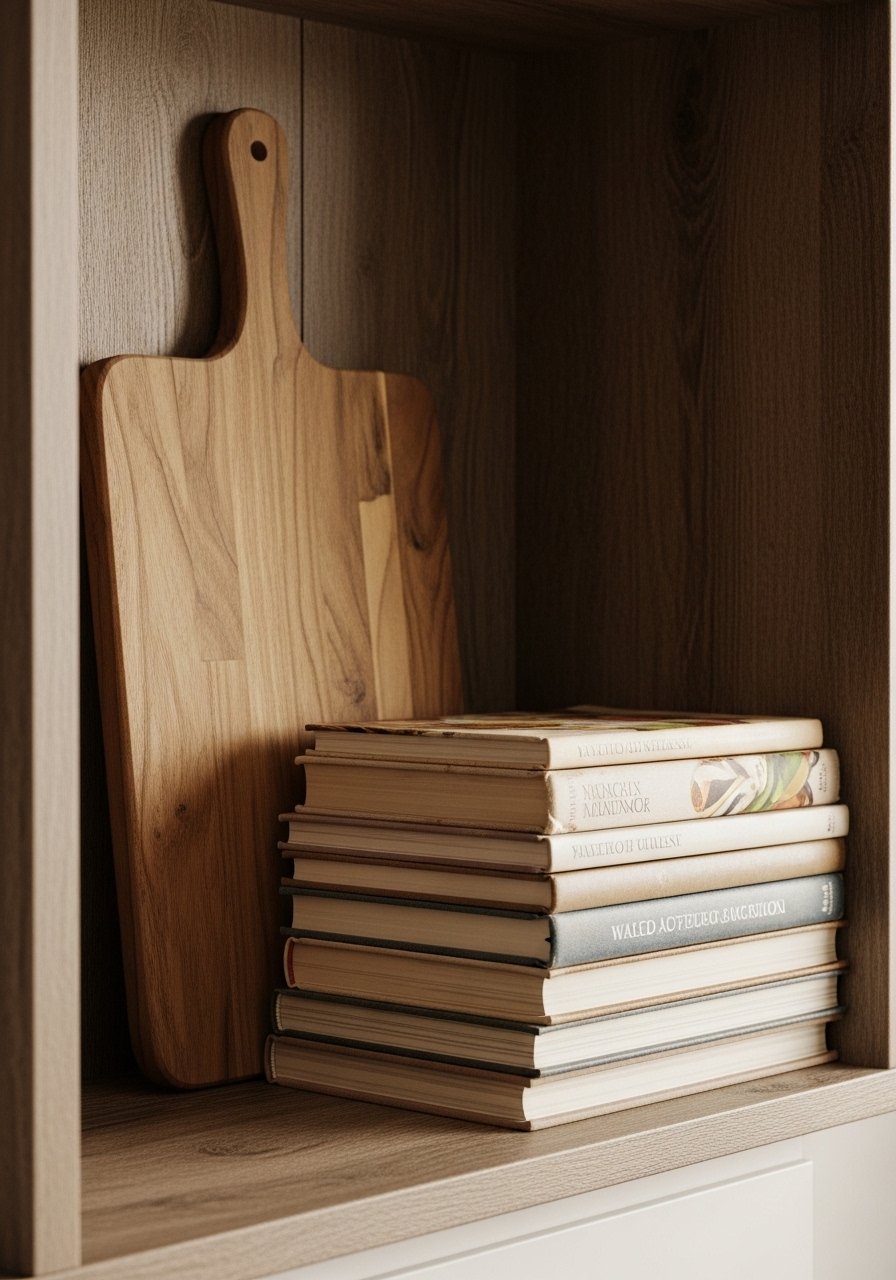
I always place one taller object at each end—often an acacia cutting board or a tall ceramic canister. That anchored edge keeps the eye moving and prevents a shelf from looking top-heavy in the middle.
Visually, anchoring gives the shelf a beginning and an end. Many people stack everything in the center instead. Mistake to avoid: using two anchors that match too closely. I like contrast—wood with white glaze or metal with terracotta.
Step 3: Layer function with beauty
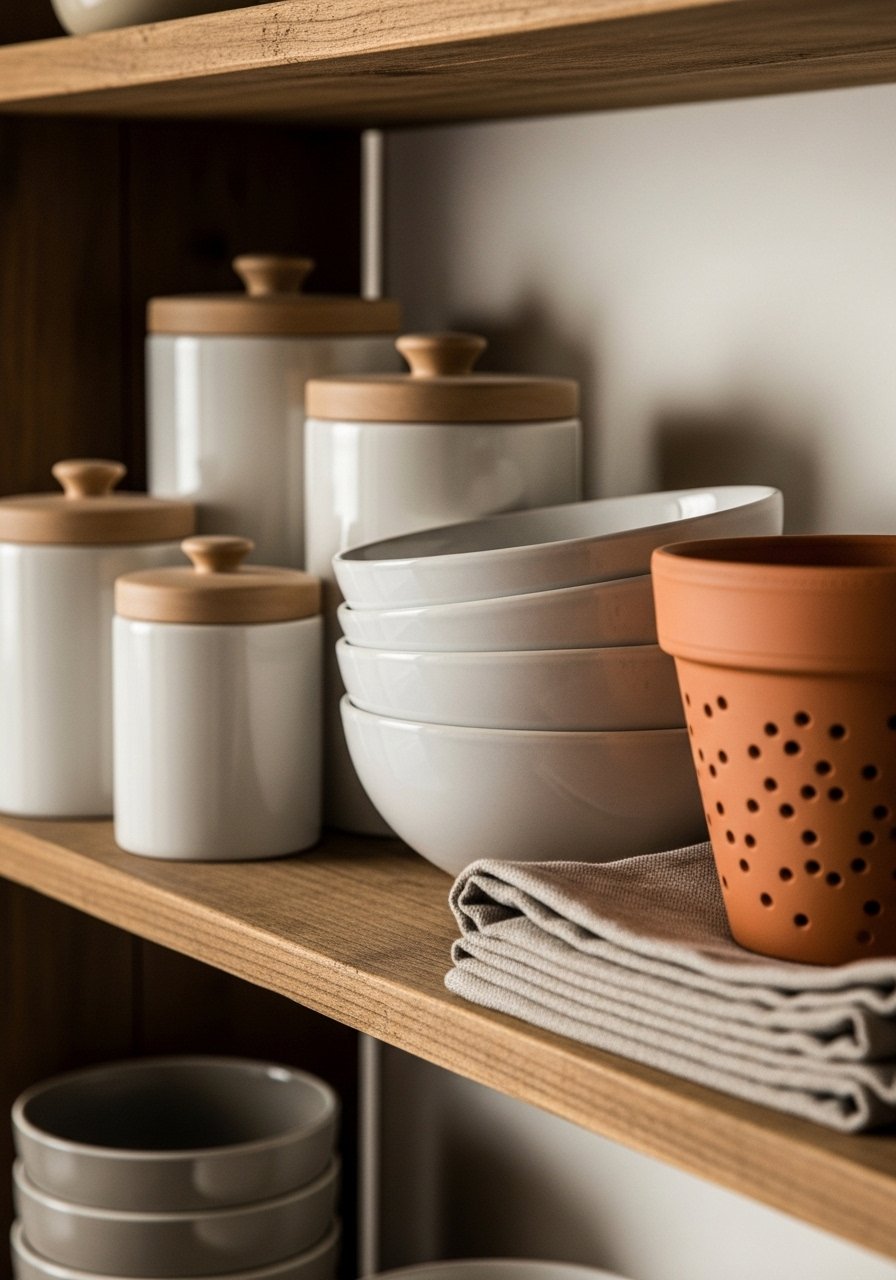
I mix useful things—canisters, bowls, a linen towel—with objects that read as decor, like a small plant or a single vintage jar. The shelf has to serve the kitchen, so I keep frequently used items within easy reach.
What visually changes is texture and rhythm. People often make everything the same height and material; that looks flat. One small mistake is over-styling: a shelf should never be too precious. Leave a little lived-in imperfection.
Step 4: Balance open shelves with closed storage
I offset open shelves with a closed drawer or cabinet below. If a shelf is showing dishes, I hide less attractive items in a woven basket or in the drawers. That balance keeps the kitchen feeling tidy and intentional.
You’ll notice the room looks calmer when clutter is contained. A common oversight is treating shelves as extra pantry space. Don’t overload them. Keep a rule: no more than one shelf of daily essentials; everything else goes behind doors.
Step 5: Finish with light and seasonal swaps
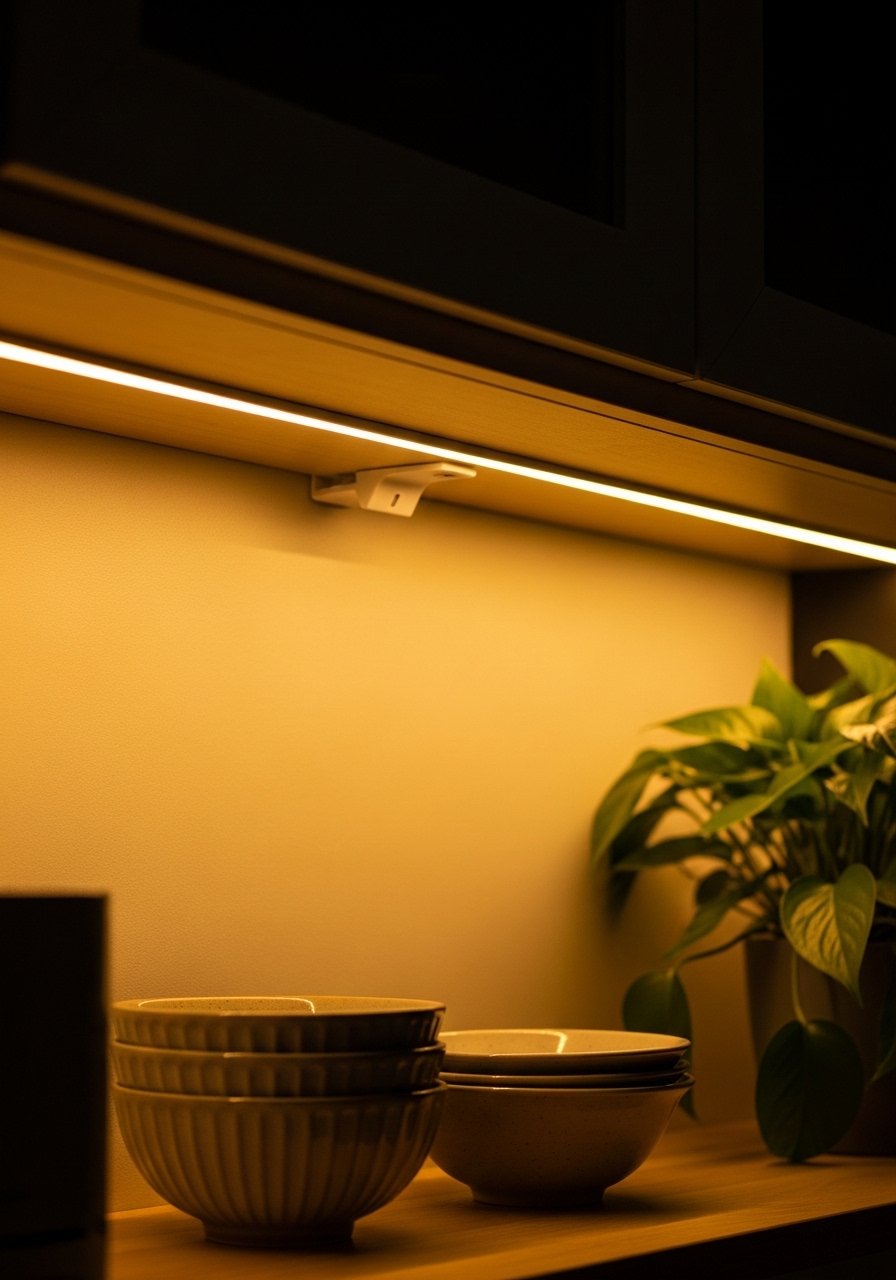
Lighting makes the shelves read as thought-out, not tacked-on. I add a warm white LED strip under the bottom shelf or a small lamp on the countertop. Then I swap in seasonal items—fresh herbs in spring, heavier ceramics in winter.
What changes is depth and mood. One missed insight: cold, bluish light makes wood and ceramics look flat. Avoid harsh, bright white LEDs. Small mistake: changing everything at once. I swap one or two pieces per season to keep the look effortless.
Common mistakes people make with floating shelves
I see the same missteps a lot. Here’s how I avoid them.
- Overcrowding: too many small items creates visual noise.
- Matching everything: identical jars or all-metal looks lack texture.
- Ignoring scale: thin shelves with heavy objects look unstable.
- Forgetting function: open shelves should make the kitchen easier, not harder.
Quick fix: step back after styling and remove the first thing you think is “extra.”
How to adapt this for small kitchens or renters
In a tiny space, less is more. I use a single narrow shelf above the sink or stove. Keep it at eye level and don't exceed two rows of items. Choose items that double as tools—pretty bowls, a visible spice rack, a plant that can be clipped on.
Budget tips:
- Use a single reclaimed-look shelf (~$35) rather than a full run.
- Swap real potted plants for faux if light is limited.
- Start with one high-impact piece, like a large cutting board, then build.
Mixing floating shelves with your current style
I match the materials to what’s already in the kitchen. For organic modern, I lean into warm wood, clay, and linen. For farmhouse, pick white ceramics and galvanized accents. For japandi, keep shapes minimal, use two-tone neutrals, and emphasize negative space.
Simple rules I follow:
- Repeat one material across the shelf (wood or ceramic).
- Repeat one color in small doses for cohesion.
- Keep at least 30–40% clear space on every shelf.
Final Thoughts
Start with one shelf and one anchor object. Give it three to five useful items and two decorative ones. It’s easier to add than to remove, but most rooms feel better when you subtract a little.
If you want a low-commitment start, try a single reclaimed-look shelf and a neutral ceramic canister set—those two things changed how my kitchen felt.

