

Image Prompt: A real, lived-in kitchen showing a styled array of cutting boards on a counter and shelf. Natural daylight, soft shadows, layered textures. The scene feels intentional but not staged. Wide angle showing balance between boards, a small vase, and folded linen towels.
I used to stare at my kitchen and feel it was cold and unfinished. The counters were clutter-free but flat. Shelves and empty corners whispered "something's missing."
Cutting boards fixed that. They add warmth, texture, and an easy rhythm across the room. This guide shows how to use them so the space feels intentional, not cluttered.
How to Decorate a Kitchen With Cutting Boards
You’ll learn simple placement and combinations—leaning, hanging, layering—so the kitchen reads warm and lived-in. This is the method I use when a space needs organic modern comfort without feeling staged.
What You'll Need
- Acacia wood cutting board, large, 18×12 (~$25–60)
- Olive wood paddle board, small, 12×6 (~$20–50)
- Marble serving board, rectangle, 12×8 (~$30–80)
- Bamboo utensil holder, natural finish (~$15–30)
- Brass wall hook set, small decorative hooks, 4-pack (~$10–25)
- Linen tea towels, set of 3, oatmeal (~$15–28)
- Hanging rail with S-hooks, 24-inch, stainless steel (~$20–45)
- Small stoneware vase, matte white, 5-inch (~$12–30)
Step 1: Gather and edit your board mix
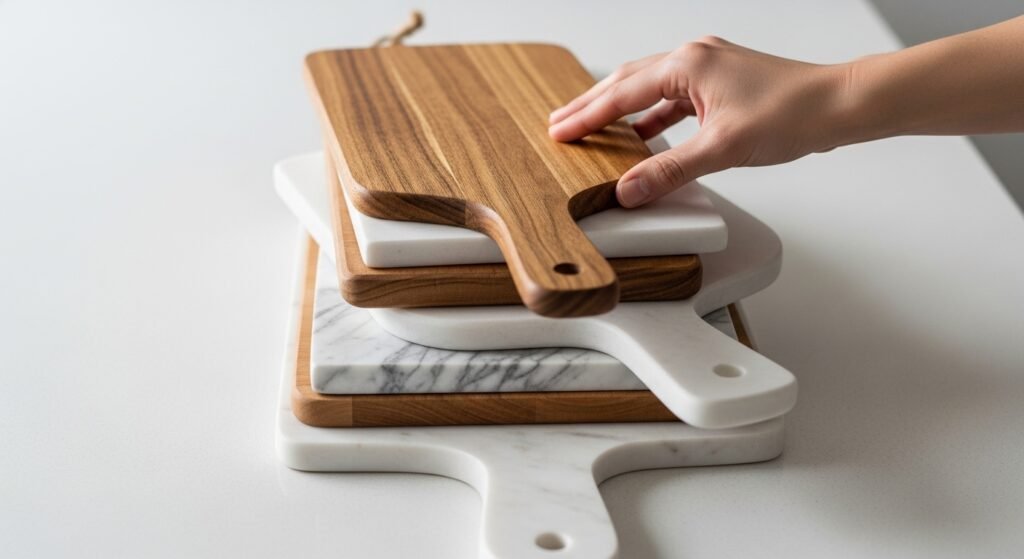
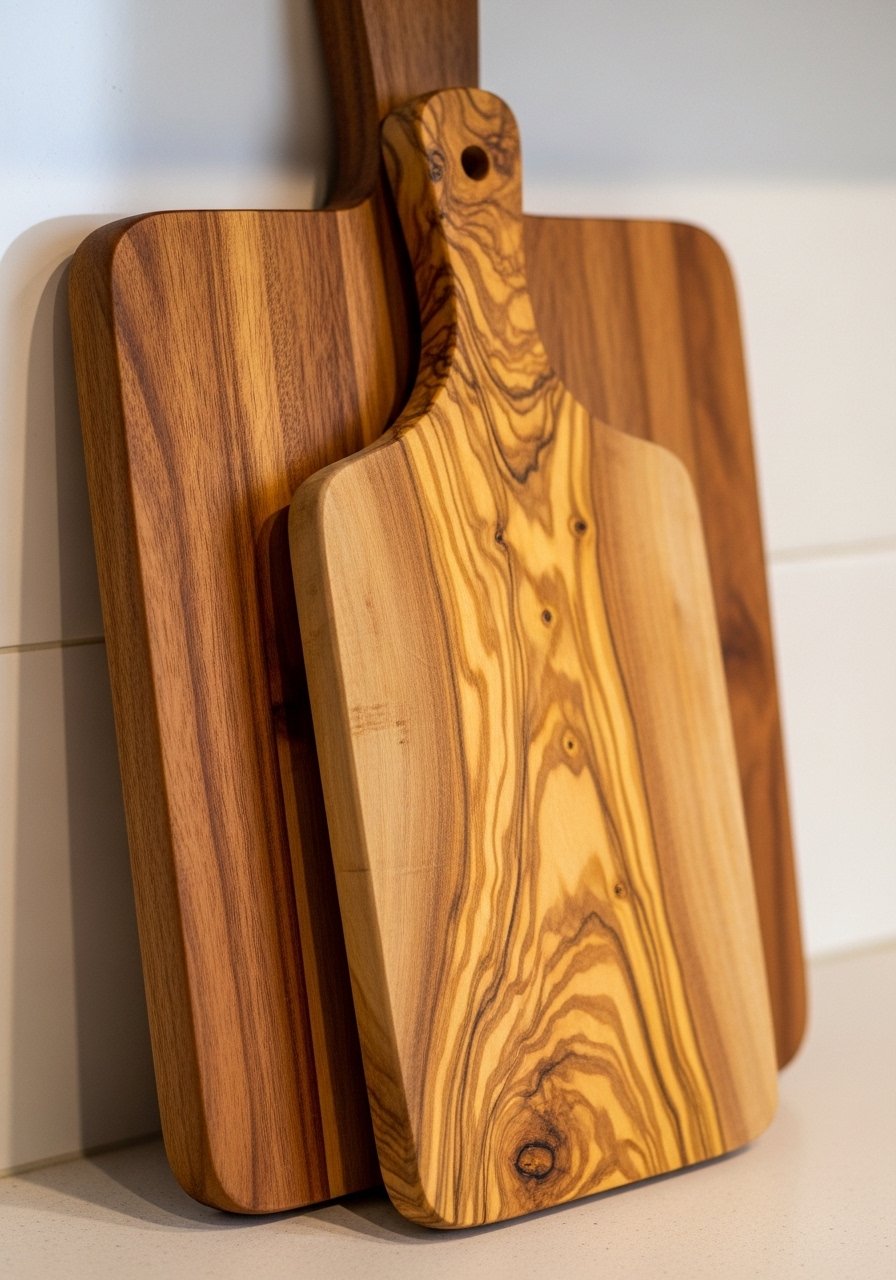
I start by laying everything out. I pull a few big boards, a couple of small paddles, and one marble piece for contrast. Seeing them together helps me aim for balance — long and short, dark and light, rough and smooth. The visual change is immediate: the pile feels like a mini collection, not random clutter. One insight: less is more — keep a dominant board plus two or three supporting pieces. Don’t make the mistake of matching every board; identical tones read flat. I look for variety in shape and material.
Step 2: Anchor with a leaned arrangement
I lean a large board against the backsplash as an anchor. Then I layer a smaller paddle or marble board in front at a slight angle. This creates depth and a casual, intentional feel. Visually, the wall goes from blank to textured without taking up work surface. One insight people miss: the angle matters—too upright looks staged; too flat disappears. A common mistake is placing them too close to the stove where they block heat or grime. I keep the arrangement near prep space but not in the hot zone.
Step 3: Add vertical interest by hanging
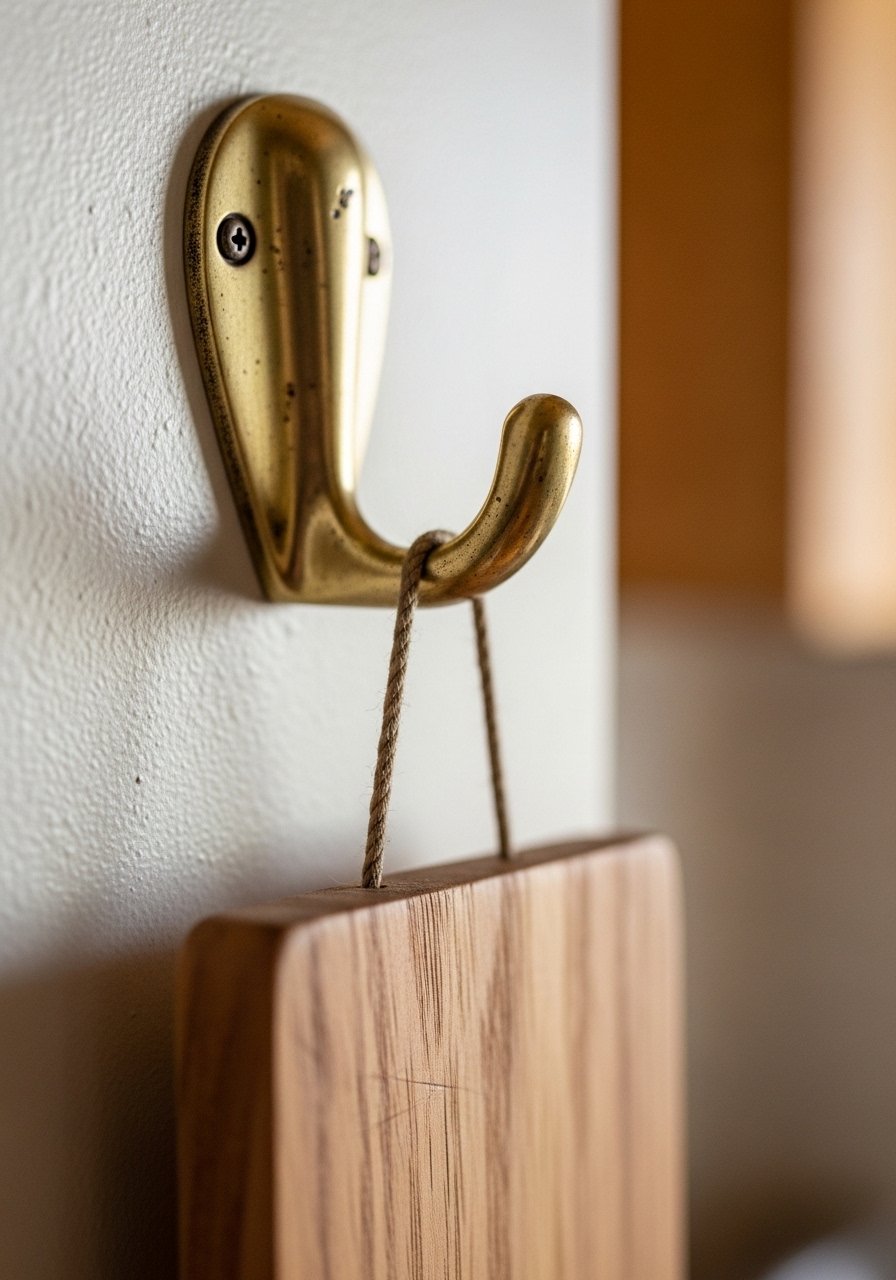
When counter space is limited, I hang boards on brass hooks or a short rail. Hanging brings the eye up and frees the surface below. I use one or two hooks for a statement board, not a crowded row. You’ll notice the kitchen feels taller and more curated. Insight: mix hanging heights so the eye travels. A mistake I made early on was hanging everything at the same level — it felt rigid. Also, avoid tiny hooks that can’t support heavier wood boards; pick hooks that match your board sizes.
Step 4: Layer on shelves and islands
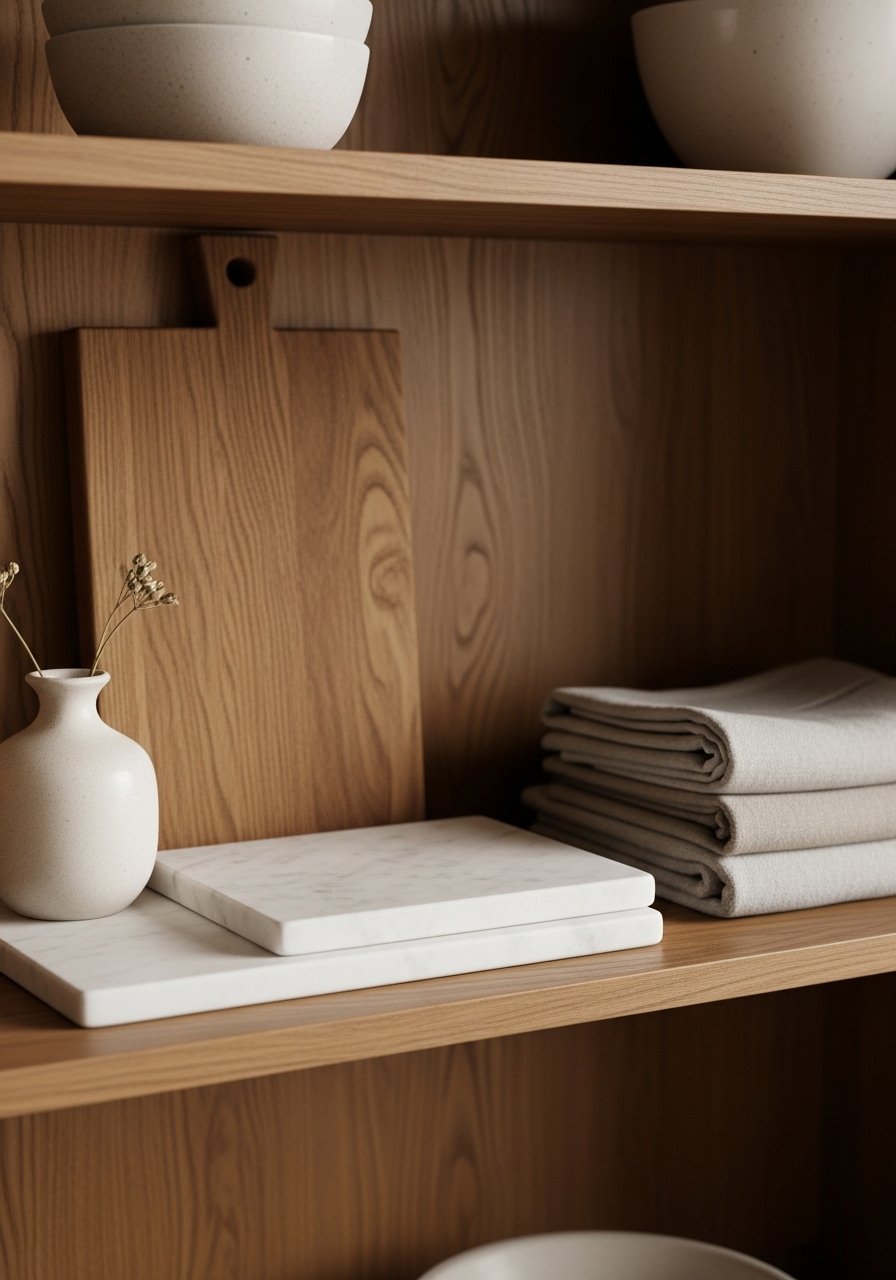
On open shelves and islands I create small vignettes. I place a marble board as a base, lean a wood board behind it, then add a small vase and folded linen towel in front. This balances hard and soft textures. The visual change is a cozy, edited shelf instead of scattered items. One insight: odd numbers read better—group three items and vary heights. Avoid the mistake of crowding a single shelf; give each vignette breathing room so it reads calm and intentional.
Step 5: Use them — and rotate
I use the boards regularly. Function keeps them looking lived-in and prevents dust collecting on an untouched display. Every few weeks I rotate which boards are visible, oil the wood, and switch the marble into a different vignette. The kitchen stays fresh without a full restyle. Insight: using boards is part of the styling — people often treat them as decor-only. Small mistake to avoid: leaving sticky food on a display board. Clean and oil so they stay beautiful and practical.
Common mistakes with board styling
I see two repeat issues: over-accessorizing and matching too much. Too many boards can read cluttered, and matching woods across the kitchen creates a flat look. I aim for contrast — one dark wood, one honey-toned wood, a stone piece.
Quick checklist to avoid mistakes:
- Limit active display to 3–4 boards.
- Mix materials for texture.
- Keep boards away from direct stove heat and splash zones.
Adapting this look for small kitchens and budgets
Small kitchens benefit from vertical thinking. I hang a single statement board on a hook and lean one smaller piece on a narrow windowsill. It gives the same warm feel without taking up counters.
On a budget, focus on shape and placement rather than expensive materials. A simple bamboo board and a thrifted paddle can read high-end when layered with a linen towel and small vase. Rotate pieces seasonally to keep the look fresh.
How to mix boards with what you already own
I match boards to existing finishes rather than replace everything. If your hardware is brass, use brass hooks. If you have open shelving, lean boards there instead of buying new racks.
Simple ways to integrate:
- Use a marble board next to glassware for contrast.
- Place a warm wood board beside stainless appliances to soften the look.
- Add a linen towel or small plant to bridge styles.
Final Thoughts
Start with one big board and one small supporting piece. Place them where you spend most time in the kitchen. I often start with a simple olive wood paddle — it’s affordable and immediately warms the space. Style slowly, use the boards, and tweak placements until it feels balanced.

