

I keep a drawer full of mismatched jars and never knew what to do with them. Counters looked cluttered and corners felt empty. Small things should make a kitchen feel finished, not louder.
I learned that ceramic jars can add warmth and order. They ground a corner and make a shelf feel intentional.
How to Decorate a Kitchen With Ceramic Jars
This is what I teach when a kitchen feels unfinished. You’ll learn how to place a few jars so counters read calm and shelves look curated. It’s achievable with simple groupings and one or two accent pieces in an organic modern or lived-in style.
What You'll Need
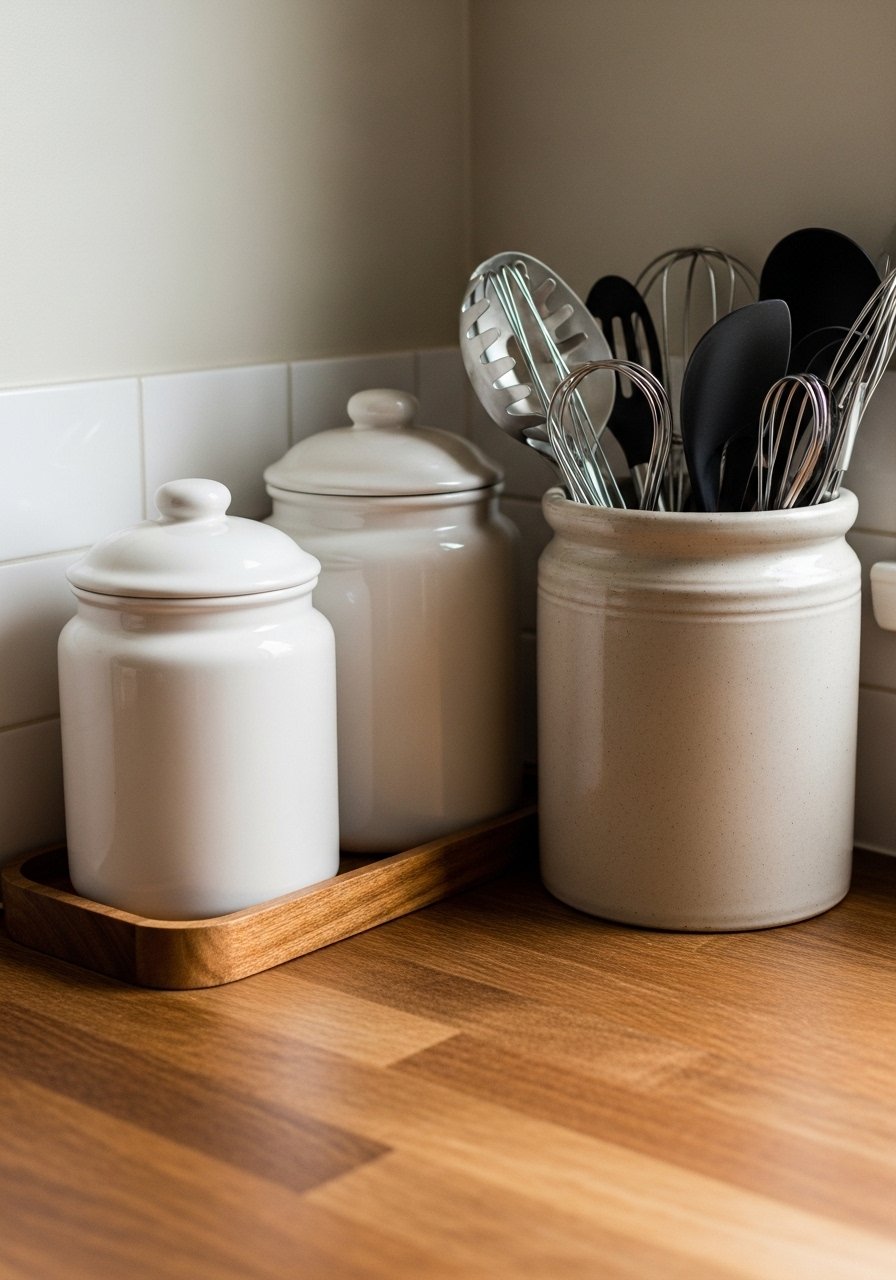
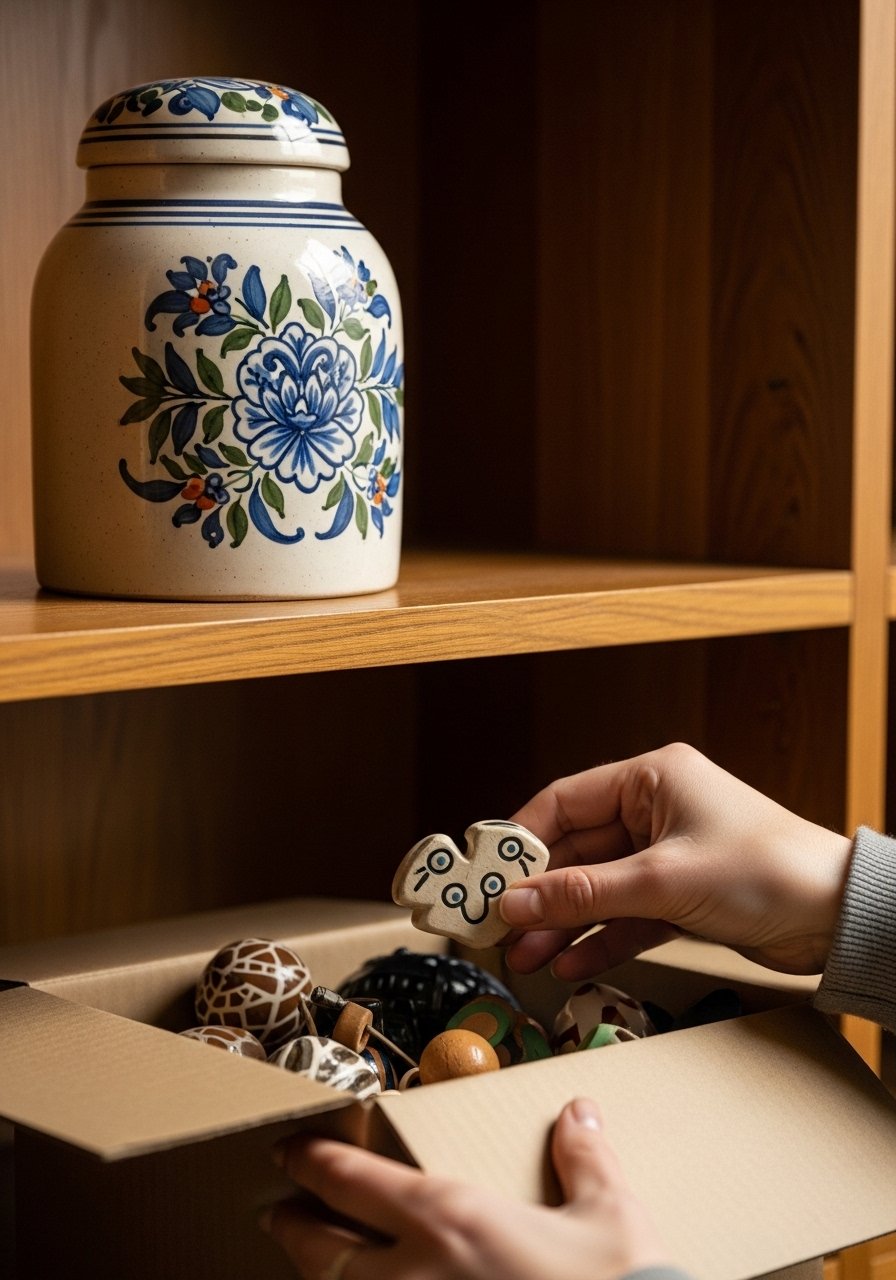
- White matte ceramic canister set, 3-piece (small/medium/large) (~$30–60)
- Hand-painted ceramic jar with lid, neutral blue/cream, 8–10" tall (~$25–70)
- Stoneware utensil crock, beige, 6" diameter (~$18–35)
- Acacia wood serving tray, 12×8" oval (~$20–40)
- Floating wood shelf, 24" natural finish (~$25–60)
- Dried eucalyptus stems bundle, natural green, 6 stems (~$8–15)
- Small ceramic bud vase, matte white, 4–6" tall (~$10–25)
- Linen kitchen towel set, neutral, 2-pack (~$12–30)
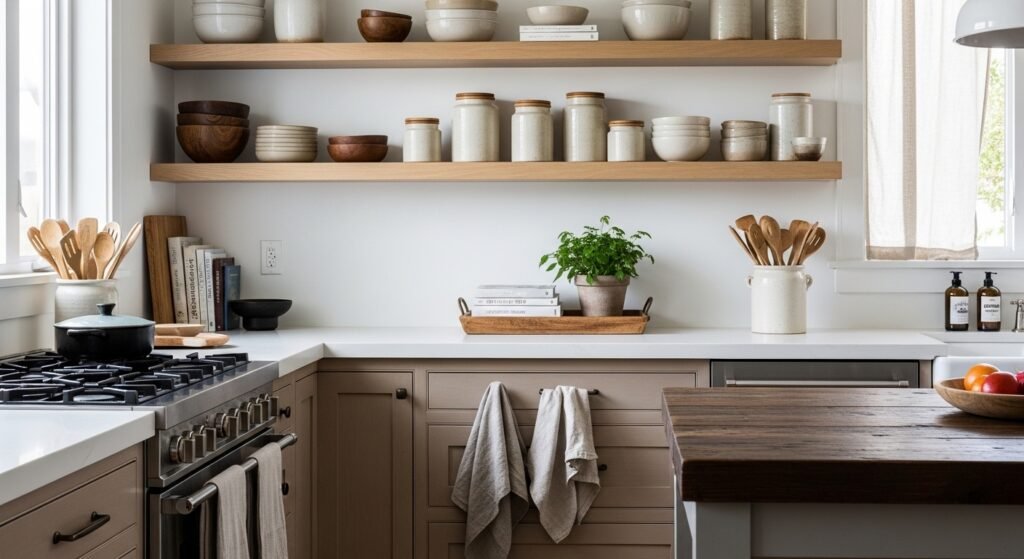
Step 1: Pick two anchor spots (counter and shelf)
I start by choosing two places for jars: one work-oriented spot on the counter and one visual spot on an open shelf. The counter anchor handles function—coffee, tea, utensils. The shelf anchor is purely about look. Visually, this keeps the kitchen from feeling cluttered.
People often miss that every jar doesn’t need to be showcased. A single canister on the counter gives purpose. Small mistake to avoid: spreading jars everywhere so nothing reads as intentional.
Step 2: Group in threes and mix heights
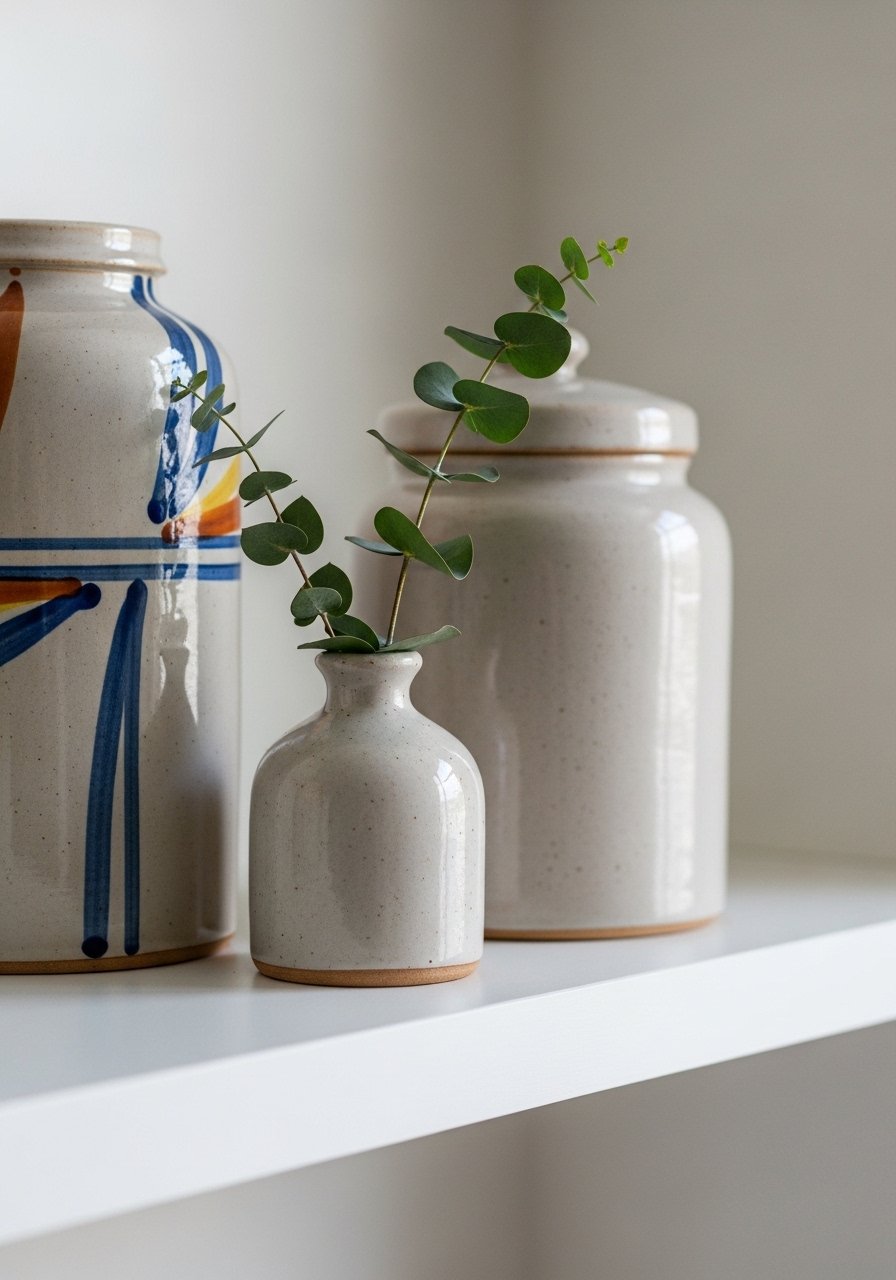
I group jars in odd numbers for a relaxed feel. I aim for three focal heights: low, medium, tall. That gives rhythm and a little tension. The hand-painted jar becomes the tallest anchor. A bud vase with eucalyptus fills in without heavy visual weight.
An insight I learned: height differences matter more than matching colors. Mistake to avoid: lining up same-size jars—it reads like storage, not styling.
Step 3: Let function inform placement
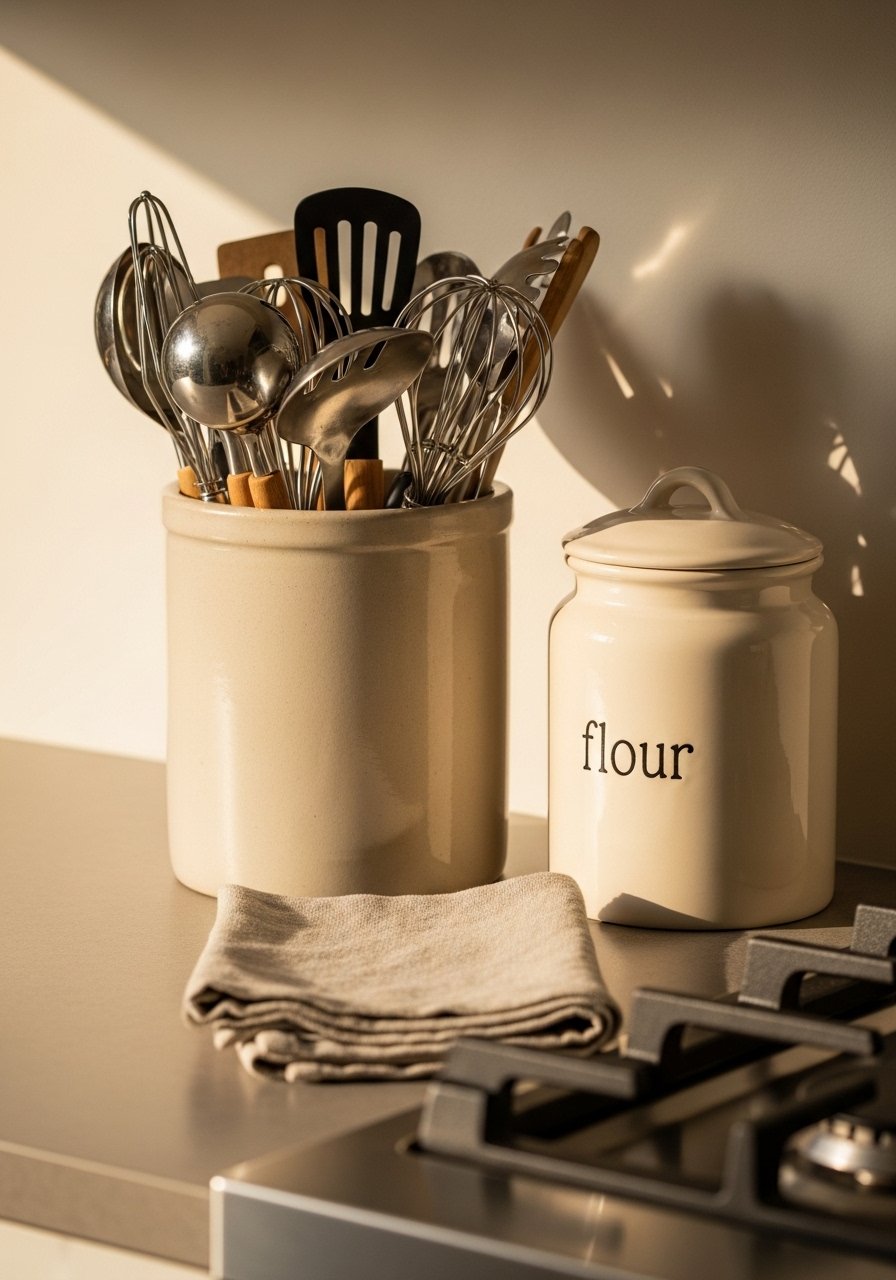
I balance pretty with practical. The utensil crock lives by the stove. Canisters for flour or sugar sit where I reach for them. That way jars feel useful, not just decorative. Function keeps styling honest and less fussy.
People miss that functional placement keeps displays tidy over time. Small mistake: putting frequently used jars on a high shelf—you’ll end up with chaos. Keep most-used jars within arm’s reach.
Step 4: Layer textures and add a tray

I pull everything together on a small wooden tray. Wood, matte ceramic, and linen make the display feel warm and grounded. The tray contains the vignette so the counter stays calm. Adding one organic element—dried eucalyptus—softens the ceramics.
An insight: negative space matters. Let the tray breathe. Mistake to avoid: overcrowding the tray with too many jars. Keep one dominant piece and two supporting items.
Step 5: Edit seasonally and keep it simple
I edit every season. A single hand-painted jar as a seasonal accent is enough. I rotate a bud vase or a different eucalyptus color for a fresh feel. Small swaps keep the look current without a full redo.
People often try to change everything at once. Mistake to avoid: constant switching that makes the room feel unsettled. Start small—one jar swap is a gentle, effective change.
Common mistakes with ceramic jars
I see the same missteps: too many jars, wrong scale, or functional jars placed purely for looks. Those make a kitchen feel cluttered.
Quick fixes:
- Remove half and live with what’s left for a week.
- Match jar scale to the shelf depth—deep shelves take taller pieces.
- Keep one surface purposeful: either work or display, not both.
Adapting this look for small kitchens or a tight budget
Small spaces need fewer, stronger choices. I pick one counter vignette and a simple shelf display.
Budget tips:
- Use one quality hand-painted jar as a focal point.
- Substitute a small tray for multiple accessories to keep cost down.
- Dried stems and a bud vase give visual interest for under $20.
How to mix jars with what you already own
I don’t start from scratch. I pair a new jar with an old cutting board or a favorite mug.
Do this:
- Place the new jar near an existing wood or metal piece for contrast.
- Use linen towels to soften ceramic edges.
- Keep colors within a simple palette—neutrals plus one accent.
Final Thoughts
Start with one counter spot and one shelf. Choose a dominant jar and two supporting pieces. Edit until the arrangement reads calm and lived-in.
A small hand-painted ceramic jar is an easy, low-commitment place to begin. Take your time and trust what looks balanced in your own kitchen.

