
Small kitchen counters often feel cluttered or oddly empty. I used to push appliances back and ignore the surface until guests arrived. The result was a counter that never felt intentional.
This guide shows how to make a tiny stretch of counter feel balanced, useful, and calm without throwing everything away.
How to Decorate a Small Kitchen Countertop
This is the method I use every time a counter looks unfinished. You’ll learn how to pick one anchor, build a small, functional grouping, and keep negative space so the surface reads calm and lived-in. It’s achievable with a few affordable pieces and a small editing habit.
What You'll Need
- Walnut serving board, small (12"x8") (~$20–40)
- Ceramic utensil crock in matte white, 5" tall (~$12–25)
- Round acacia wood tray, 10" diameter (~$18–35)
- Real-looking potted succulent, 4" pot (~$10–20)
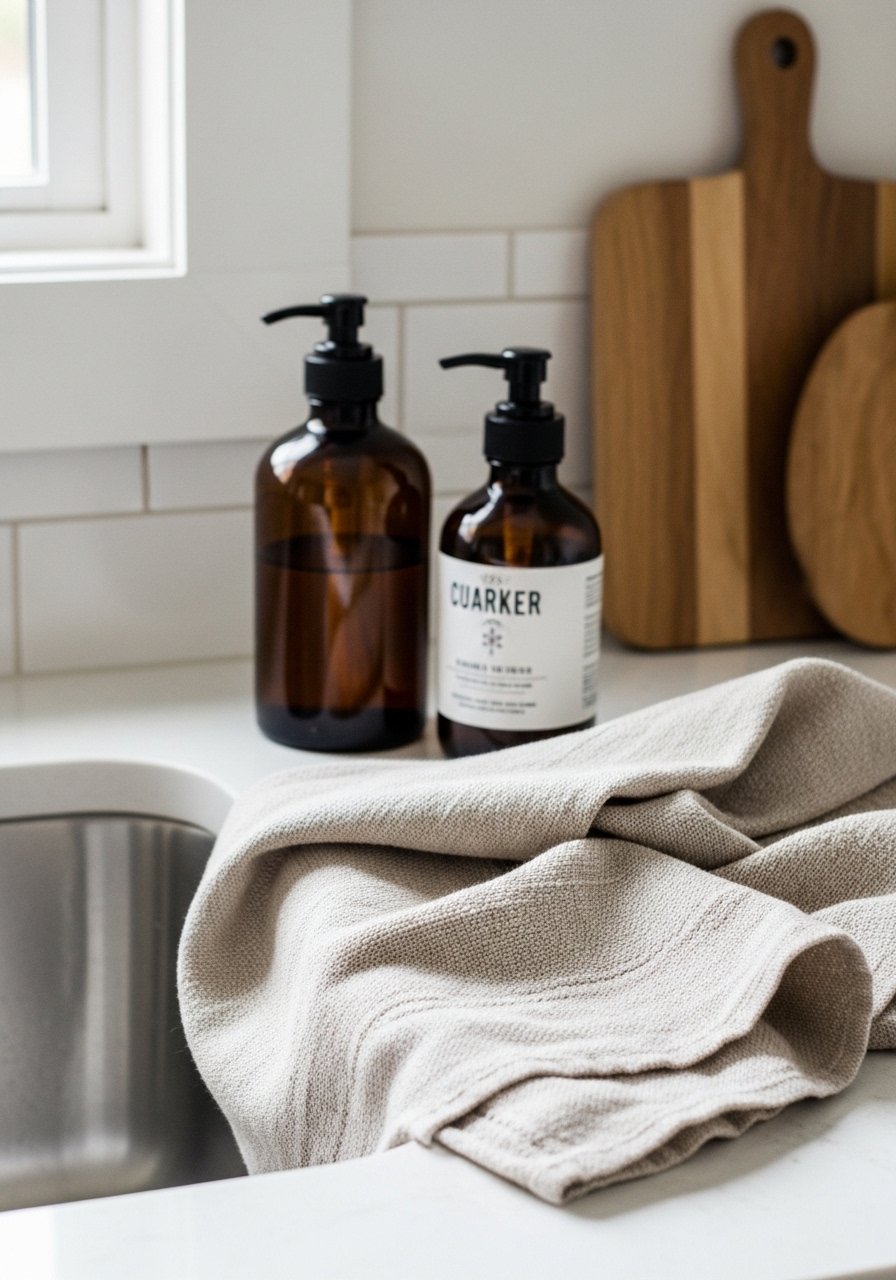
- Glass soap dispenser with pump, 12 oz (~$12–22)
- Small LED table lamp, warm light, 9" tall (~$25–60)
- Clear glass canister with lid, 16 oz (~$15–30)
- Linen hand towel in natural, 18"x28" (~$10–18)
Step 1: Clear and define the styling zone
I always start by taking everything off the counter and sorting it into “daily use” and “stored” piles. That moment of empty space helps me see the true working zone versus the styling zone. Mentally mark the area closest to the sink or stove as functional; the rest can be for styling.
People miss how much calmer a counter looks when you allow a strip of empty space. The common mistake is trying to fill the whole surface—leave breathing room instead.
Step 2: Place a single anchor
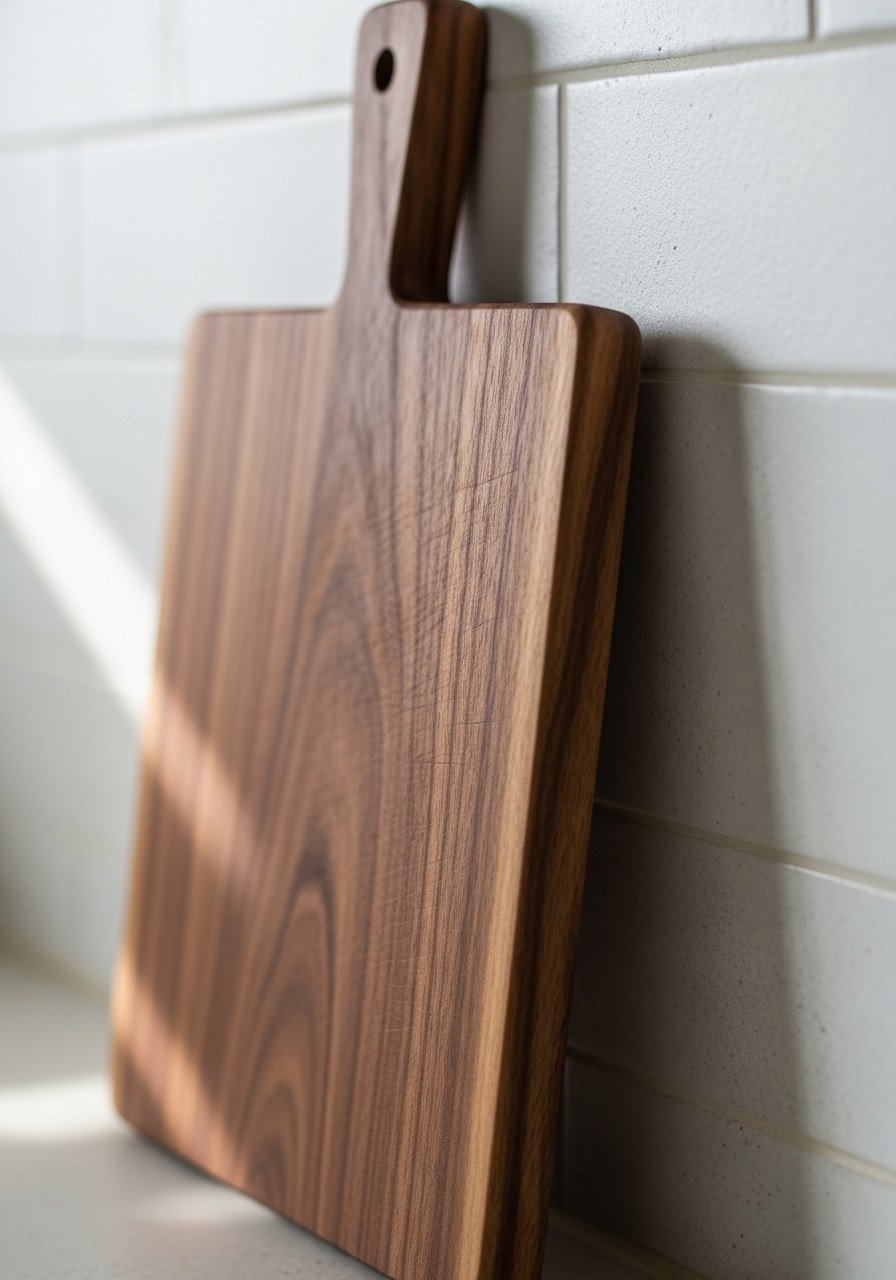
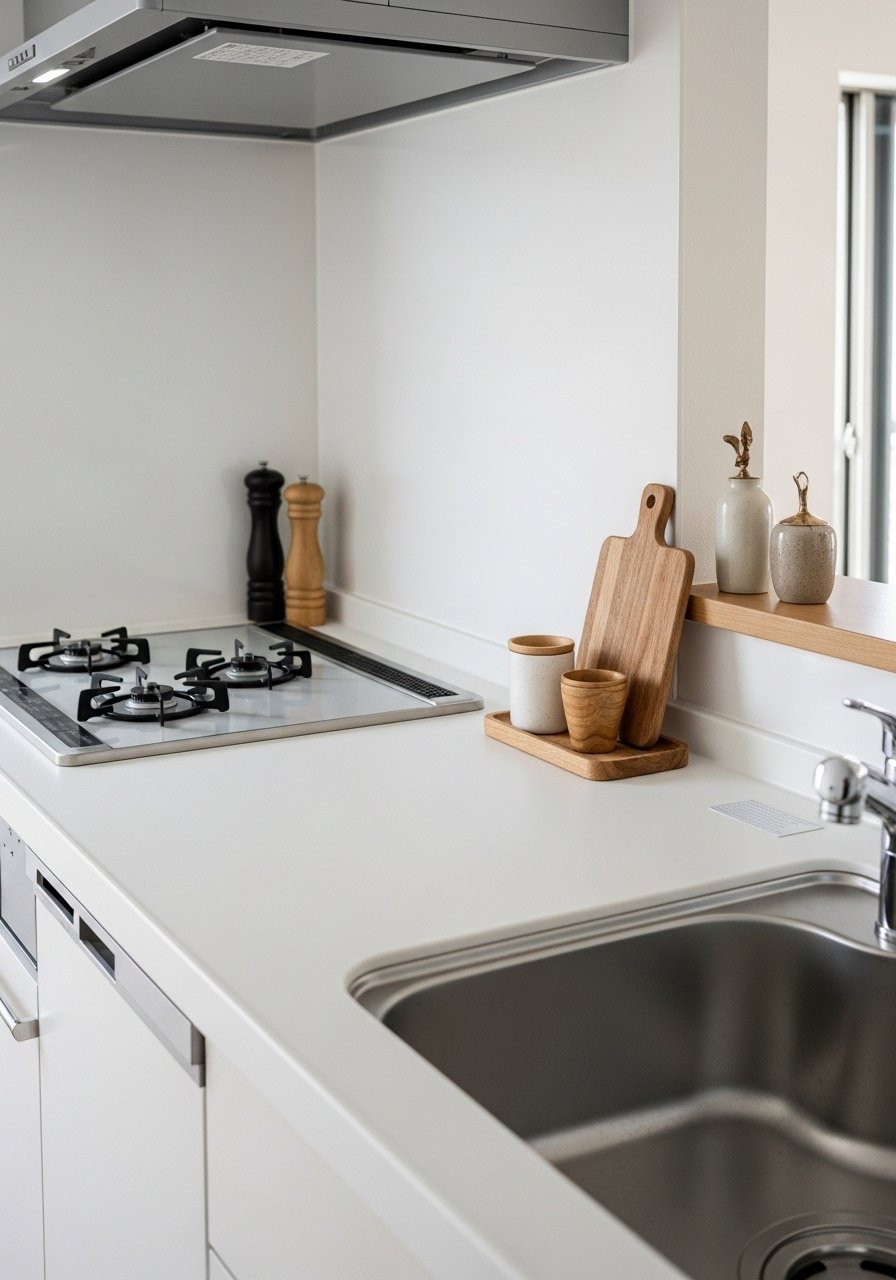
I pick one anchor piece and stick with it. For me that’s a small walnut cutting board or an acacia wood tray. I place it slightly off-center, leaning it or setting it at an angle against the backsplash. It immediately gives the eye a place to land.
An anchor creates scale and warmth. People often choose anchors that are too large or too small; the right size is roughly one-third the width of the available counter space. Avoid centering everything perfectly—slight asymmetry reads more intentional.
Step 3: Build a simple functional trio
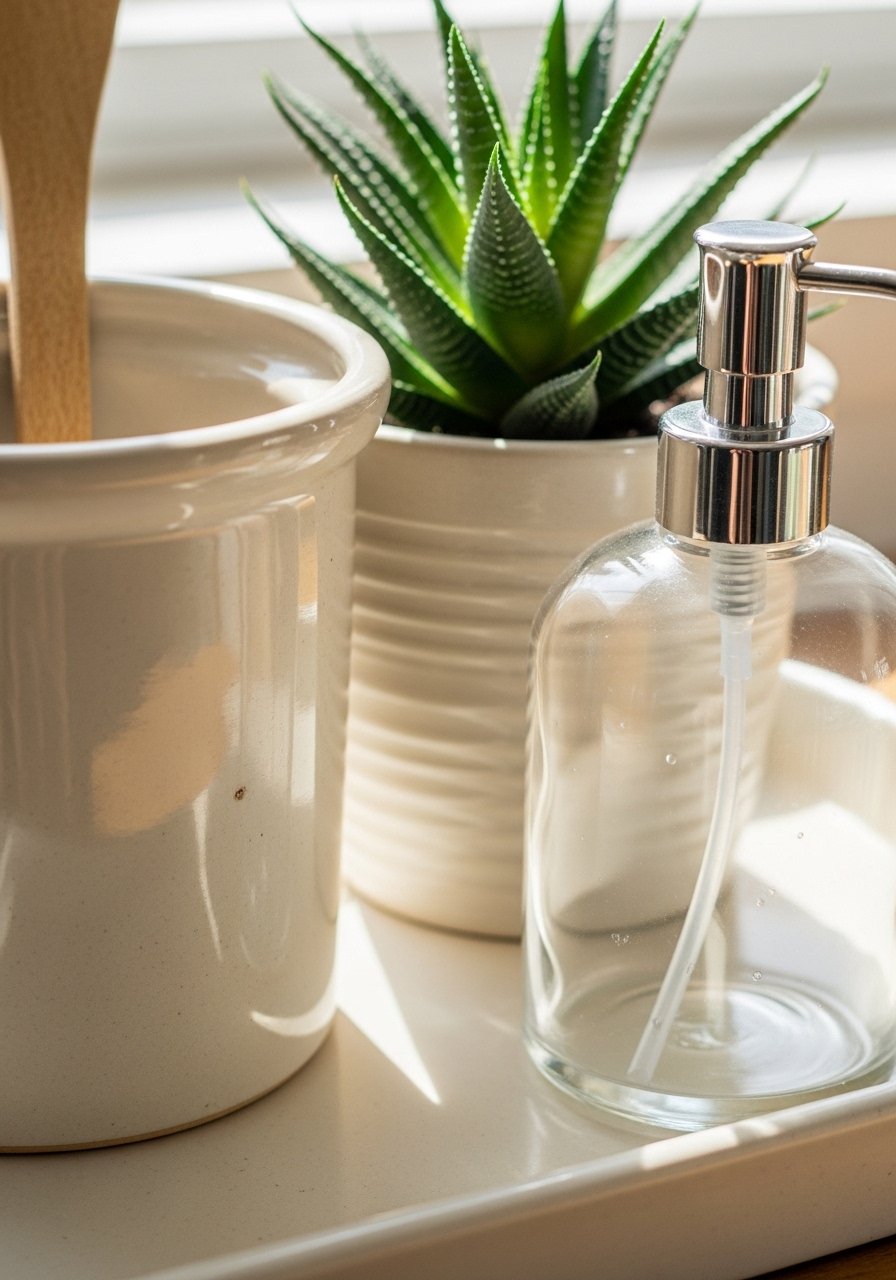
On the anchor or tray I group three items: a utensil crock, a plant, and a soap dispenser or glass canister. I vary heights—tall crock, low plant, medium dispenser—so the visual line moves. I keep colors limited: a warm wood, a neutral crock, and clear glass.
People underestimate scale and texture. The trick is odd numbers and varied materials. The mistake is lining items up in a straight row; instead, stagger them and let some negative space show.
Step 4: Add a soft light or reflective detail

If the counter sits in a dim corner, I bring in a small LED lamp or a reflective glass canister. I use warm light to make the grouping feel intentional and cozy in the evenings. A little glow makes the counter read as part of the room, not an afterthought.
People forget to test the light in the evening. Too-bright bulbs or oversized lamps steal the scene; choose low wattage and a compact scale so it supports, not competes with, the anchor.
Step 5: Edit weekly and keep one small routine
Styling a small counter is half taste and half habit. I wipe down the surface twice a week and return items to designated spots. I also rotate one small accent—a seasonal herb in the canister or a new towel—so it never feels static.
The thing people miss is maintenance. The biggest mistake is treating styling as a one-time task. A five-minute weekly edit keeps the counter calm and useful.
Common mistakes and quick fixes
I see the same errors all the time. The worst is thinking every object needs to be a decoration. Function is allowed to be pretty.
- Too many small pieces: Consolidate into one tray or board to reduce visual noise.
- One flat plane: Add height with a board or lamp.
- Ignoring negative space: Leave at least a third of the visible counter empty to read as calm.
Quick fixes: hide bulky appliances, swap a handful of mismatched utensils for one crock, and choose coherent materials (wood, ceramic, glass).
Adapting for different layouts and budgets
Small galley counters, L-shaped runs, and rental kitchens all need slightly different approaches. I scale the anchor: a tile or framed print above a longer counter, a single tray for narrow runs.
- Tight budget: start with a plant and a linen towel (~$10–20).
- Renter-friendly: use removable hooks and a plug-in lamp—no drilling.
- Narrow counters: use vertical anchors (leaning board) instead of wide trays.
I focus on texture and color over expensive items. A thrifted tray and a cleaned glass jar often do the same visual work as pricier pieces.
Mixing your existing style with organic modern or japandi
If you like organic modern or japandi, I lean into warm wood, matte ceramics, and simple shapes. But you don’t need everything to match.
- Keep one unifying material (wood or matte ceramic).
- Add a plant for organic softness.
- Use neutral tones and subtle contrast rather than bright colors.
I mix old and new: a vintage cutting board next to a clean ceramic crock reads intentional, not themed.
Final Thoughts
Start with one anchor and one small routine. You don’t need many items—just a board, a crock, and a plant can change everything.
If you want a low-commit start, pick a small acacia tray or a potted succulent and style around it for a week. Tiny edits make the counter feel calm and lived-in.
