

My living room had nice furniture and decent lighting but it still felt like a waiting room. Took me embarrassingly long to figure out it was missing texture and useful surfaces. Once I started building simple holders and repurposing furniture I actually used every shelf, and my tools stopped taking over the entryway.
These ideas lean practical-industrial with a few cozy accents. Most projects are under $50, with a few spares around $75-100 for power tool chargers or metal shelving. They work in garages, utility closets, basements, and even a corner of an apartment balcony if you like to tinker.
Slim Wall Cabinet For Small Apartments, Cozy Workshop Vibe
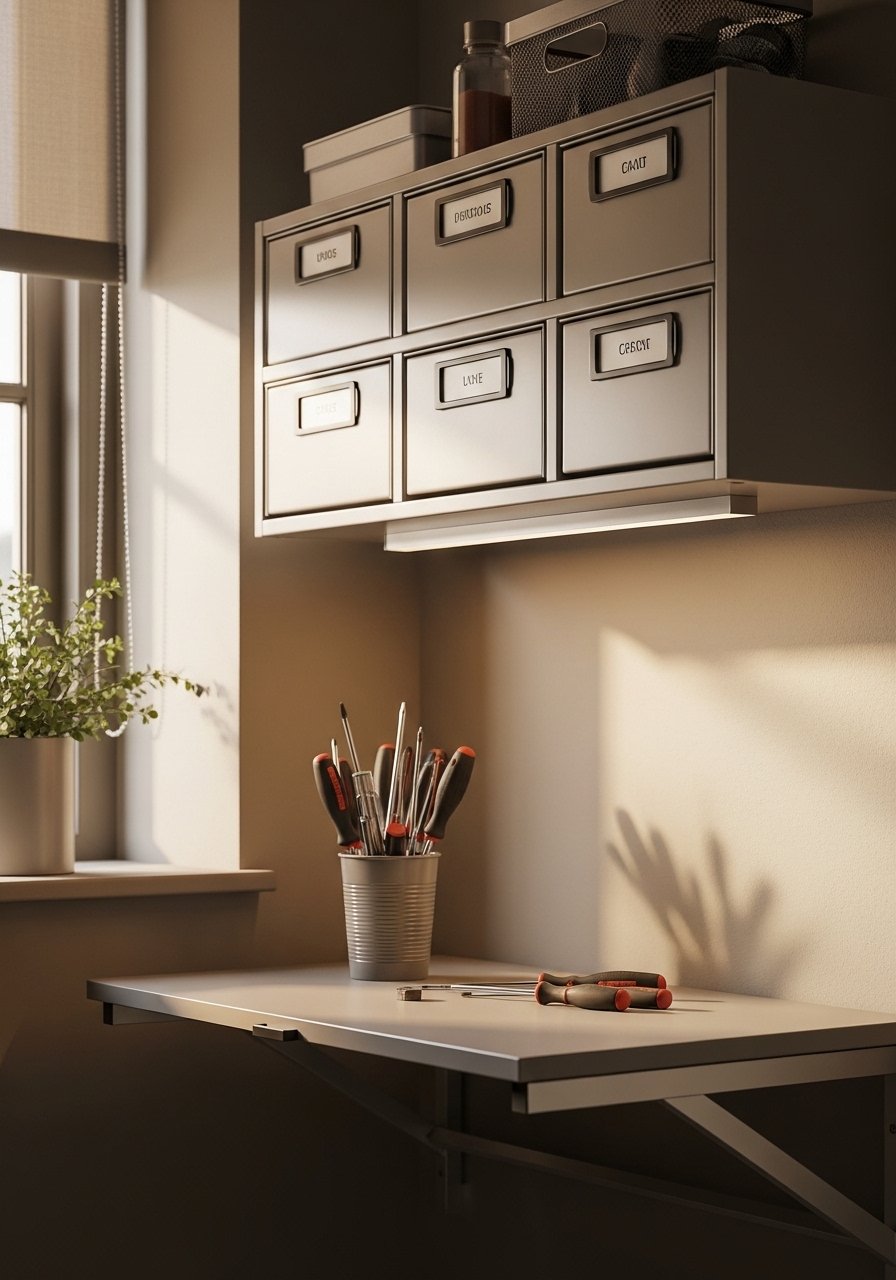
I needed closed storage to hide random bits without losing accessibility. A slim wall cabinet tacked above a folding bench keeps nails, sandpaper, and a cordless drill out of sight and off surfaces. It feels tidy and warm in a small space, which is why I painted mine a deep green to read like decor. Budget is $40-90 depending on hardware. I used magnetic-bits-organizer for tiny pieces and one shallow drawer for chargers. A common mistake is making the cabinet too deep. Keep it 8-10 inches so it does not intrude into the walkway. Rule of three applies here, group three small jars for paint brushes to make it look intentional.
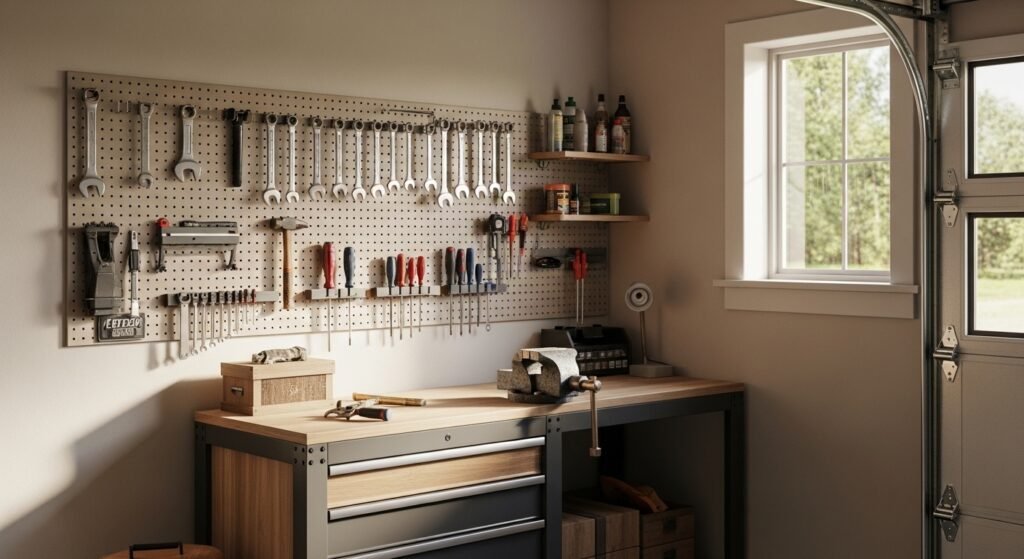
Vertical Pegboard Storage For Garage, Industrial Functional Style
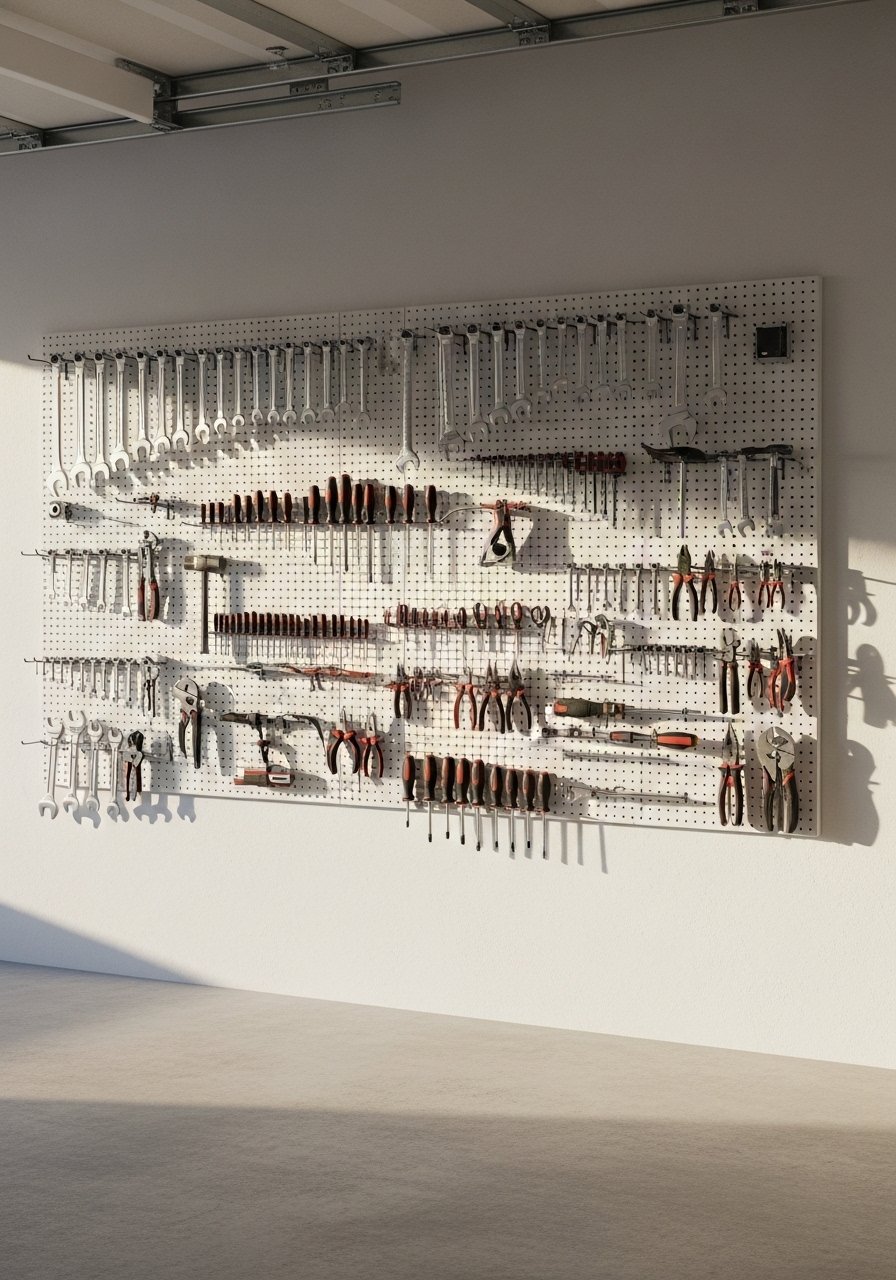
Pegboard is boring until you plan it like a grid. I laid out tools by frequency of use, not by size. Everyday items sit at eye level, seasonal ones up high. Budget friendly under $30 for basic pegboard and hooks. I added a metal-pegboard-hook-set so heavier tools stay secure. The common mistake is hanging everything in a single jammed row. Leave 2-3 inches between clusters so you can actually grab a wrench. Swap bulky closed cabinets for open peg storage when you want it to feel workshop-like not like a storage dungeon.
Magnetic Strips For Small Metal Tools, Minimalist Utility Corner
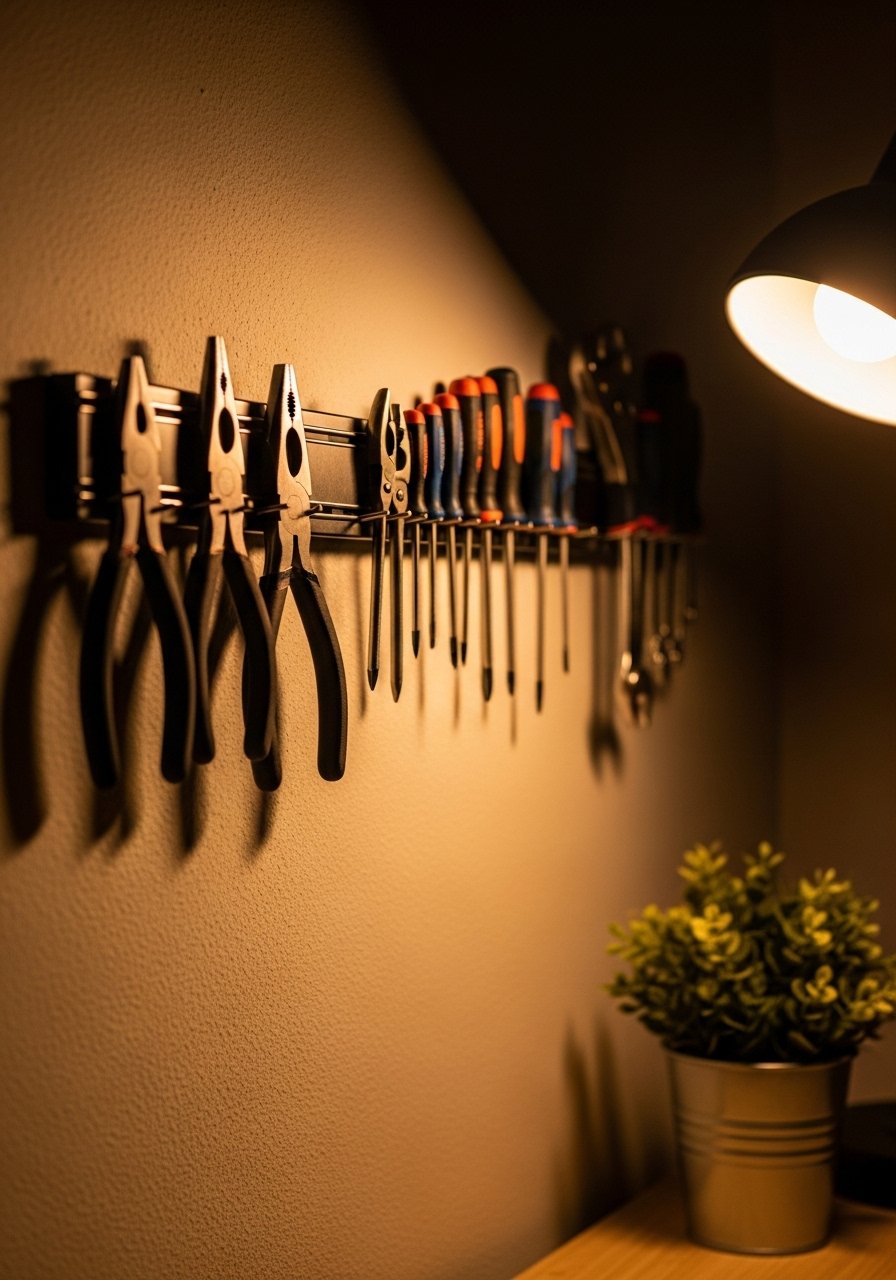
Magnetic strips are the easiest way to tame small metal tools. I stuck one over my bench and never fumbled for a screwdriver again. It creates a clean, minimalist look in a tiny utility corner and costs under $20. For bits and blades I used a heavy-duty-magnetic-tool-strip. People forget to mount them to studs when storing heavy items. Use wall anchors or a plywood backing to spread the load. A small detail most guides skip: place the strip 4-6 inches above the work surface so tools don’t bump the bench when you grab them.
DIY Pipe Shelves For Rustic Workshop, Warm Wood Tone
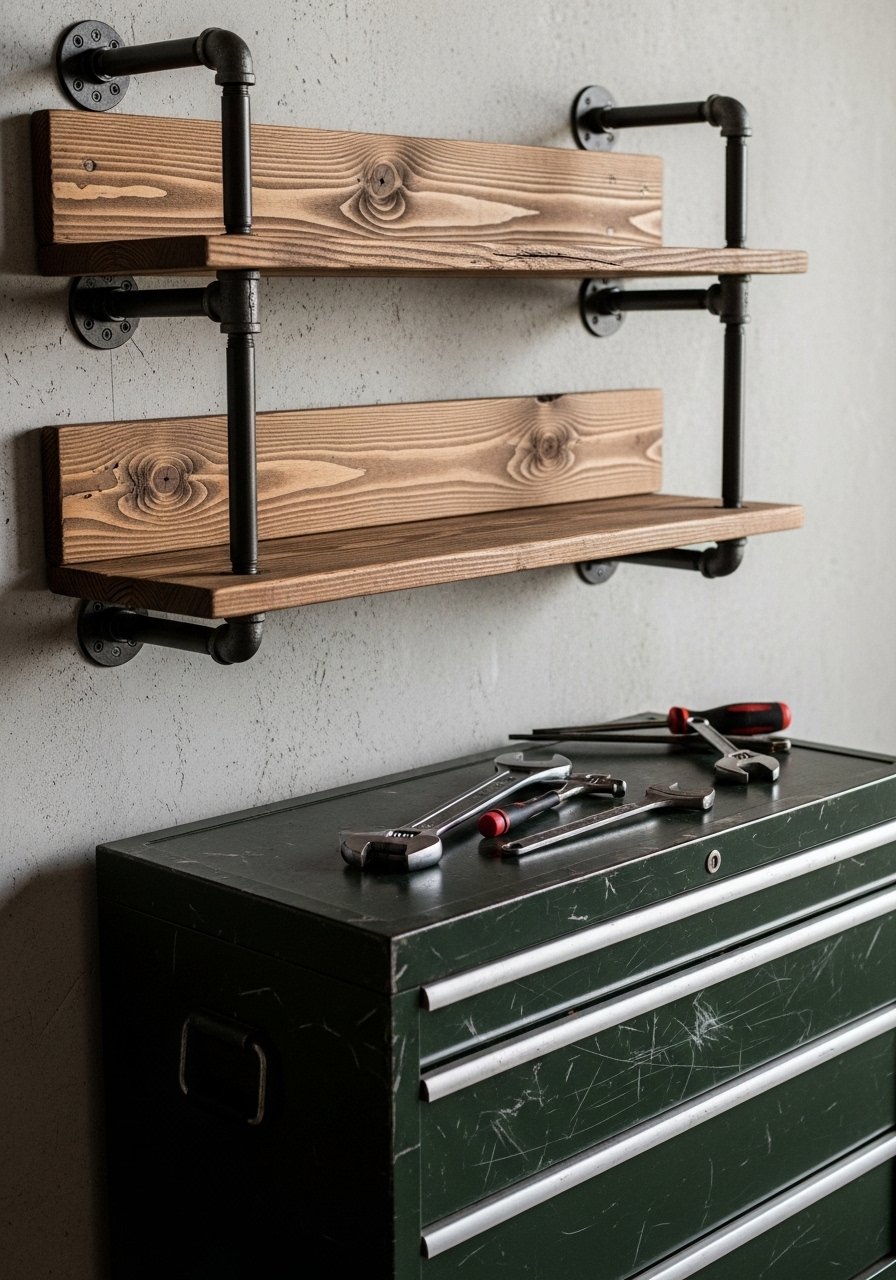
I built pipe shelves because open shelving feels more workshop than cabinet. The pipes add weight and contrast and the shelves are great for paint cans and toolboxes. These look great in a mudroom or garage and cost around $60-120 depending on wood choice. I used black-iron-pipe-kit and 2×10 pine boards. A common mistake is undersized brackets that sag. Measure for a 1:3 depth-to-height ratio, meaning a 10-inch shelf needs support every 30 inches. Pair this with the pegboard idea above to keep small items off the shelf but within reach.
Repurposed Vintage Toolbox As Shelving, Eclectic Entry Workshop
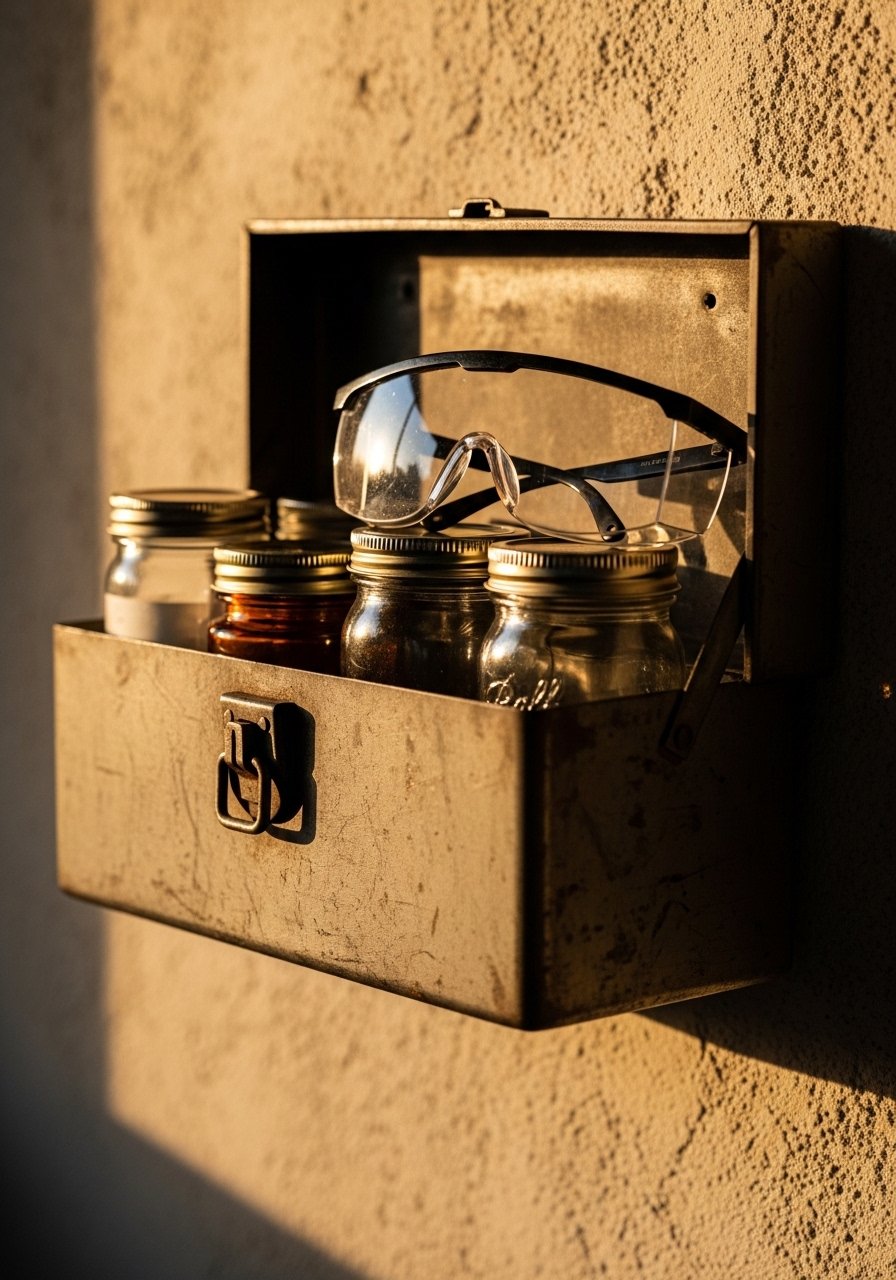
I found a rusty toolbox at a flea market and turned it into a wall shelf for drill bits and glue. It adds personality and hides a lot of clutter in a small footprint. Price varies but you can mimic the look with a new metal-storage-box for under $35. People make the mistake of leaving sharp edges untreated. Sand and line with felt so your small parts do not bounce out. That tactile, imperfect thing other articles ignore is how storage becomes part of the room instead of a boring necessity.
Hanging Garden Tool Rack For Outdoor Storage, Casual Patio Setup
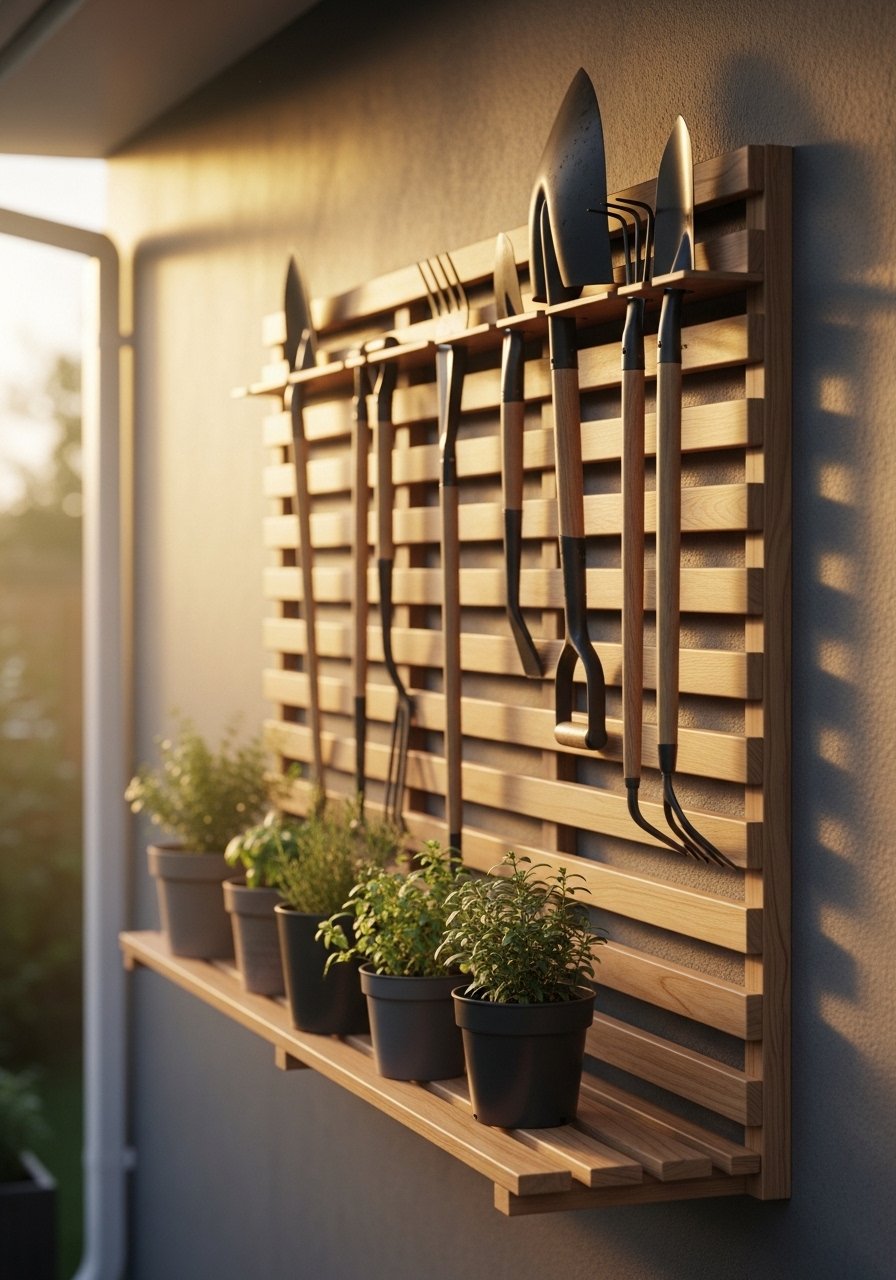
Garden tools are a pain to store, especially in an apartment balcony. I built a wall rack with spaced slats and hooks so shovels, rakes, and a folding saw hang neatly. Works under $50 if you buy basic hardware. I used outdoor-wall-hooks rated for wet conditions. A common error is mounting too low. Keep handles 6-8 inches off the floor to avoid mud and moisture. For a cleaner look, paint the rack to match your fence so it reads like built-in storage.
Rolling Cart Workshop Station For Small Spaces, Flexible Utility
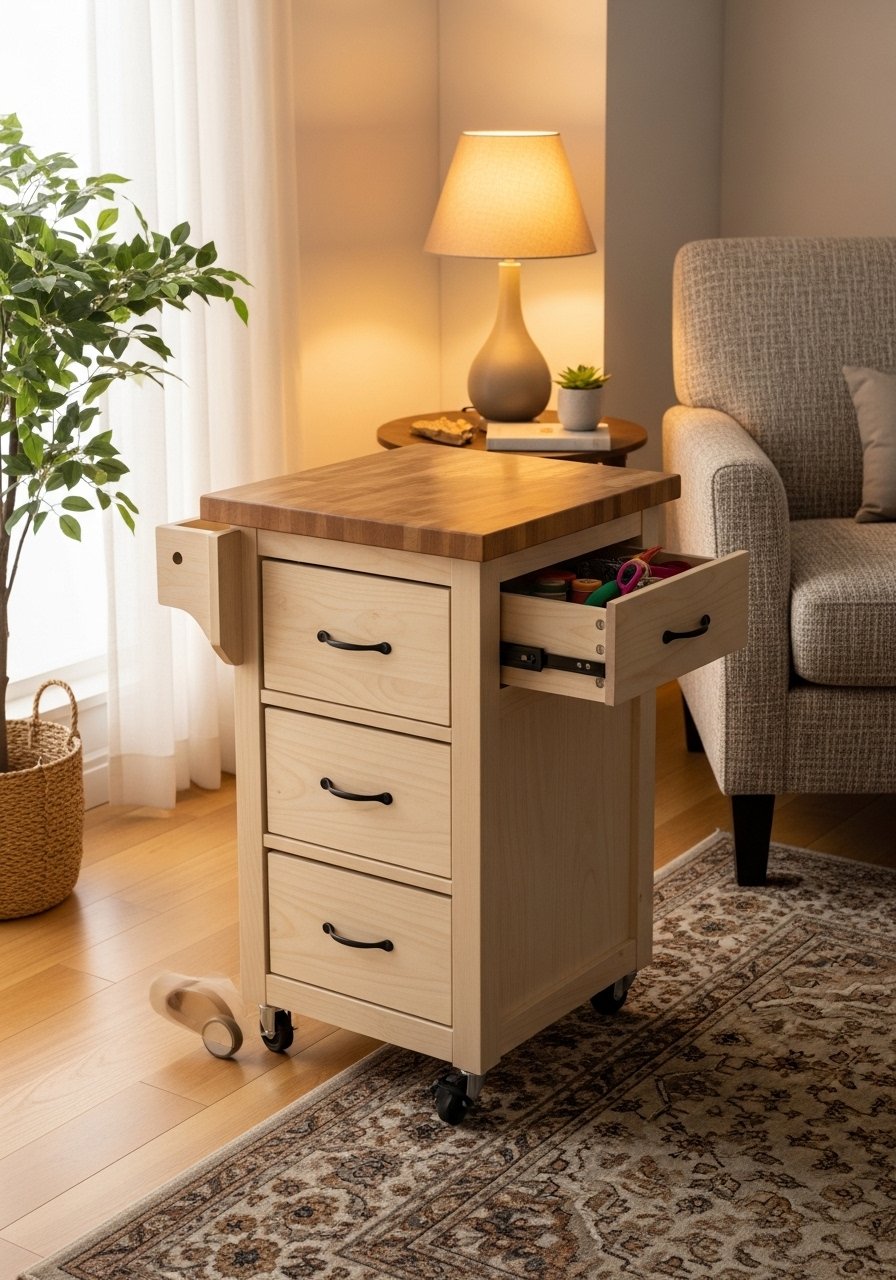
A rolling cart is my favorite solution for apartment tinkerers. It gives surface area and locks away messy bits. Mine has one drawer for screws and an open shelf for a drill charger. Costs run $40-120 depending on materials. I linked a sturdy workshop-utility-cart that fits under a counter. Mistake people make is ignoring wheel locks. Make sure the casters lock solidly or your cart will roll during projects. The detail many articles skip is stacking trays by task, not size, so a sanding tray, finishing tray, and hardware tray are all ready when you need them.
Over-The-Door Organizer Repurposed For Tools, Renter-Friendly Workshop
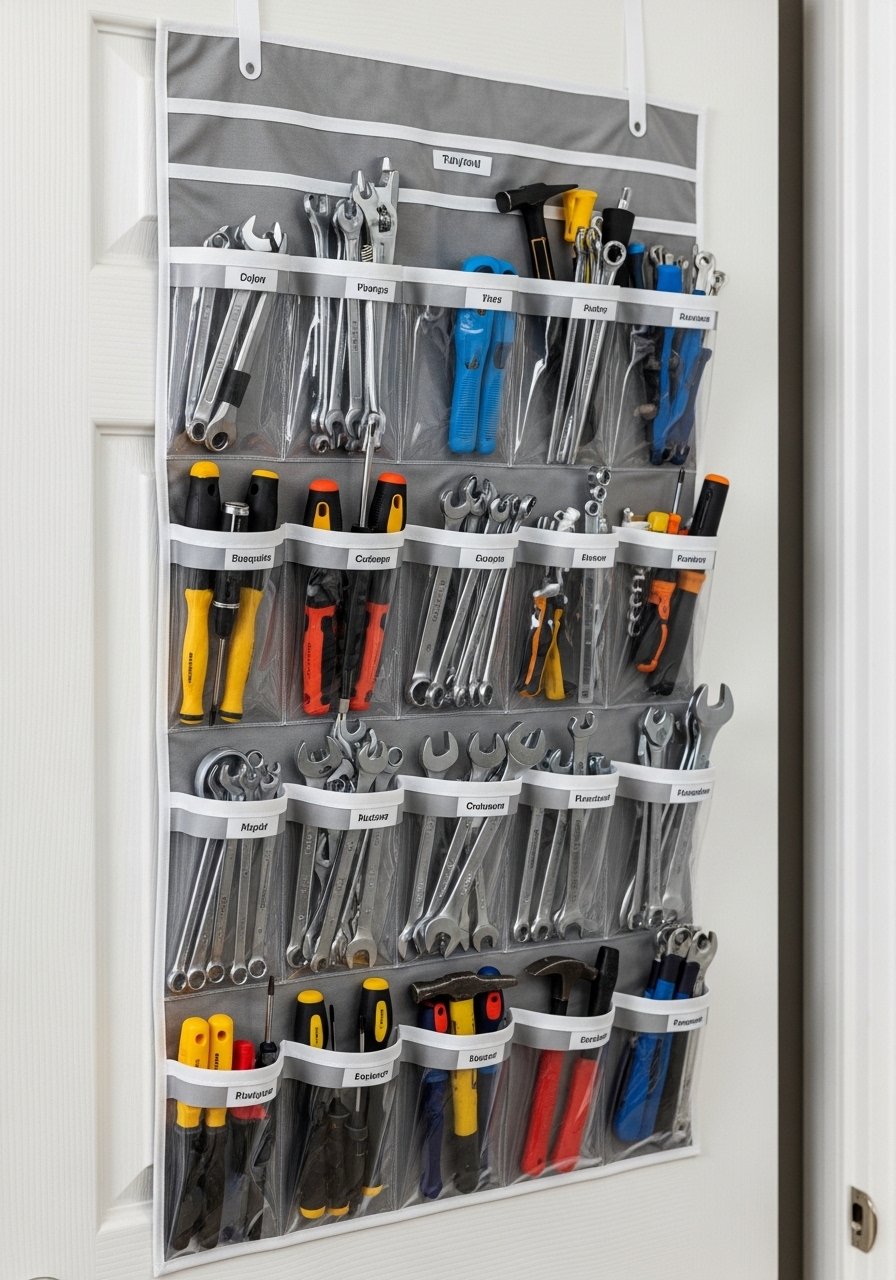
Closet doors are wasted real estate. I hung an over-the-door shoe organizer and filled pockets with sandpaper, measuring tapes, and glue. It is a renter-friendly hack and costs under $25. I recommend a heavy-duty-over-the-door-organizer with reinforced pockets. The mistake is stuffing it so full the pockets sag. Keep 70 percent capacity so pockets keep shape. Also, label the pockets with a small washi tape flag. That tiny detail saves time every single weekend project.
DIY Clamp Rack Using Curtain Rods, Casual Woodshop Corner

Clamps take up so much space. I mounted two curtain rods to the wall and slid bar clamps onto them. It is cheap and looks tidy. Budget under $20 for rods and brackets. A good option is this heavy-duty-curtain-rod that holds weight. People often place clamps in a pile. That makes them harder to reach and damages handles. Hang them by size, smallest in front. A trick I use is to leave one clamp on the bench as a quick-hold so I do not hunt for one mid-cut.
Multi-Tiered Shelf With Labeled Bins, Functional Laundry Room Workshop
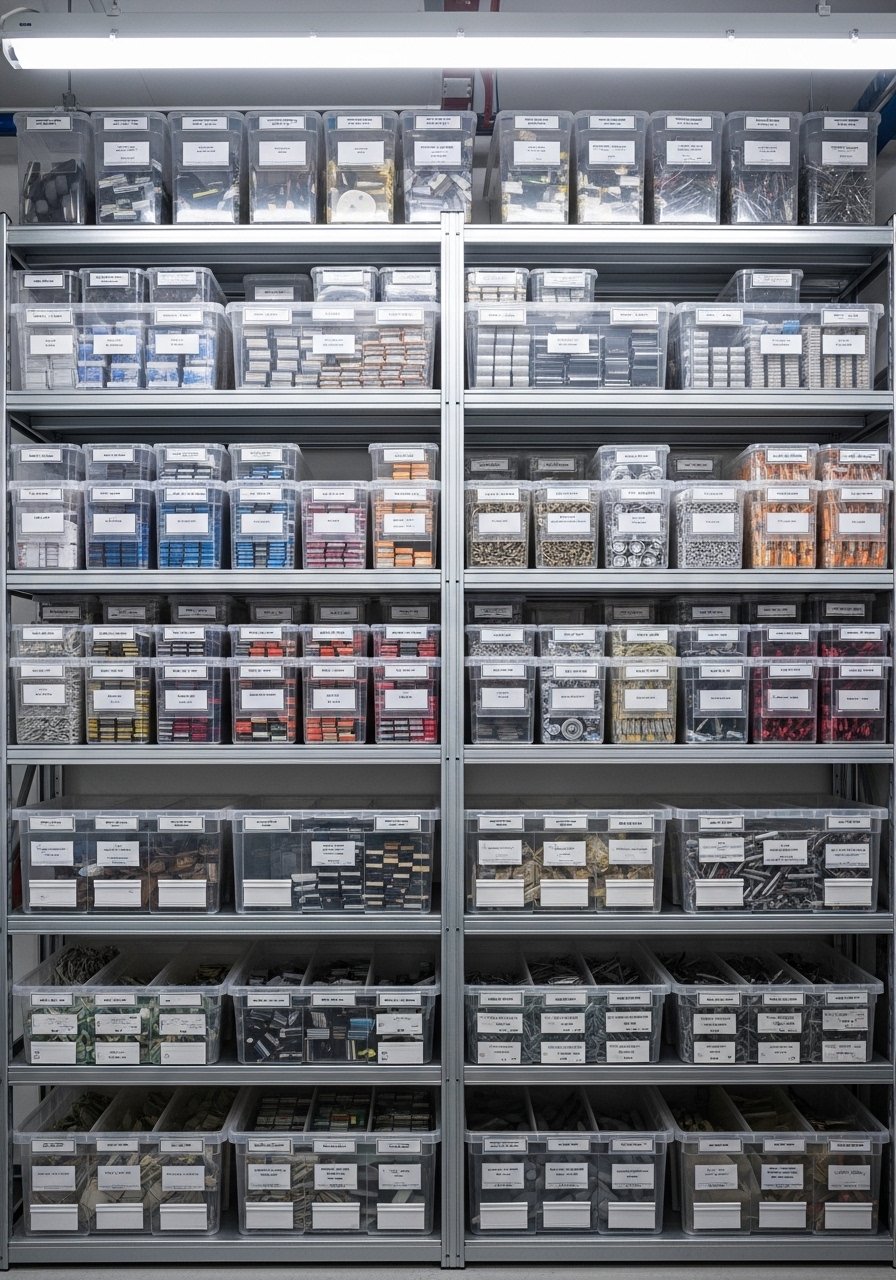
Plastic bins are obvious but only useful when labeled and visible. I built a multi-tiered shelf with clear bins for fasteners, organized by type and size. It cost about $80 including shelving and bins. I used clear-storage-bins-set that stack securely. The common mistake is using opaque bins. You waste time guessing what is inside. Pick standard bin depths, for example 12×6 inches, so they line up and you can use the rule of three on each shelf for visual calm.
Wall-Mounted Drill Charging Station, Clean Countertops Strategy
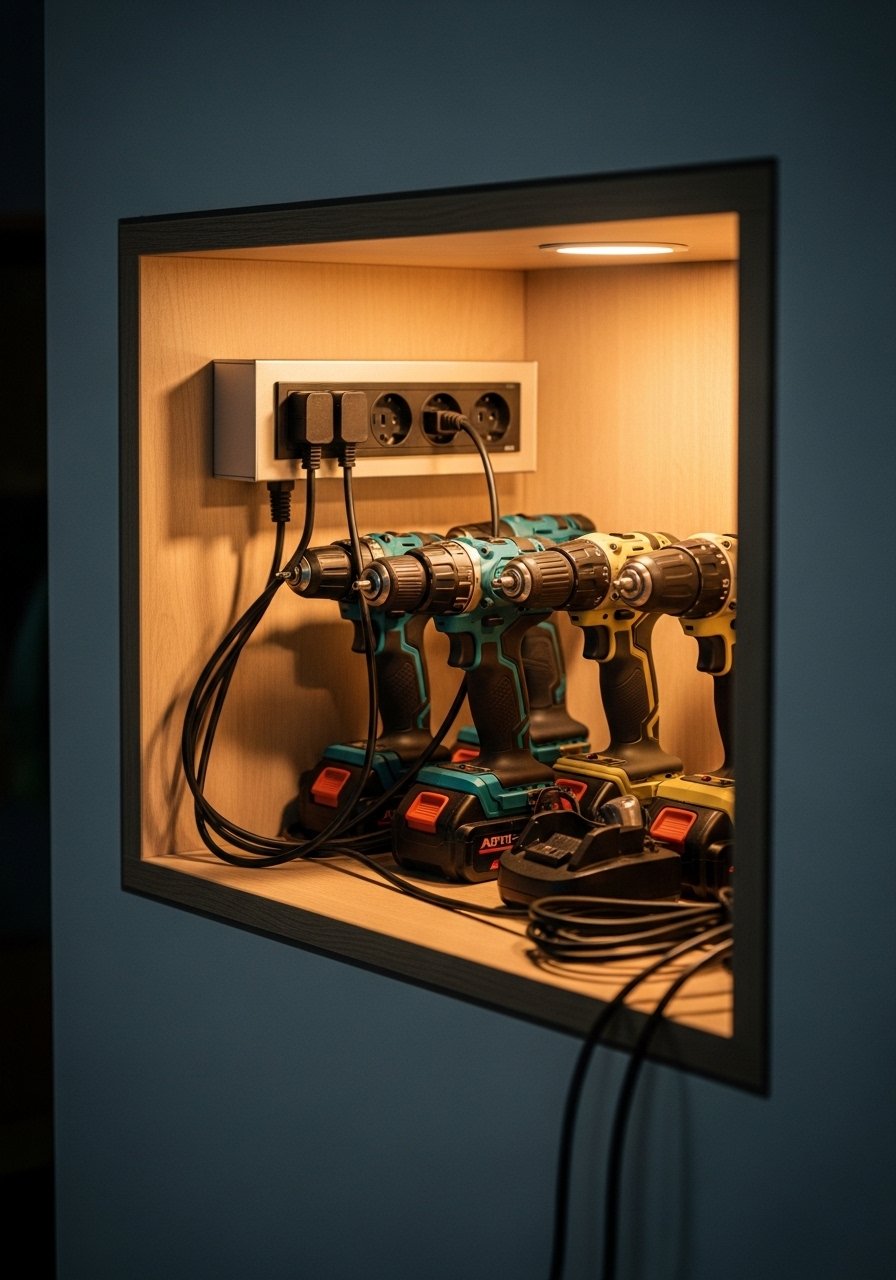
Drill batteries were everywhere until I made a wall charging station. I screwed a shallow box with a mounted power strip over it and pluggable bays so each drill has its place. It clears the bench and looks intentional. Materials around $30-60. Use a wall-mount-charging-station. A mistake is putting outlets behind the drill where cords kink. Route cords out the bottom and add labels for each battery. A detail most listicles miss is spacing bays 2 inches apart so chargers do not overheat when used together.
Lazy Susan Hardware Organizer For Small Parts, Cozy Garage Shelf

I once lost a single washer for three days. Now I keep small parts on a Lazy Susan that spins to whatever I need. It is perfect for the middle of a workbench and costs under $25. Use rotating-lazy-susan-platform and small mason jars for visibility. People make the mistake of using open trays that collect sawdust. Use jars with lids to keep parts clean. Pro tip many guides skip, place a thin non-slip shelf liner under the jars so they stay in place during rotation.
Magnetic Cup Rail For Small Bits, Clean Workbench Aesthetic
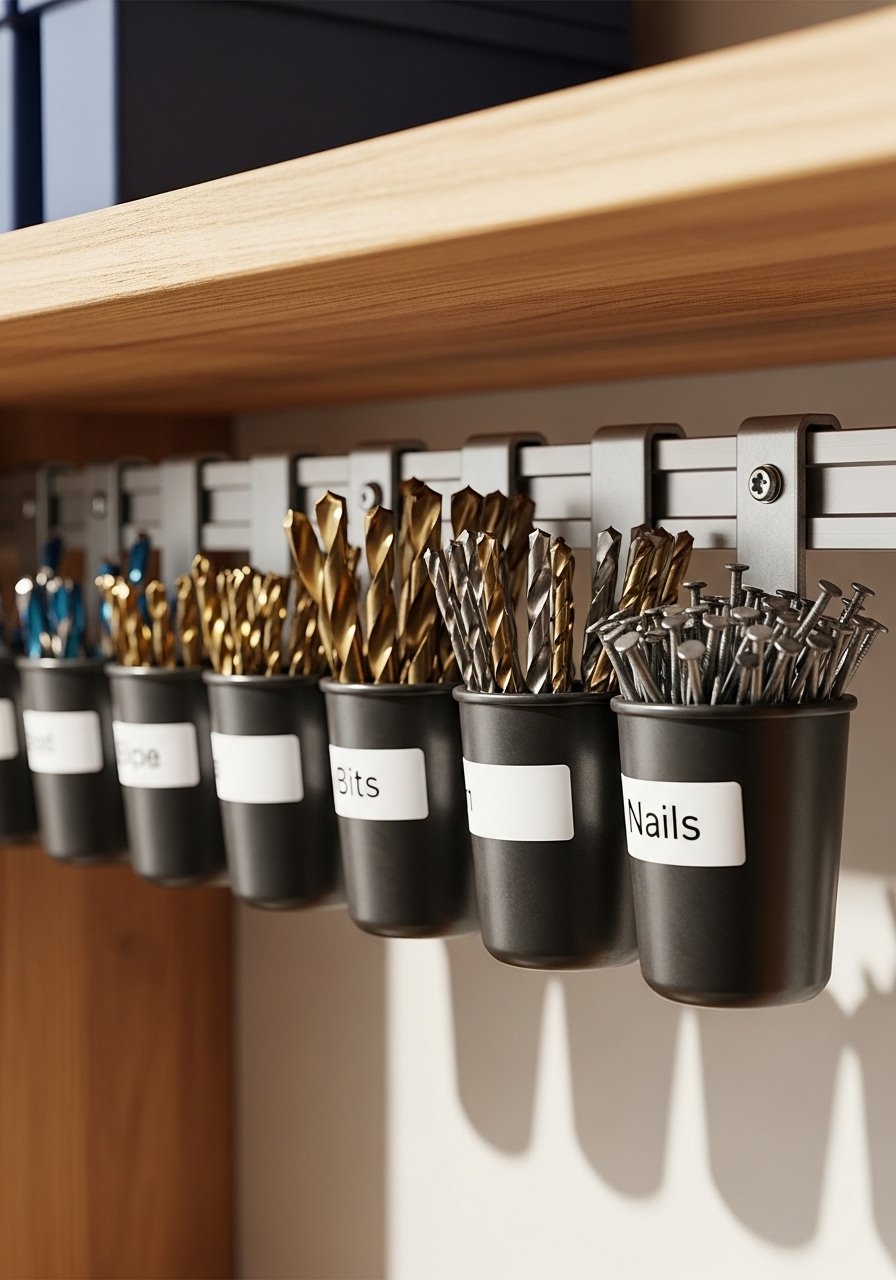
Magnetic cups are a game when you have lots of tiny bits. I mounted a magnetic rail under a shelf and stuck labeled metal cups onto it. They are easy to reach and cheap. I used magnetic-parts-cup-rail. A common mistake is not securing the rail to studs or a backer board; it will pull away when full. The detail I like is staggering cup sizes so you can see contents at a glance, obeying the 80/20 rule visually where 80 percent of items are in 20 percent of the containers.
Floating Shelf With Built-In Tool Slot, Minimalist Workshop Wall
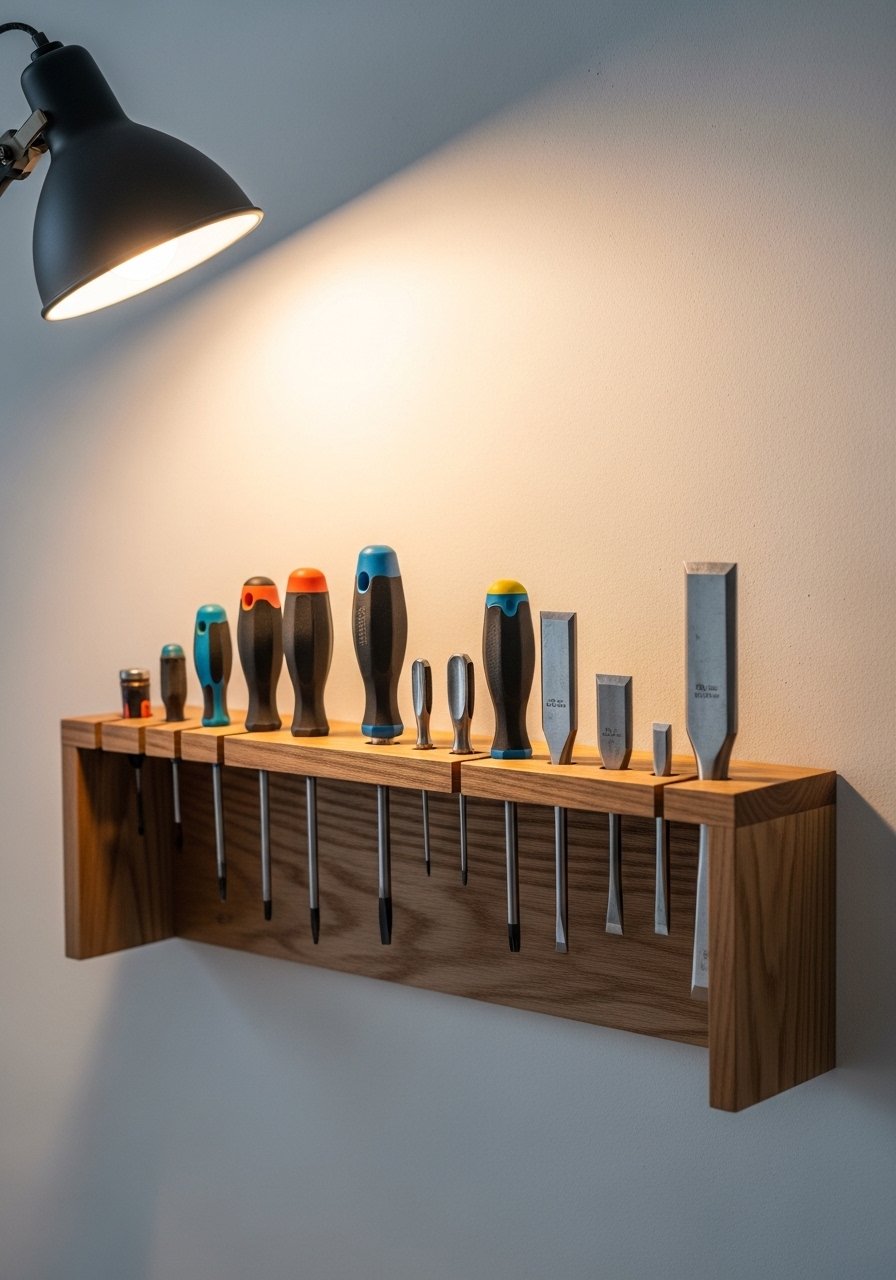
I carved a shallow slot into a floating shelf so screwdrivers and chisels stand up like books. It looks intentional and keeps tools accessible. Budget depends on wood choice, plan for $30-80. A good match is floating-wood-shelf-kit. Most people make the slot too deep so small tools tip over. Keep the groove 1/4 the tool height for balance. This pairs beautifully with the pegboard idea earlier for frequently used vs long-term tools.
Reclaimed Pallet Vertical Storage For Long Items, Rustic Shed Solution
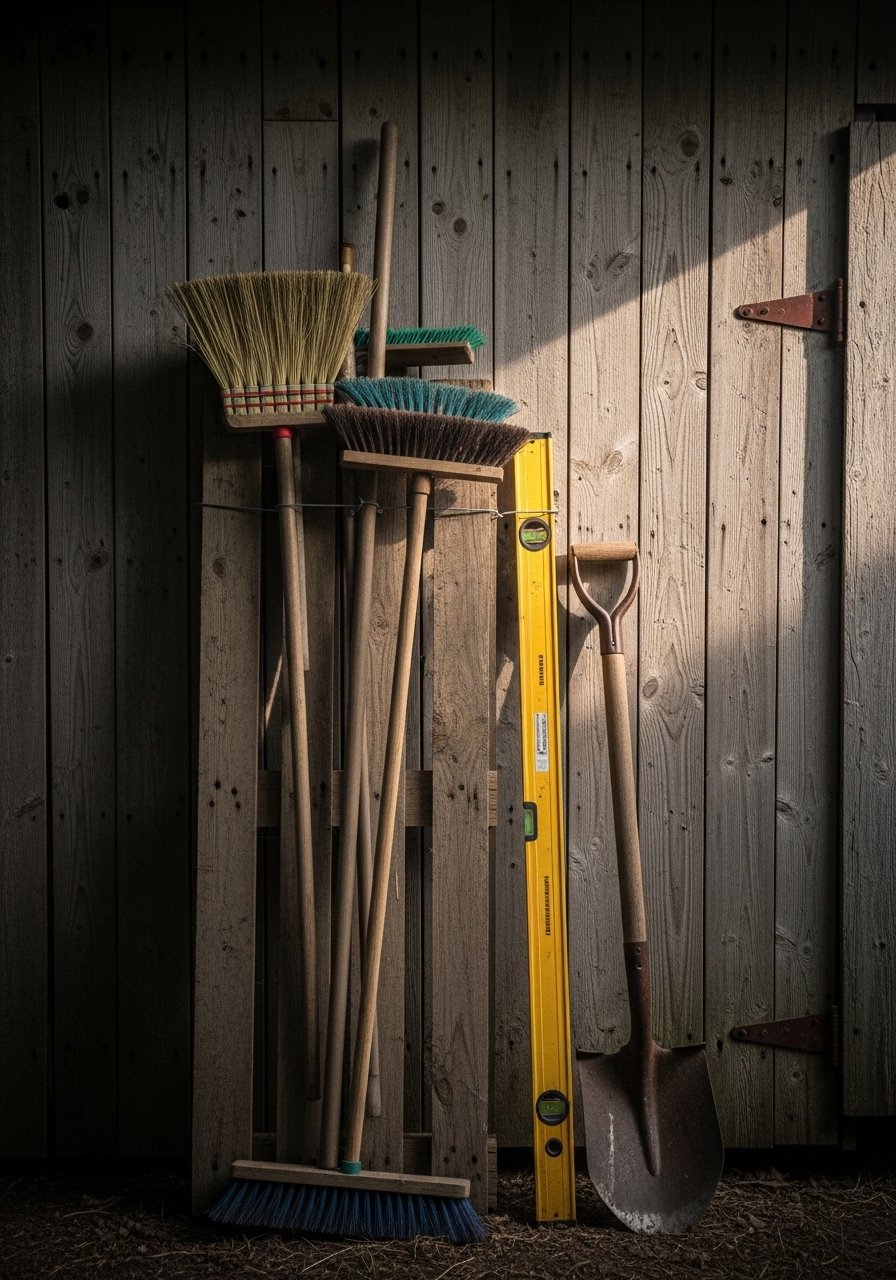
A pallet leaned upright becomes perfect for long pieces. It keeps rakes, brooms, and levels off the floor and costs nearly nothing if you source locally. I screwed hooks into the slats and added a bottom catch to stop handles sliding. Try a reclaimed-wood-hook-kit if you do not want to make your own. The mistake is leaving a gap at the bottom where items tilt out. Add a 1.5-inch high lip and it stays upright. Most how-tos forget to mention using one corner for winter-only tools to reduce clutter.
Portable Power Tool Caddy For Jobsite Trips, Rugged Practical Look
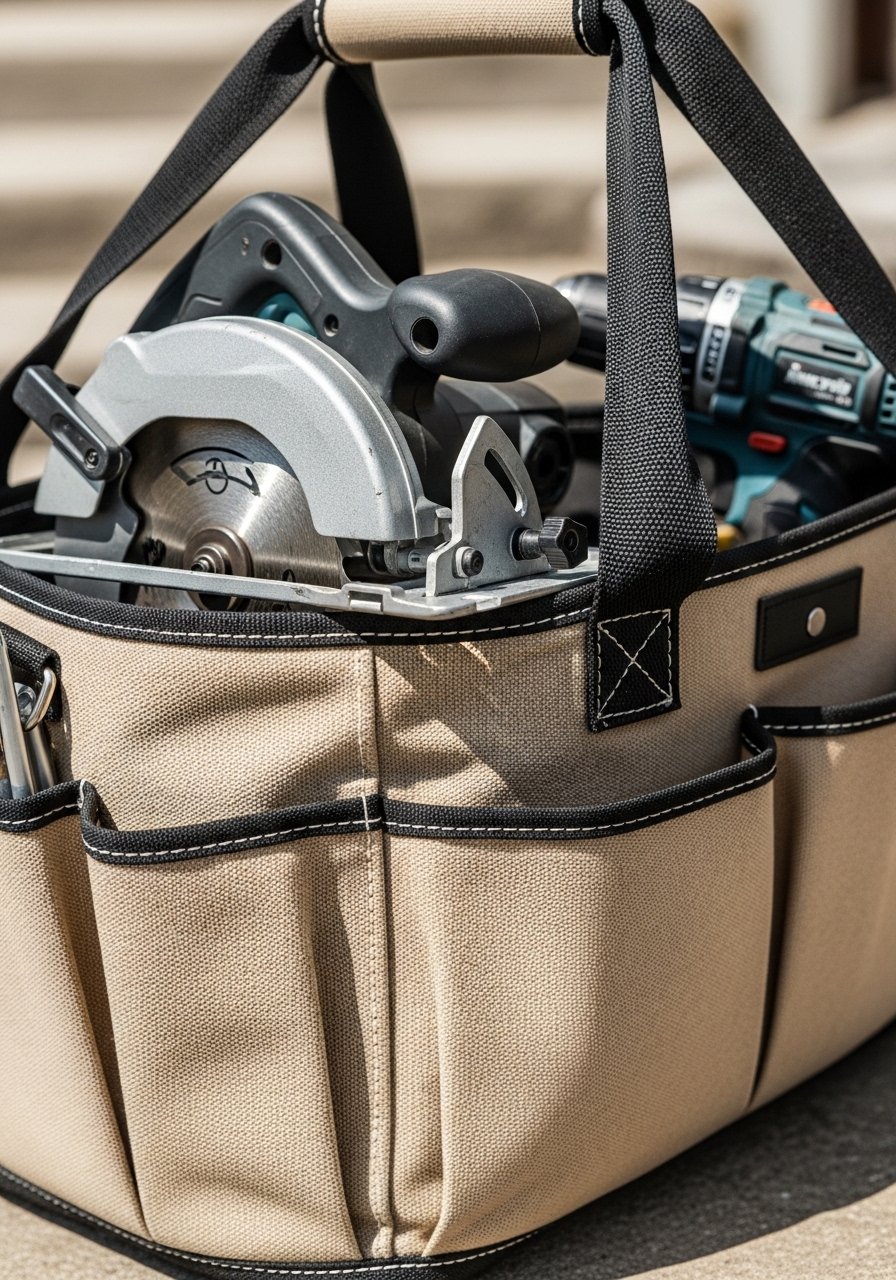
If you take tools out of the house you need a caddy. A canvas tote with reinforced pockets keeps everything together and makes loading the car fast. Mine cost about $45 and has a shoulder strap so it is easy to carry. I recommend a heavy-duty-tool-caddy. People put batteries loose in the bottom and they rattle. Keep battery pockets separate and padded. A specific detail often skipped is to keep a small zip pouch for fasteners inside the caddy so you never forget screws at the site.
Hidden Socket Organizer In A Drawer, Sleek Workbench Storage

I cut foam to fit sockets and arranged them by size in a drawer. It keeps everything from rattling and looks like a shop pro did it. Foam kits are around $20-40. I used eva-foam-tool-organizer to get a clean fit. People forget to leave room for future additions. Reserve a last column as a growth zone to avoid redoing the whole insert. It pairs well with the labeled bin shelf idea for larger hand tools.
Ceiling-Mounted Pulley System For Ladders, High-Ceiling Workshop Hack
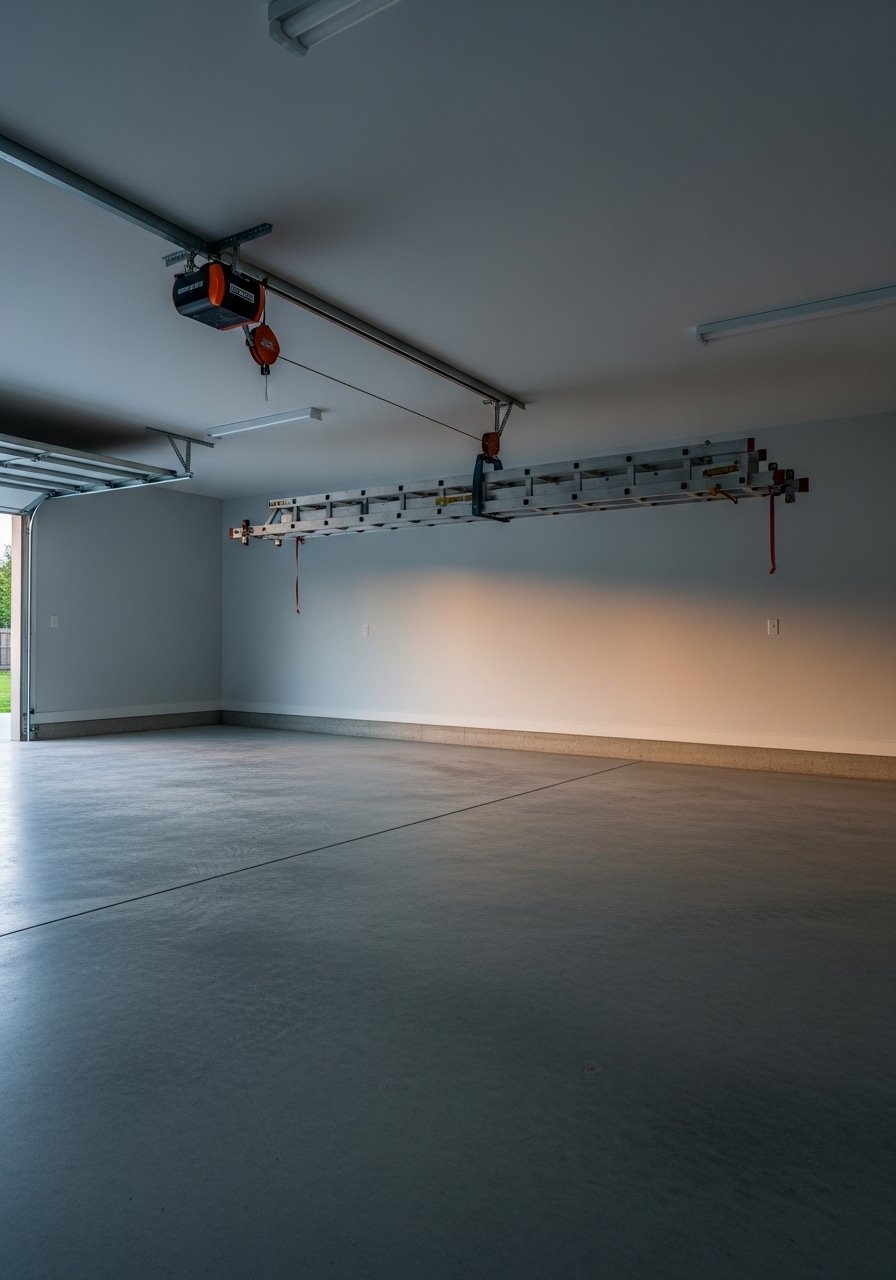
Small garages lose floor space to ladders. I rigged a simple pulley system up near the ceiling to lift and lock my ladder out of the way. It gives back a lot of floor real estate and costs around $40-70. Buy a ceiling-pulley-lift-kit rated for the ladder weight. Common mistakes are putting the anchors too close to the drywall. Attach to joists, and use spreader plates if needed. The detail many lists miss is adding a colored tag so you can lower the ladder precisely to the same height every time.
Wall Pocket Organizer For Power Tool Accessories, Clean Charging Nook
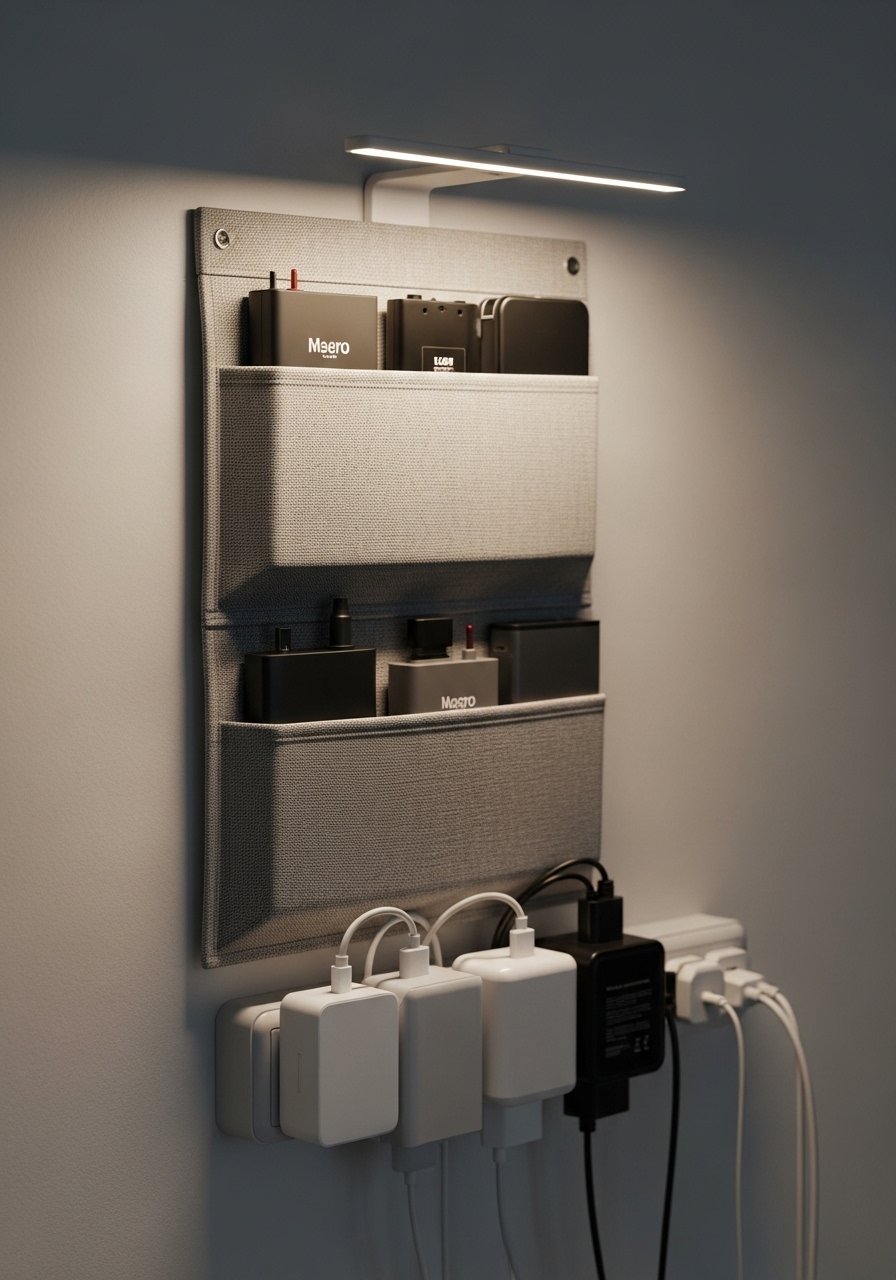
I sewed a canvas pocket organizer that hangs by the charging station. Batteries sit tip-down so contacts are visible and chargers tuck behind. It looks neat and prevents loose batteries on counters. Material cost around $20-30. Try a canvas-hanging-pocket-organizer. The mistake is making pockets too shallow. Make them one-third deeper than your tallest battery so they cannot fall out. Also, leave one empty pocket labeled "incoming" for items you need to clean or repair before they go back in.
Slim Rolling Ladder For High Shelves, Modern Utility Closet

High shelves are useless if you cannot reach them. A slim rolling ladder fits in a narrow closet and lets you use vertical space safely. Prices start around $90 for a basic one. I use a slim-rolling-ladder and store it behind the workshop door. People mistake aesthetics for usability by choosing a ladder without non-slip feet. The ladder should have rubber grips matched to your floor. A detail often skipped is to store the ladder in the same zone as the items it accesses so you avoid cross-room trips.
Pegboard Tool Outlines For Visual Memory, Practical Craft Room Wall
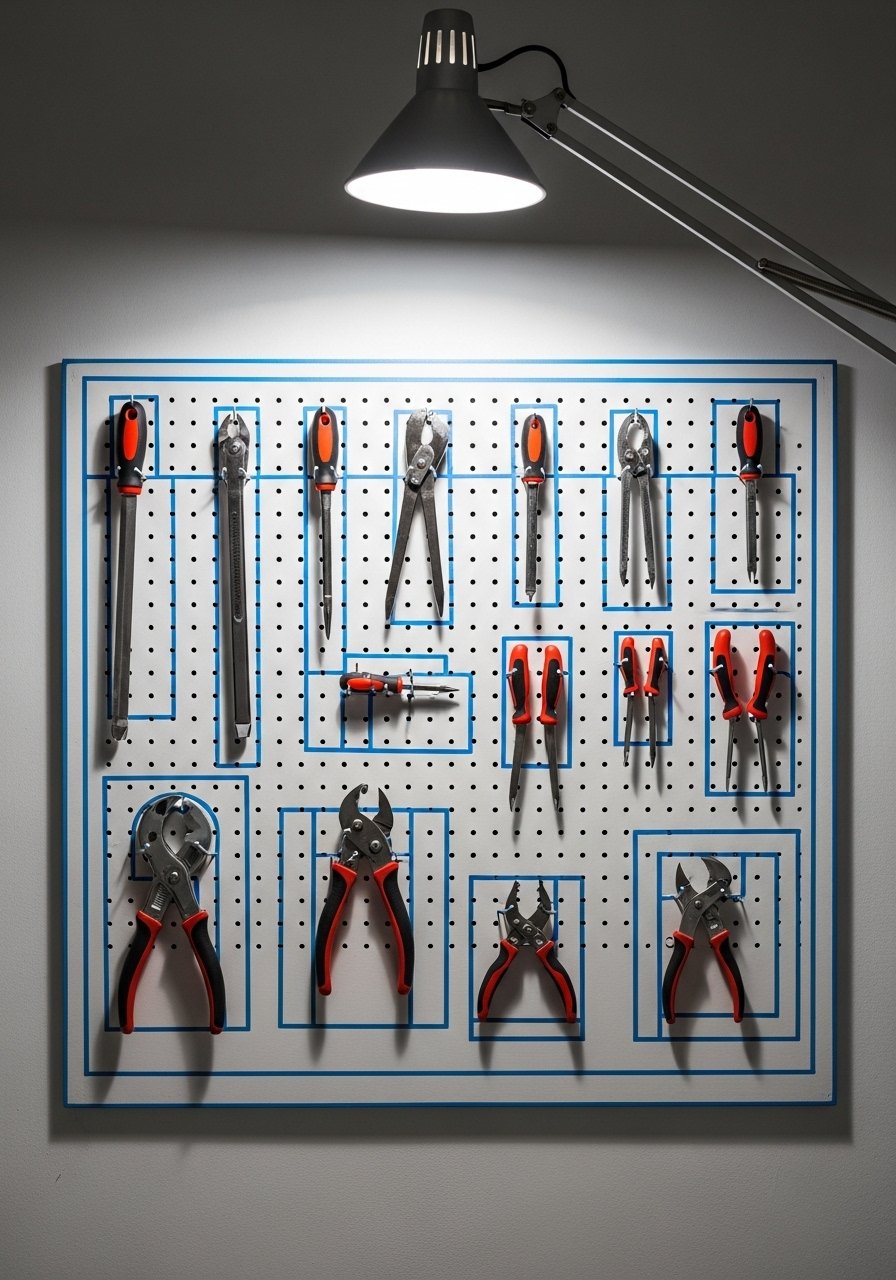
I painted simple outlines around each tool on my pegboard. It sounds silly but it trains your eye and family members to return items to the right spot. It costs almost nothing and the visual result is surprisingly satisfying. Use a pegboard-outline-stencil-set for neat lines. The common mistake is drawing outlines too close together. Give 1 inch of breathing room so tools do not overlap. This follows the rule of three visually when you group related tools in threes for balance.
Charging Drawer With Cord Management, Quiet Workshop Upgrade

Electronics and tool chargers create cord chaos. I made a charging drawer with grommets and a small power strip inside so devices charge out of sight. It keeps the bench tidy and the cat off the cables. Expect $20-40 for a strip and grommets. I recommend retractable-grommet-power-strip. The mistake is blocking drawer vents. Leave a 1-inch gap at the back for airflow. A detail most articles skip is color-coding cords with small heat-shrink markers so you know which charger belongs to which battery quickly.
Your Decor Shopping List
Textiles
- Canvas hanging pocket organizer in charcoal. Use for batteries and chargers, about $25. Similar at HomeGoods.
- Chunky-knit throw in cream (~$35-55). Drape over a bench seat if your workspace doubles as a mudroom.
Wall Decor & Organization
- Metal pegboard hook set (~$18-30). Hooks that hold up to 20 pounds each.
- Rotating lazy Susan platform 12-inch. Perfect for jars of screws.
Shelving & Storage
- Black iron pipe kit for DIY shelves. Buy matching wood planks 2×10. $60-120 total.
- Clear storage bins set 12×6 inches. Use for sorted fasteners.
Tools & Accessories
- Heavy-duty magnetic tool strip 18-inch. Good for screwdrivers.
- Heavy-duty tool caddy canvas with reinforced pockets. About $45.
Hardware & Installation
- Ceiling pulley lift kit rated for 100 pounds. For ladder storage.
- Wall mount charging station with integrated outlets. Look for surge protection.
Shopping Tips
White oak beats dark wood in 2026. Design feeds have shifted completely. These white oak floating shelves look current, not dated. (Format A)
Grab velvet pillow covers for $12 each. Swap them every season and the whole room feels different. (Format B)
Curtains should puddle or kiss the floor, never hang halfway up. These 96-inch linen panels are right for standard 9-foot ceilings. (Format C)
Everyone buys five small succulents. One single 6-foot fiddle leaf fig has ten times the visual impact. Use a tall plant where you need height without maintenance. (Format D)
If you are buying a pegboard, get the metal kind for heavy tools. Perforated metal pegboard costs slightly more but lasts longer.
When choosing bins, pick clear 12×6 sizes so they stack neatly. Clear-storage-bins-set fits most shelves and keeps items visible.
Frequently Asked Questions
Q: Can I mix rustic wood shelves with modern metal pegboard without it looking messy?
A: Yes. Keep your color ratio roughly 80/20, meaning 80 percent neutral wood and one or two metal accents. Use matching hooks and one wood tone across shelves to tie both materials together.
Q: How do I stop small parts from disappearing in my drawers?
A: Use clear jars or foam inserts. I use a rotating lazy Susan with labeled jars for parts I reach for most. It keeps everything visible and cuts the time spent digging.
Q: What is the easiest renter-friendly tool storage trick?
A: Over-the-door organizers and magnetic strips. They do not require drilling into studs and cost under $30. Just make sure pockets are not overloaded so they do not sag.
Q: How high should I mount pegboard in a garage?
A: Mount the board so the most-used tools sit at eye to chest height, about 48-60 inches from the floor. Reserve top rows for seasonal items and bottom for heavier things. That layout reduces bending and speeds up work.
Q: Do I need real plants in a workshop or are faux acceptable?
A: Both work. Real snake plants handle neglect well. For height without maintenance use a faux fiddle leaf fig so you get scale without watering. Placement matters more than whether it is real.
Q: Will magnetic strips scratch my tool finishes?
A: They can if your tools slide. Layer a thin strip of felt under heavy items or mount the magnet a couple of millimeters away with shallow standoffs. That protects finishes and keeps tools secure.
Q: What size drawer do I need for a charging station?
A: A shallow drawer 3.5-4 inches deep is usually enough for batteries and chargers. Leave a 1-inch gap at the back for airflow and route cords through a grommet so everything stays tidy.

