

I used to hate how my kitchen felt like two rooms at once, useful and ugly. I shoved all the prettiest things on one shelf and left counters cluttered. After three attempts I realized the problem was not the objects. It was where I put them and how much empty space I allowed.
What I kept messing up was mixing function and display without rules. Pots, a hand towel, and a decorative bowl looked busy because I had no anchor or rhythm. Once I treated the kitchen like a living workspace and planned one small zone at a time, it stopped feeling frantic and started to feel like home.
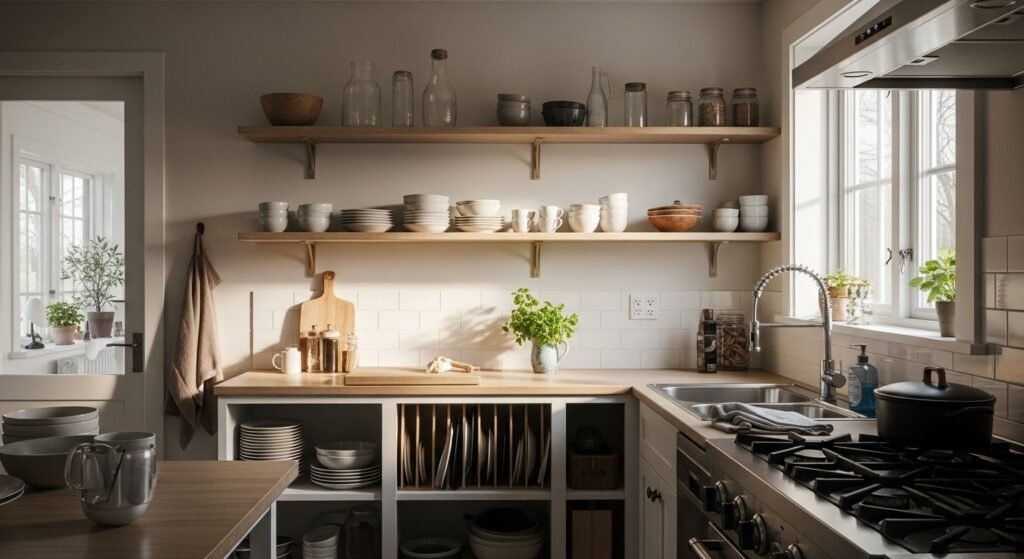
Step 1: Clear a Real Prep Zone and Leave 2/3 of It Open
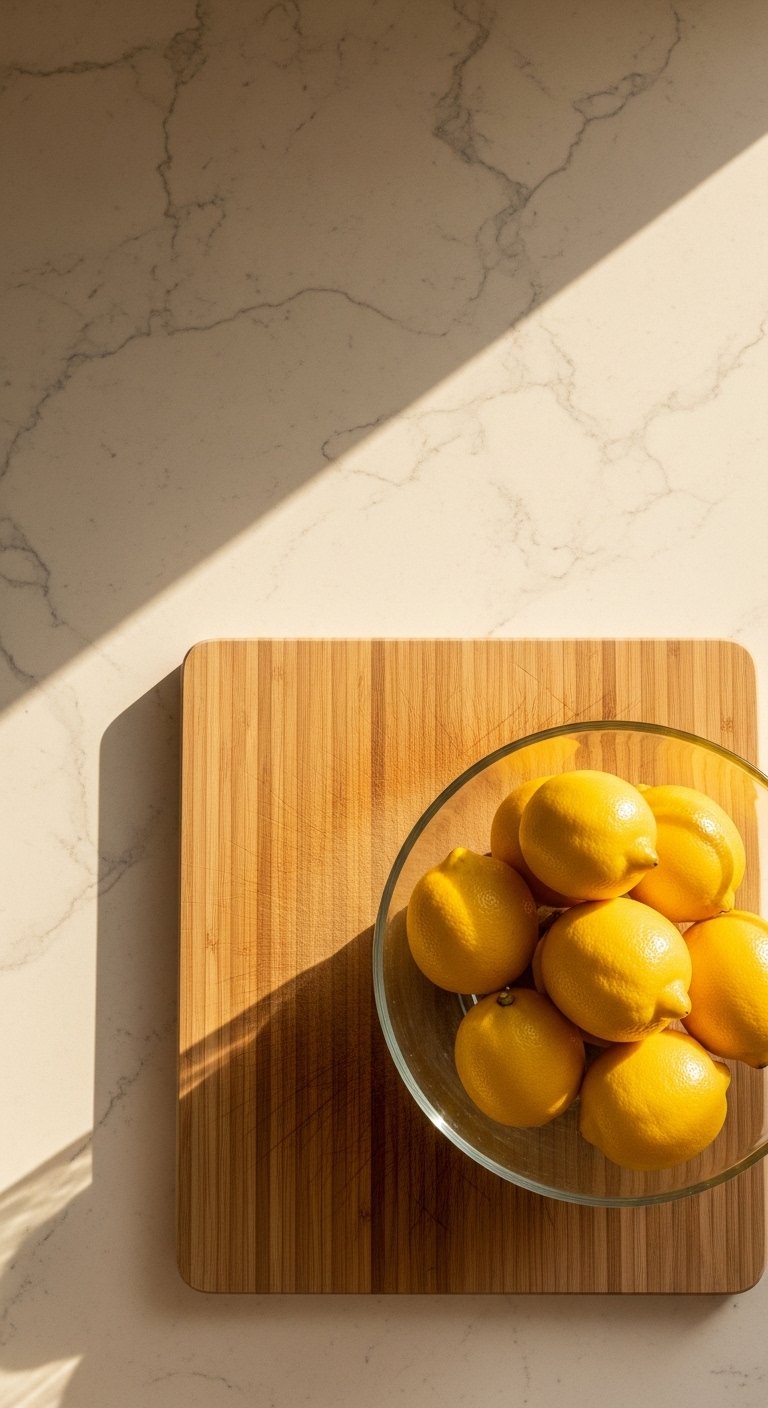
Pull everything off one stretch of counter. Yes, everything. I learned the hard way that having 60 to 66 percent of a chosen prep zone empty makes the whole kitchen breathe. Place a cutting board, a small jar for utensils, and one low tray for daily items on the remaining third. The visual payoff is immediate. Your eye can focus on a few useful things instead of a surface of random clutter.
Common mistake, and I did this too: trying to show off every ceramic piece at once. Put most decorative items elsewhere, and keep this area practical. The items here should be cool to the touch or easy to move while you cook, like a matte ceramic utensil jar that feels pleasantly heavy in your hands.
Step 2: Anchor with One Tall Object, Then Build in Odd Groups
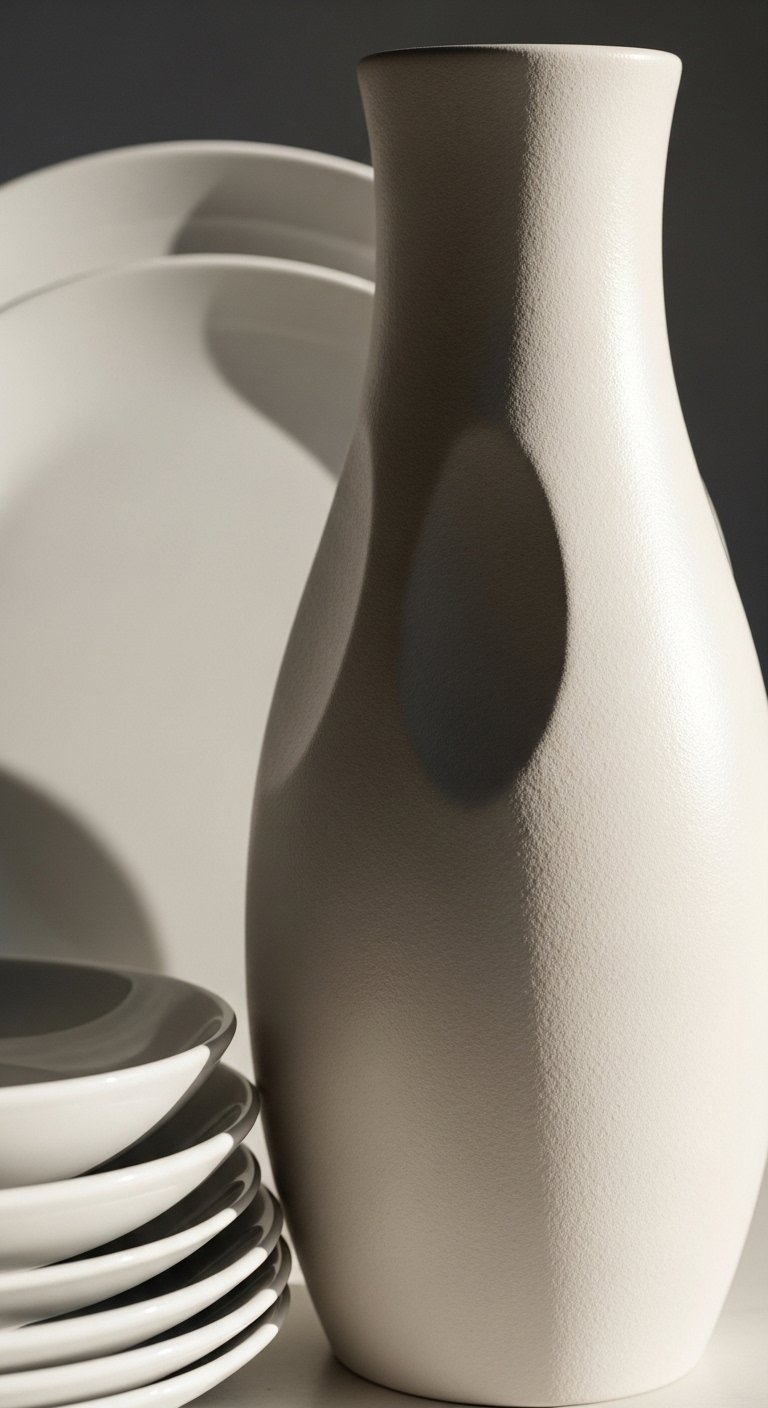
Start with one tall thing, like a 12-14 inch ceramic vase or a bottle of olive oil that has presence. I often picked something too short and the arrangement looked flat. Once the tall piece is set, add two or three shorter items grouped in odd numbers. A tall item at roughly twice the height of the next tallest piece gives a simple 2:1 ratio that reads balanced without fuss.
A mistake I kept making was lining things up perfectly even. Asymmetry feels more intentional in kitchens. The tactile contrast matters too. A linen kitchen towel feels soft and lived-in next to a cool, smooth ceramic bowl. That mix of textures is what tells your eye the space is both useful and cared for.
Step 3: Use Open Storage for Everyday Items, Closed Storage for the Rest

Open shelves are great but only for things you touch often. I learned this after one shelf became a dust magnet. Keep mugs, plates, and a stack of frequently used bowls on low, reachable shelves. Put less-used gadgets behind doors. A practical rule I now use is to dedicate the lower third of open shelving to heavy items and leave 12 to 15 inches between shelf heights to comfortably stack plates and bowls.
People over-accessorize shelves to prove they styled them. Resist that urge. Leave negative space. Your kitchen will feel calmer and more functional when every visible object earns its spot. If you have kids or pets, skip low open shelves with fragile things. My roommate knocked over a vase twice before I moved it up.
Step 4: Anchor the Sink and Stove with Small Zones of Intentional Stuff

Treat the sink and stove like little stages. They are workhorses so styling must be tough and tactile. Place one tray near the sink that holds dish soap, a scrub brush, and a folded linen towel. Choose materials that handle moisture, like glazed ceramic and linen that dries quickly. Near the stove, keep a wooden spoon jar, a salt cellar, and a small oil bottle. The aim is to have tools handy and attractive.
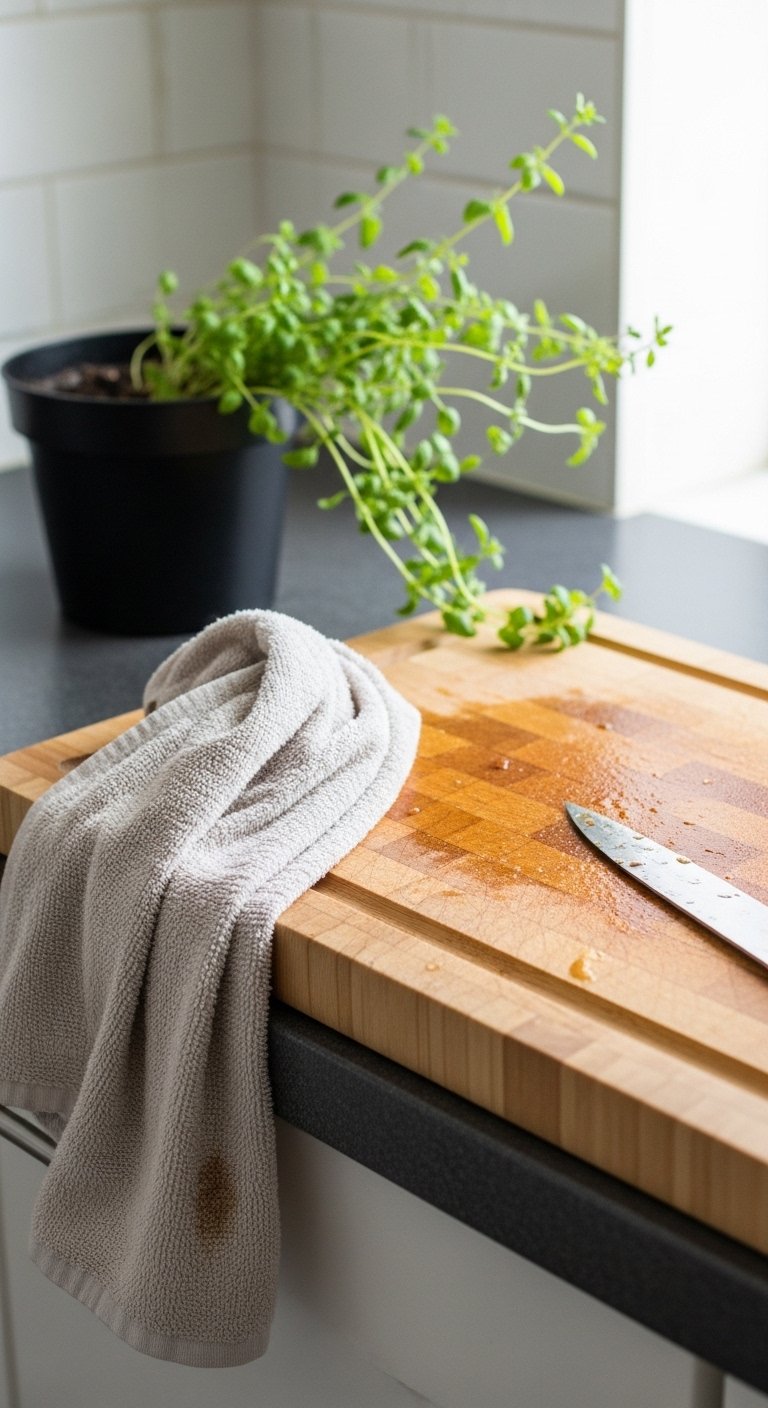
I nearly skipped the tray step once and the sink looked messy for weeks. That tray collects drips, looks intentional, and is easy to wipe. Texturally, wood warms the metal of burners. A small clay pot of thyme smells good and feels alive while staying useful.
Step 5: Add One Living Touch and Rotate It Monthly

Finish with a living element, like a potted herb, a bunch of cut flowers, or a bowl of fruit. I swap mine every month so the kitchen never feels frozen in one photo. A living touch softens the hard edges and adds a smell you can notice when cooking. Keep the pot small, around 4 to 6 inches, so it does not take over the counter.
I tried a large fiddle leaf here once. It was dramatic but got in the way of reaching the toaster. Smaller is smarter. Live plants like thyme or basil are cool to touch, fragrant, and genuinely useful when you are cooking.
Your Kitchen Styling Checklist
- Matte ceramic utensil jar, 6×6 inches, white ($18-30). Use in Step 1 for tools you grab while cooking.
- Linen kitchen towels, set of 3, natural ($20-35). Soft and quick-drying, referenced in Steps 3 and 4.
- Glazed ceramic tray, 12×6 inches, speckled beige ($25-40). Keeps sink area tidy in Step 4.
- Ceramic vase, 12 inches, matte white ($20-35). Anchors groups in Step 2.
- Stackable dinnerware set, stoneware, set of 4 ($50-80). Works on open shelves as in Step 3.
- Small herb planter, 4-inch terracotta ($8-15). For the living touch in Step 5.
- Bamboo cutting board, 18×12 inches ($25-45). Keeps prep zone practical from Step 1.
- Heavy linen apron, adjustable, charcoal ($30-50). Helps you use the space without worrying about splatters, mentioned across steps.
Why Your Counters Still Feel Messy After Styling

If counters still feel messy, you probably mixed function and display without clear boundaries. People put decorative jars next to the toaster, then wonder why it feels cluttered. Set one zone for cooking tools and one for display, then leave at least 2/3 of the prep zone clear. Most kitchens feel calmer when you stop trying to show everything at once.
Another frequent hiccup is scale. Small items on a wide counter look lost. Use one taller piece or a stack of two objects to create a focal point. Finally, check your materials. Porous items and textiles that trap crumbs can make a styled area feel worn quickly. Choose washable linens and glazed ceramics where spills happen.
Making This Work in a Small Kitchen

Use vertical space. A magnetic strip for knives, a rail for frequently used utensils, and a single open shelf at eye level keep things accessible without taking up counters. In tiny spaces, commit to one visible craft piece and keep the rest simple. I used to overcrowd my only shelf, and the kitchen felt claustrophobic. Now that shelf holds plates and one decorative jar, the rest lives behind doors.
Short checklist for small kitchens
- Choose stackable dishware to save space.
- Keep open shelf items light in color to keep the area feeling open.
- Leave the main prep zone 50 to 66 percent clear, even if it is small.
What This Looks Like After a Week with Real Life
After a week, expect small messes. The goal is not perfection. You want to see signs of life: a water ring on a tray, a used towel folded back on the jar, a smudge that wipes away. My kitchen looks better after a week because everything has a place and is easy to return. If you find things drifting, reset for five minutes each night. It keeps the system honest.
One surprise I had was how much rituals matter. Putting knives back, wiping the tray, and rotating the herb are tiny moves that keep the space feeling intentional with almost no effort.
Start With One Prep Zone
Pick the smallest stretch of counter that feels most useful. Clear it, add the utensil jar, a cutting board about 18 by 12 inches, and a small tray for the sink. Leave two thirds of that area empty. Work there for a week, notice what you use, and then add one anchor object and one living touch.
You will learn more by using the space than by planning endlessly. If you want a single swap that changed my kitchen, try the glazed ceramic tray from the checklist. It caught the mess I could not stop ignoring, and suddenly the whole space felt calmer.

