

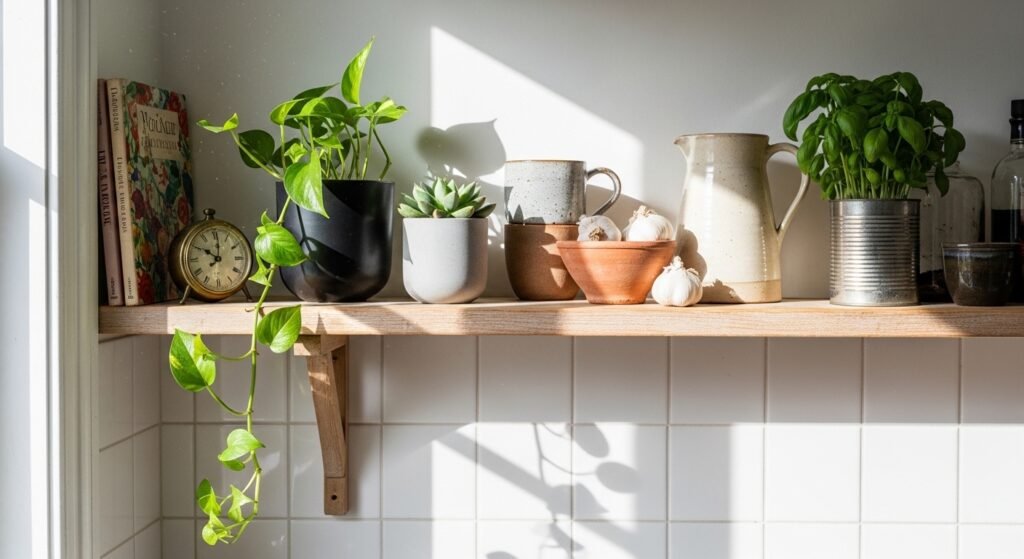
My kitchen open shelf felt like a set of orphaned objects for months. Every thing I added looked like a ransom note. I kept moving pieces and never found a rhythm. It was small, everyday frustration that made the whole room feel unfinished.
I use one simple process to fix that awkwardness. It brings balance, texture, and a calm rhythm. I've noticed organic modern touches and warm neutrals make the look feel current and lived-in.
What You'll Need
- Matte white ceramic vases, set of 3 ($25 to $40). Great for odd-number groupings
- Large walnut cutting board, 18×12 ($35 to $70). I lean it against the wall as a backdrop
- Rattan storage basket, medium ($20 to $45). Hides tea bags and chargers
- Live small potted herb, 4-inch pot ($8 to $20). Real green, tiny footprint
- Worth every penny: Adjustable cookbook stand, collapsible ($18 to $35). Keeps one cookbook open and honest
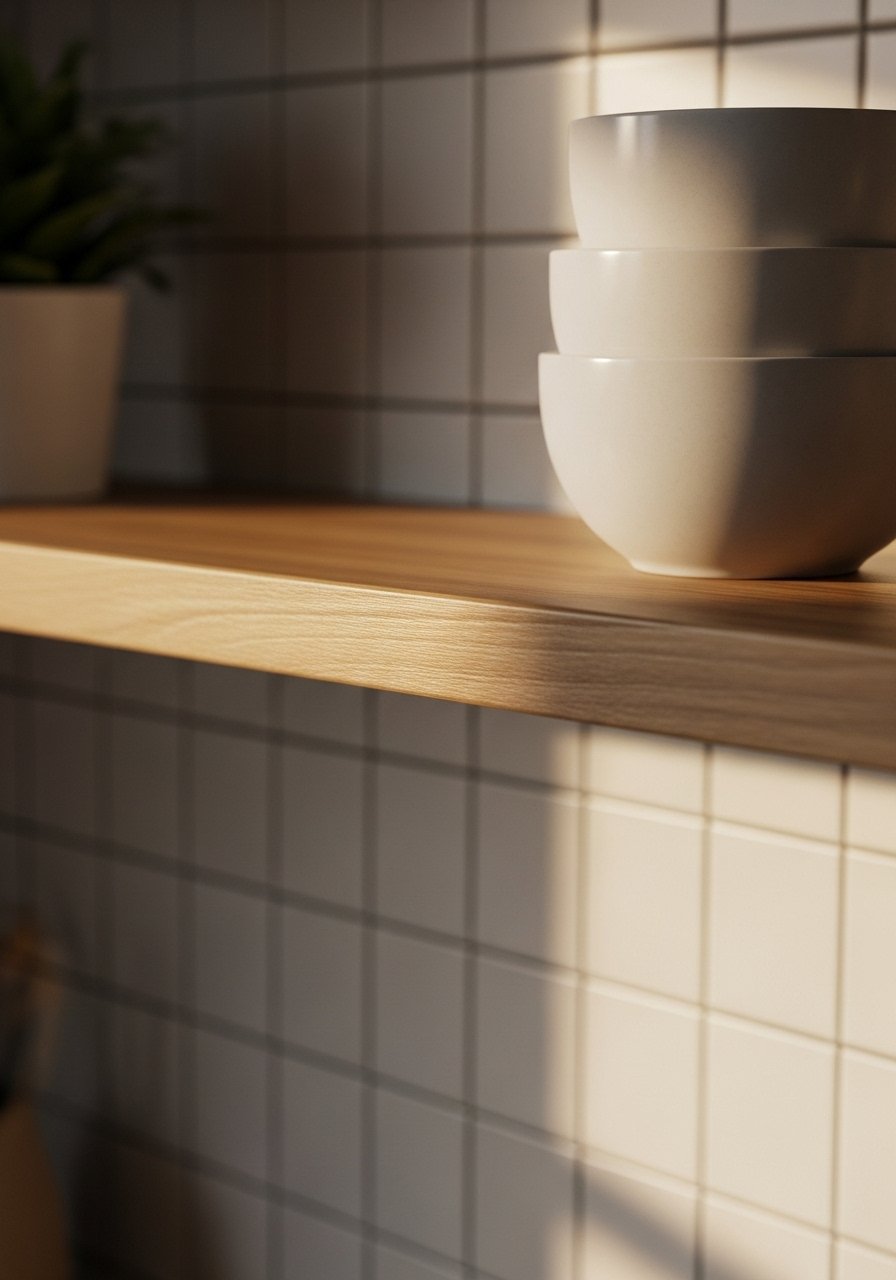
- Stackable ceramic mugs, set of 4 ($25 to $50). I stack by color
- Brass salt cellar with spoon ($12 to $28). Small metallic anchor
- Vintage glass bottle, amber, single ($10 to $30). Adds reflected light
Step 1: Clear the Shelf and Set the Scale
Pull everything off. Yes, everything. Seeing the bare shelf is how you learn its proportions. Measure the length. I aim to fill no more than two thirds of a single shelf with grouped items, so things breathe. That measurement keeps the arrangement from looking crowded.
Most people guess scale and then overfill. The visual change is immediate. Blank space becomes your tool. Mistake to avoid, filling the whole shelf edge to edge. Leave intentional gaps.
Step 2: Build a Backdrop, Then Layer Forward
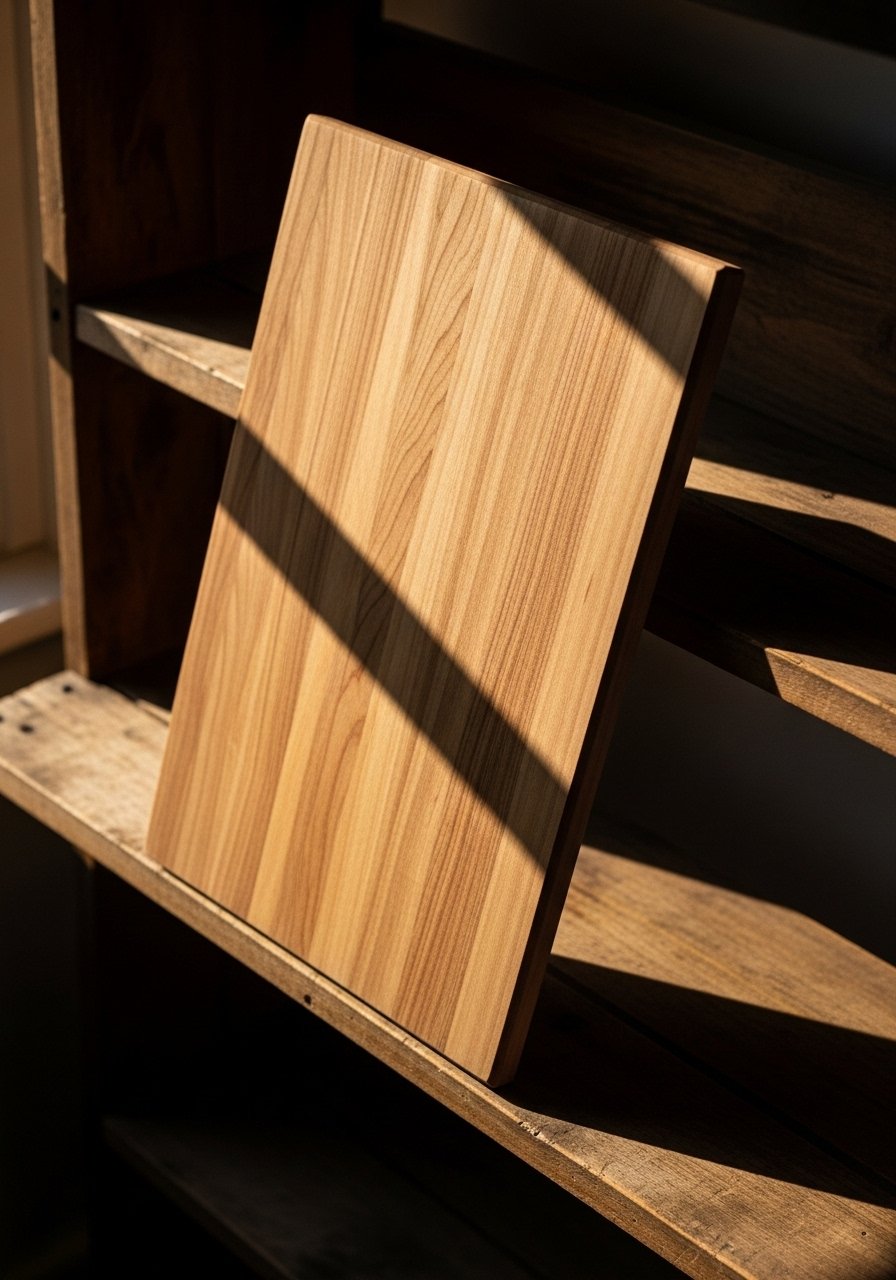
Start with a tall backdrop like a walnut cutting board or a cookbook stand. I lean one board vertically on the left or center. It gives height and a warm plane to tuck other items against. When done right, the shelf reads as a composed picture rather than a line of objects.
An insight people miss is starting with the smallest objects first. That makes the display look top-heavy. The mistake to avoid is placing everything at the same height. Layering creates depth. Use the cutting board to anchor one side and leave the opposite side lighter.
Step 3: Group in Odds and Mind the Proportions
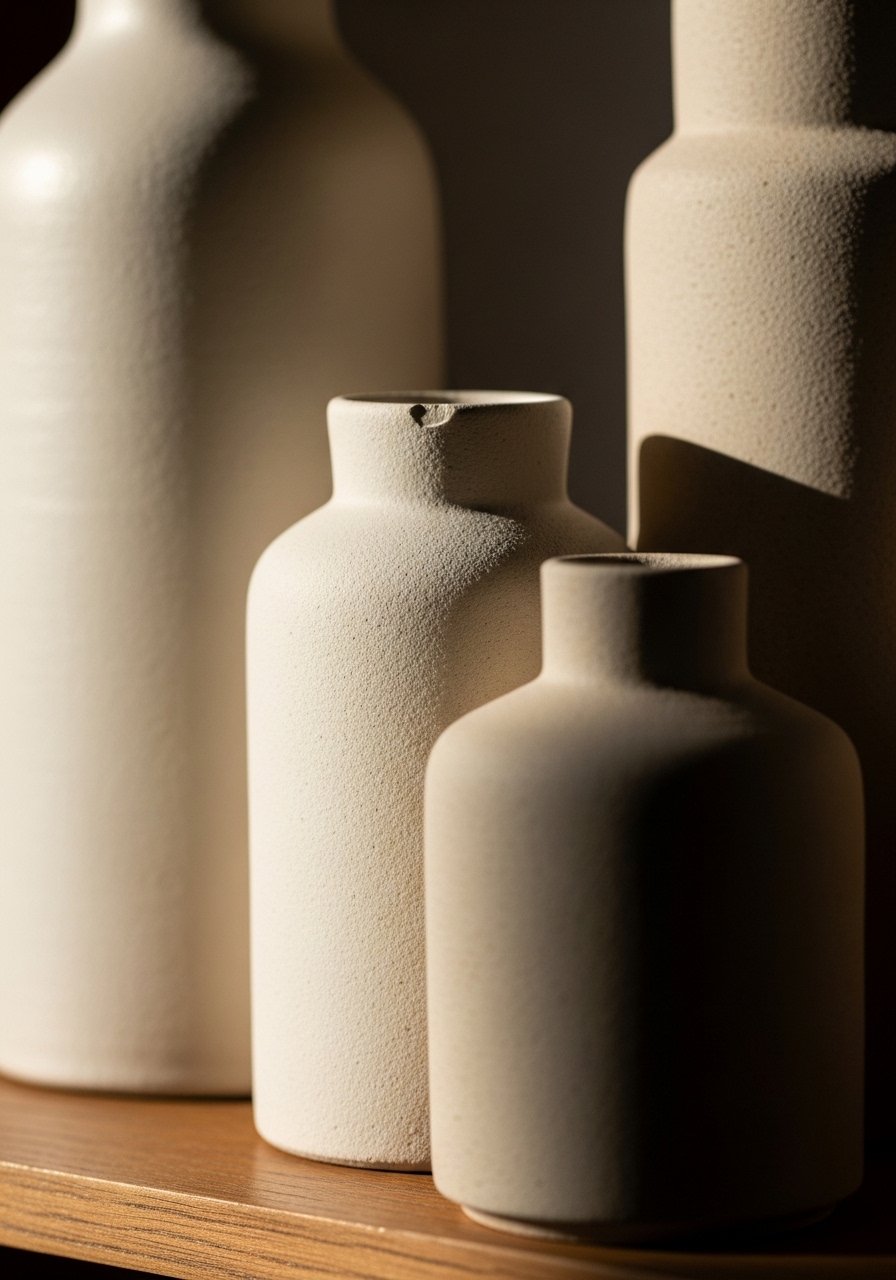
This is where the shelf starts to look styled, not cluttered. Group items in odd numbers, usually three. I place the set of matte vases together. Keep the group width to about one third to one half of the shelf length. That proportion prevents a blocky look.
People often spread the group too wide or stack identical pieces. The key insight, vary heights within the group by 2 to 4 inches. Mistake to avoid, aligning everything to the edge. Pull groups a few inches from the front and back for depth.
Step 4: Add Life with Green and a Practical Object
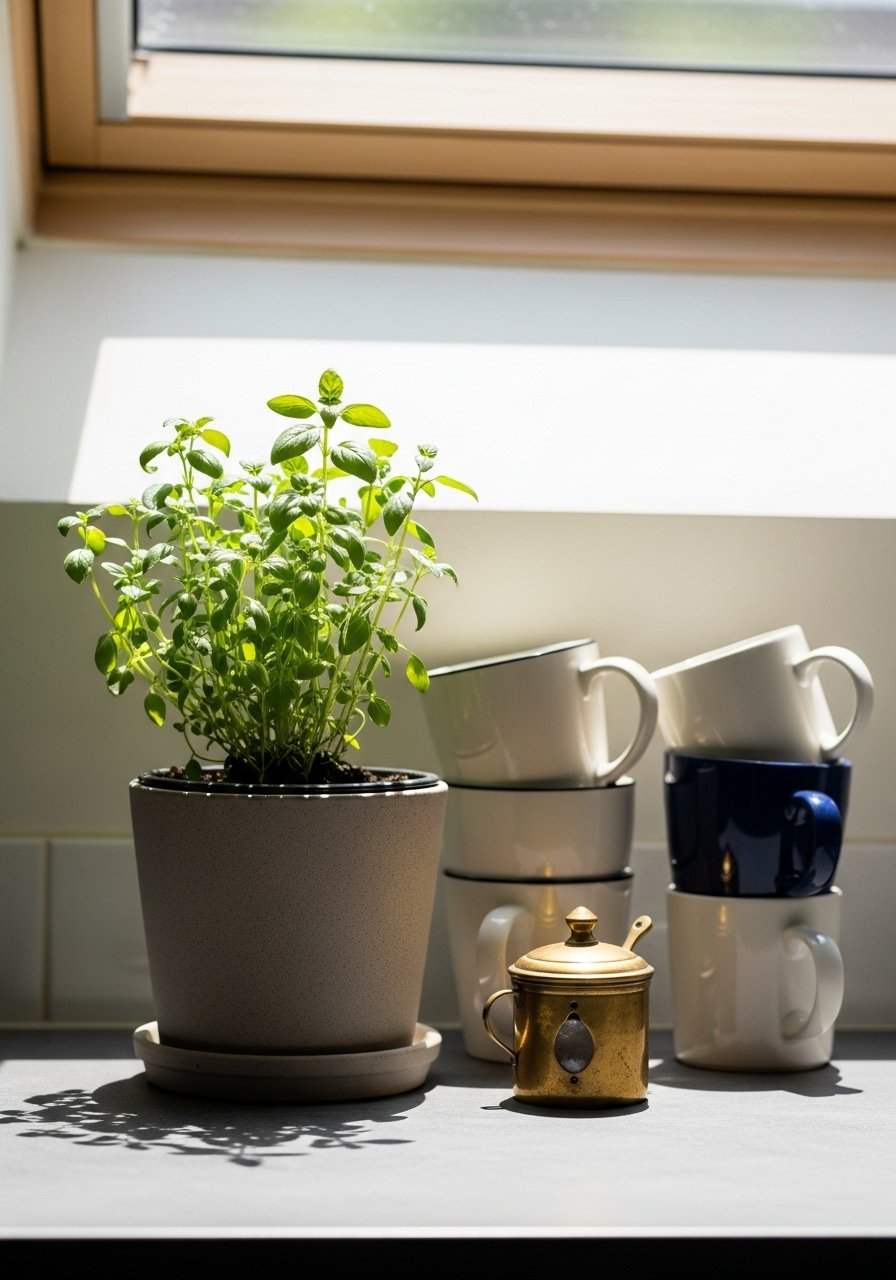
I like a live herb pot to add color and scent. Choose a 4-inch pot so it never overwhelms. Pair it with a useful object, like stacked mugs or a brass salt cellar. That mix keeps the shelf looking lived-in and purposeful.
Many people add plants that are too tall or too many. Insight, one small plant balances a heavier wooden or ceramic group. Mistake to avoid, placing a plant where it blocks the view of lower items. Keep it slightly forward so it feels natural, not like an afterthought.
Step 5: Finish with Texture and a Small Accent
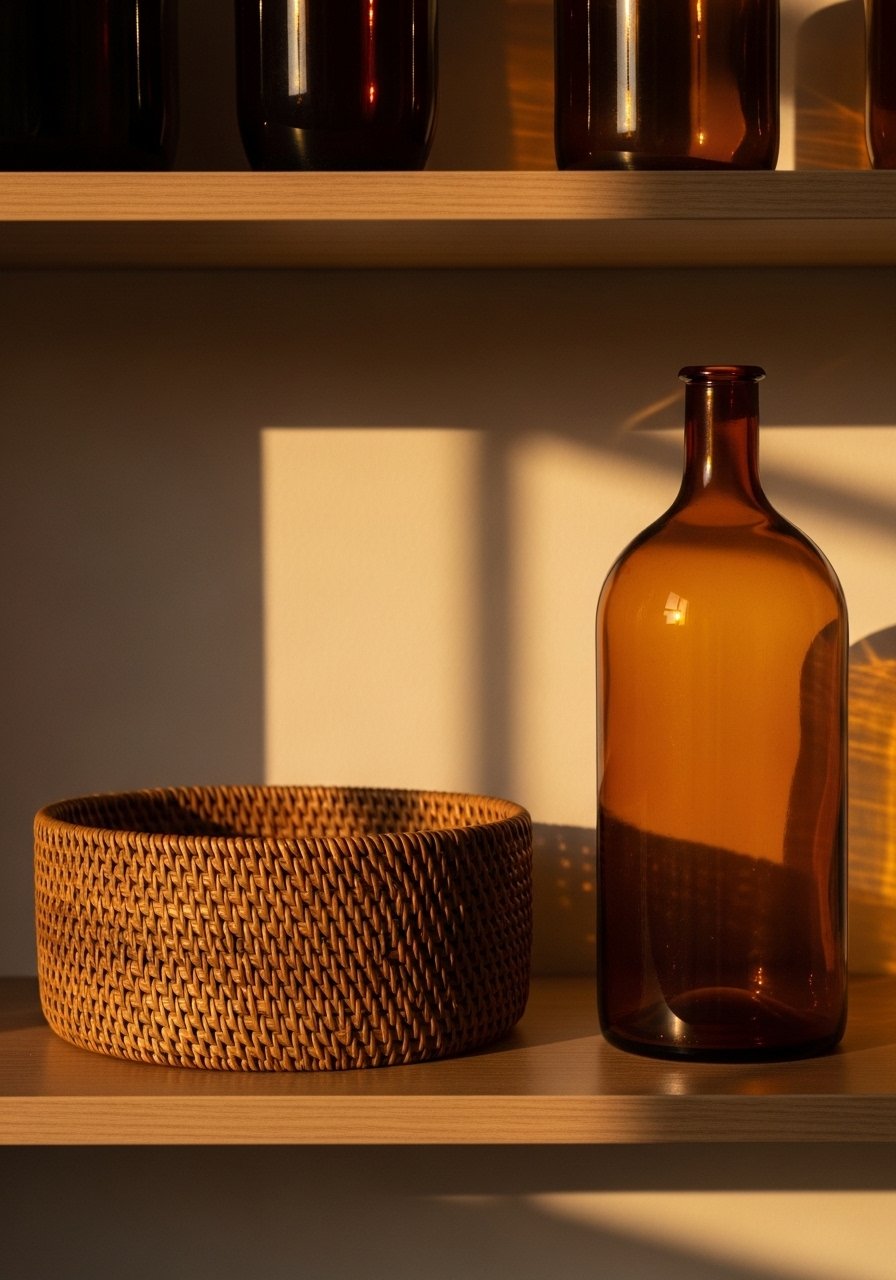
Finish by adding texture. I tuck a medium rattan basket below or to the side to ground the shelf. A vintage amber bottle reflects light and gives a little visual sparkle. Small metallics like a brass salt cellar act as anchors.
People often stop before adding a tactile element. The insight, texture makes the display feel collected. Mistake to avoid, overusing pattern. Keep texture simple, one woven piece, one metallic, one glass. That balance reads calm and intentional.
Why Your Shelves Still Look Cluttered After Styling
I've seen this happen in kitchens that get styled too fast. You need contrast, scale, and a bit of emptiness. Start with three kinds of material, like wood, ceramic, and natural fiber. Keep one dominant color and one accent color. Avoid repeating small decorative items across multiple shelves. That creates visual noise. I also rotate items seasonally so shelves feel fresh and manageable.
Making This Work in a Small Kitchen
Small shelves need tighter rules. Try these quick adjustments.
- Limit groups to one per shelf. Bigger impact with fewer items.
- Keep group width to under half the shelf length. Prevents crowding.
- Use slim backdrops, like a 12×8 cutting board, instead of large art.
- Choose stackable mugs to reduce footprint and add vertical rhythm
I keep seeing small kitchens lean into warm neutrals and live plants. It makes a tight space feel calm.
Mixing Old and New Without It Looking Forced
I mix thrifted pieces with new basics. A slightly worn amber bottle sits beside a fresh matte vase. That contrast signals a collected look. When I add a newer piece, I match one material or color to an older item. For example, a brass salt cellar ties to an old brass spoon. The result feels curated, not staged. If a shelf still looks like a store display, pull one item and replace it with something personal, like a cookbook you actually use.
The First Shelf Is the Hardest
Start with one shelf only. Spend 30 to 60 minutes on it. Keep a small toolkit, like a cutting board and one textured basket, for quick edits.
Once that shelf looks balanced, the rest follows more easily. Trust the scale and keep one small plant nearby. The first success gives you the confidence to repeat the look across your kitchen shelves.

