

I hated the blank wall above my counter. Floating shelves always looked either cluttered or cold — too sparse or chaotic.
I wanted shelves that felt warm and useful. I learned to balance function and empty space so the shelves read as calm, lived-in, and intentional rather than an afterthought. I'll show what worked for me.
How to Decorate a Kitchen With Floating Shelves
This is the method I use when a kitchen still feels unfinished. I’ll show how to pick the right shelf, choose anchor pieces, and arrange items so the shelves read organic modern — simple, warm, and useful — without trying too hard.
What You'll Need
- Reclaimed wood floating shelf, 36-inch, walnut (~$35–80)
- White ceramic canister set, 3-piece (~$25–50)
- Neutral stoneware mug set, 4-piece, matte glaze (~$20–40)
- Woven seagrass basket, medium (~$18–35)
- Faux potted plant, small, ceramic pot (~$12–25)
- Acacia narrow cutting board, 12×6 (~$15–30)
- Soft linen tea towel, set of 2, natural (~$12–28)
- Small framed kitchen print, 8×10, black frame (~$10–25)
- Under-cabinet LED light strip, warm white, USB (~$12–30)
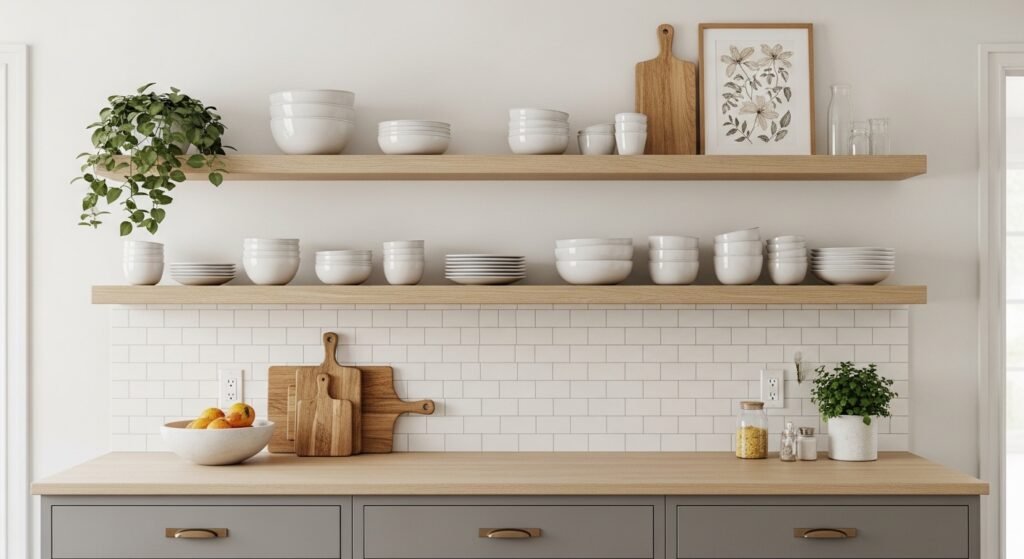
Step 1: Pick the right wall and shelf length
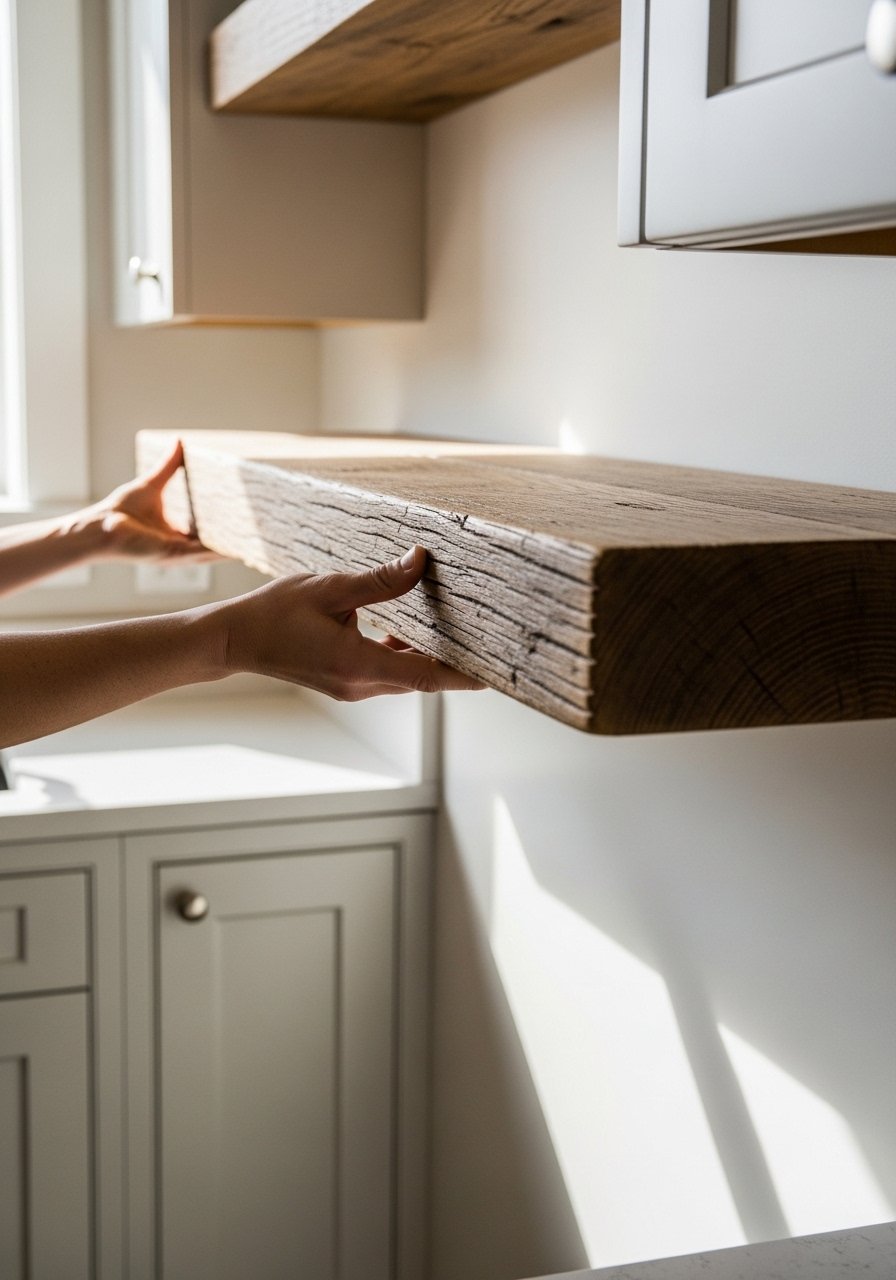
I start by standing back and deciding how the shelf will connect to existing lines. I usually choose a shelf that reads like it belongs — about two-thirds the length of nearby upper cabinets or centered over the clear counter space. That proportion keeps the shelf from feeling like a lone object.
One insight I learned is to consider sightlines from the doorway. A shelf that lines up with cabinet edges or the range hood feels intentional. A common mistake is adding too many short shelves; they can make a wall feel busy and off-balance.
Step 2: Place two anchor pieces first
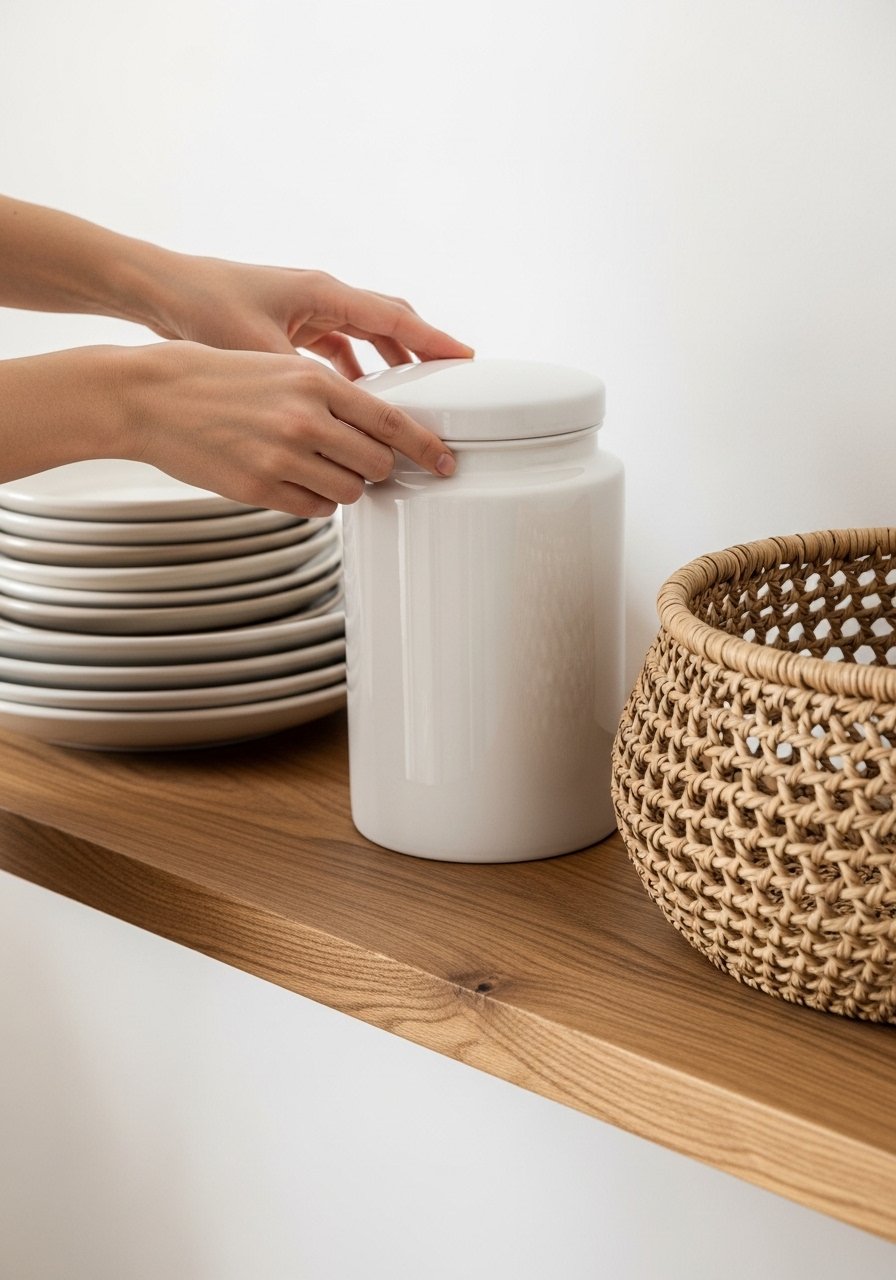
I always start styling with two larger, slower pieces — a canister set and a woven basket or a stack of plates. They read as anchors and give the eye somewhere to rest. I place one anchor toward the left and the other slightly off-center to avoid perfect symmetry.
An insight people miss is letting one anchor be functional (canisters or a basket for napkins). That keeps the shelf useful. A small mistake is crowding anchors flush against the wall; giving them a small gap makes the composition feel airy and calm.
Step 3: Layer in everyday items for warmth
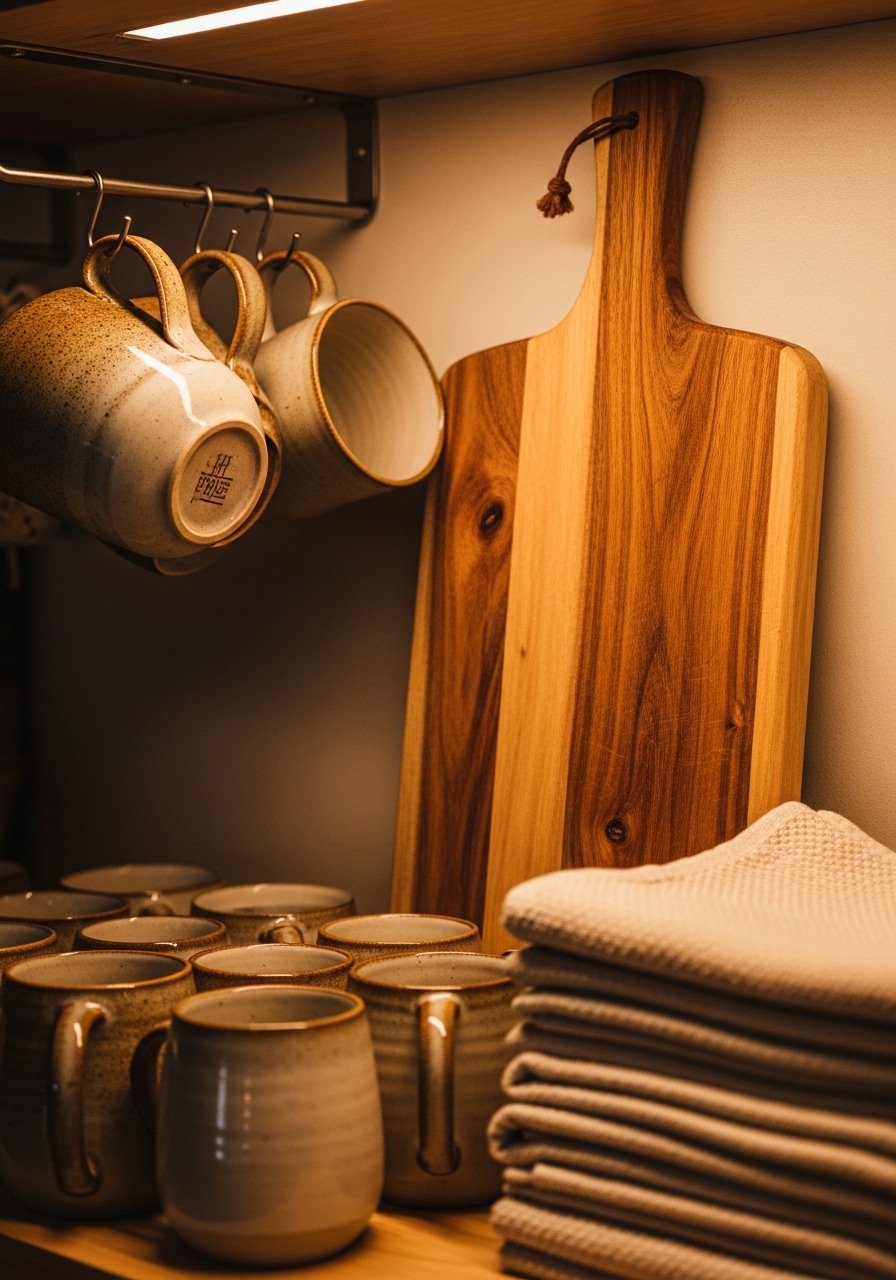
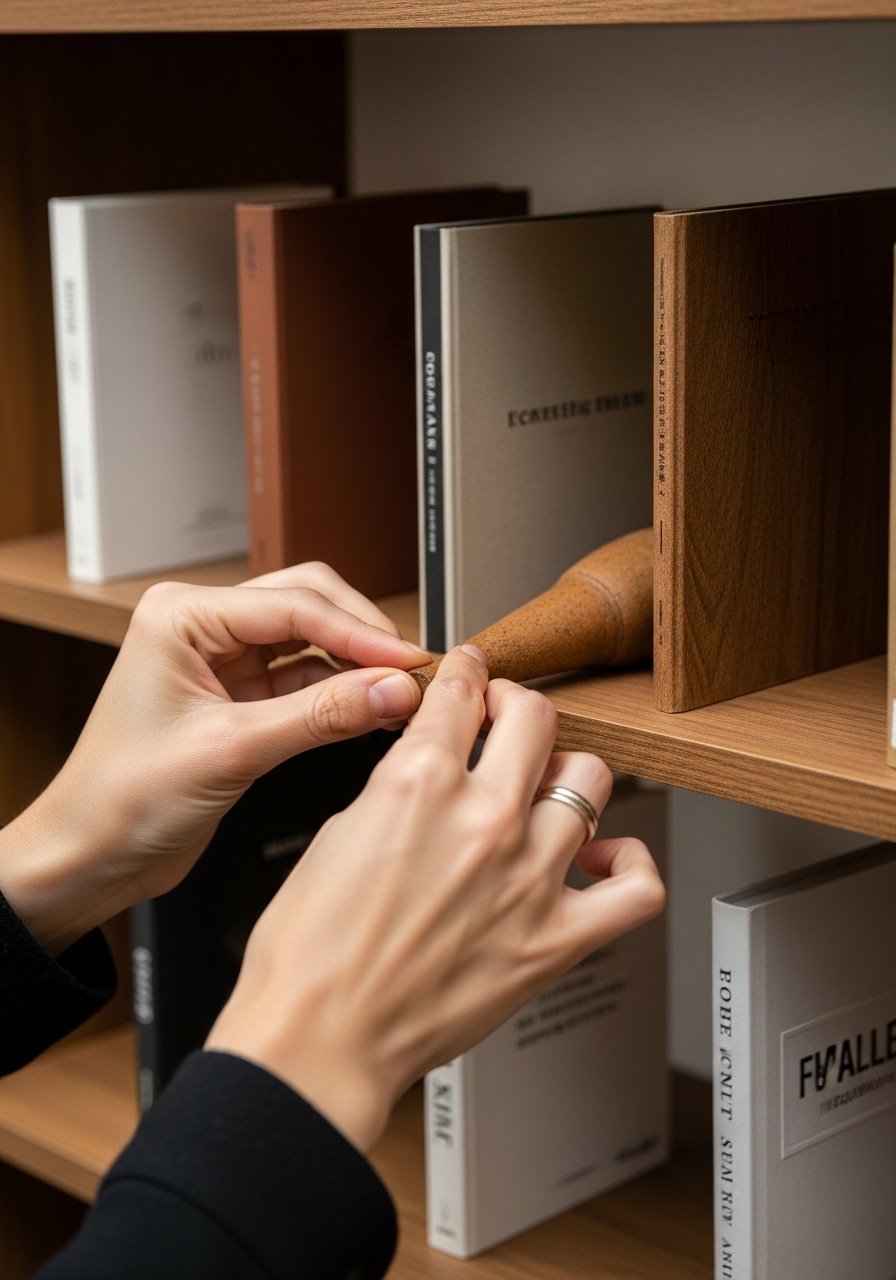
Next I add the items I actually use: a stack of mugs, a narrow cutting board leaned behind, and a folded linen towel. Mixing materials — wood, ceramic, woven fiber — creates the organic modern or japandi feel I like. I keep frequently used pieces within easy reach so the shelf stays practical, not just pretty.
One insight is to vary heights and orientations: upright mugs next to a horizontal stack of plates. A mistake I often made was styling only decorative objects. Shelves look lived-in and balanced when function stays part of the arrangement.
Step 4: Introduce life and softness with plants and art
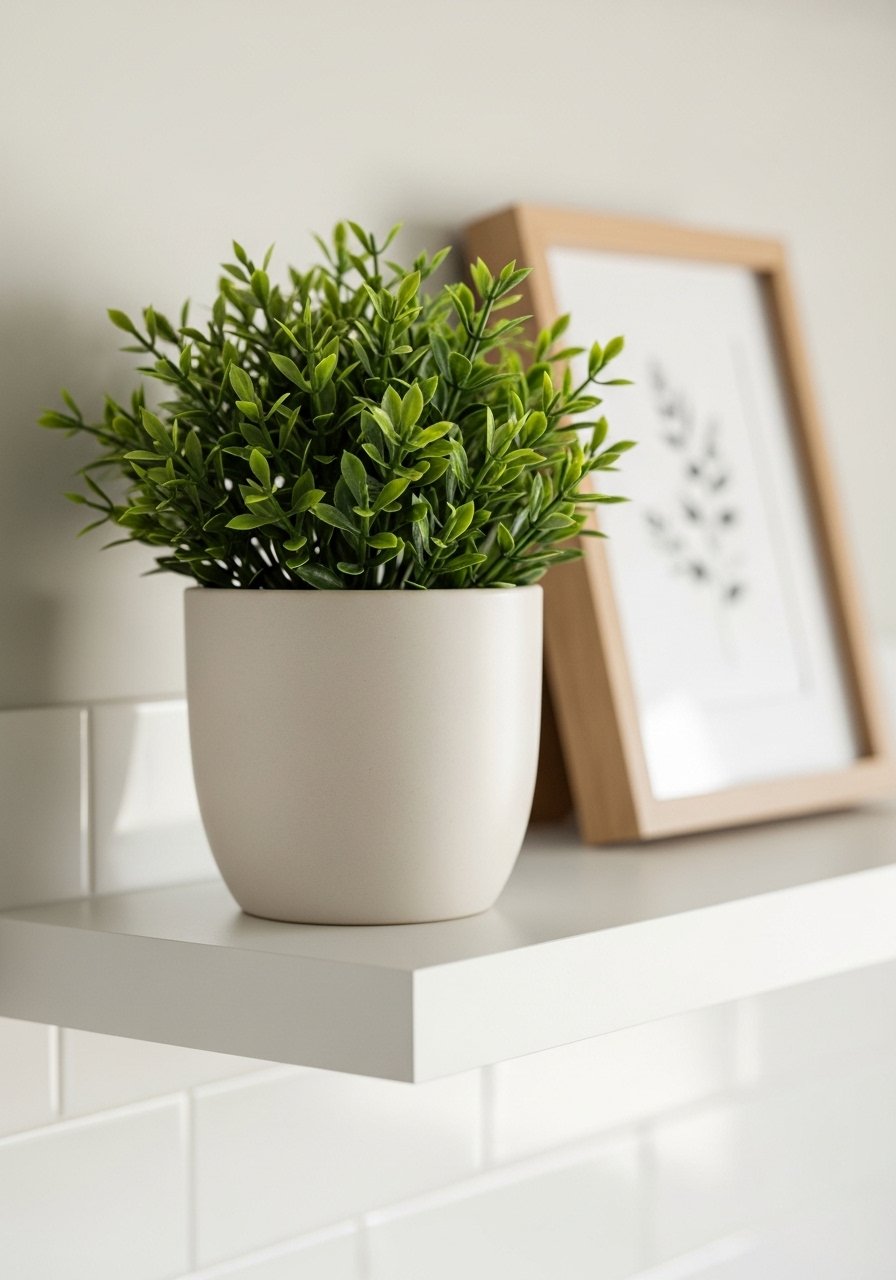
I add a small faux plant and a single framed print leaning slightly against the backsplash. Living things — or realistic faux versions — give the shelf softness and a sense of life. Leaning art keeps the look relaxed and approachable compared with perfectly hung pieces.
People often miss scale when picking plants; a tiny pot can hold its own without overwhelming. The mistake to avoid is tall floppy plants that crowd everything else. Keep the greenery compact and the art modest.
Step 5: Edit until there’s breathing room
I step back and remove at least one item. That pause creates negative space, which is what makes arrangements feel intentional. I aim for clusters of objects with slight gaps between them so the eye moves instead of getting stuck on clutter.
An insight I learned is odd-number groupings read friendlier — three mugs, one plant, and one stack of plates. The mistake I used to make was filling every inch; less often looks more balanced and calm.
Step 6: Live with the shelves and adjust
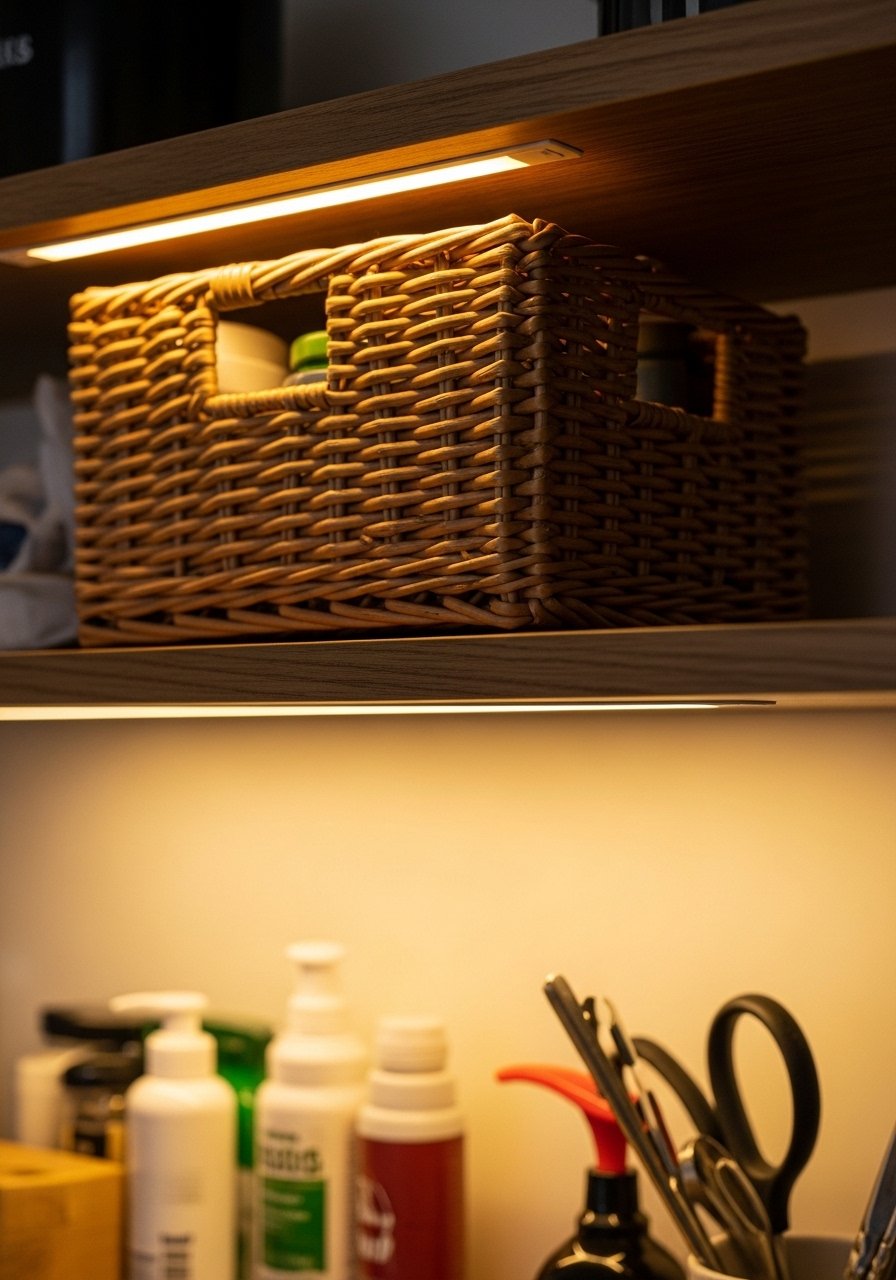
I let the shelves live for a week before deciding on final tweaks. I note what I reach for and what looks decorative but unused. Baskets under the shelf (or on the counter) tame clutter, and a warm LED strip under the shelf adds a soft glow for evening tasks.
An insight is shelves should evolve. I rotate seasonal items or swap a mug color to freshen the look. A mistake is treating styling as permanent; a little editing keeps the shelves feeling natural and lived-in.
Common mistakes I see
I find the same few errors repeat in kitchens.
- Overcrowding: Filling every inch removes rhythm.
- Too much symmetry: Perfect symmetry reads staged, not lived-in.
- Ignoring scale: Small items get lost next to flush-mounted cabinets.
I fix all of these by editing down, keeping odd-number groupings, and pretending the shelf is a slow vignette that changes over weeks.
Adapting this look for small kitchens or a tight budget
I often work with compact kitchens. One narrow shelf can be more effective than two crowded ones. I pick multifunctional anchors: a canister that holds frequently used utensils or a basket for pantry overflow.
Budget-friendly swaps work well: use thrifted plates, small faux greenery, and a single quality cutting board rather than many decorative objects. I focus on texture over cost — wood, ceramic, and woven fibers make a modest mix read thoughtful.
Mixing floating shelves with existing cabinets and styles
I tend to echo at least one element of the cabinets — a wood tone or a metal finish — so the shelf feels like part of the room. For a modern kitchen I keep objects minimal and tonal. For a farmhouse vibe I bring in more warm wood and rustic ceramics.
Bulleted habits that help me blend styles:
- Mirror one material (wood grain or metal) on shelf items.
- Keep colors within a simple palette so the shelf doesn’t fight the cabinets.
- Let one item be the focal point and the rest support it.
Final Thoughts
Start with one shelf and two anchors. I like a reclaimed wood shelf and a small faux plant as a low-commitment test.
Style slowly. Edit more than I expect. The result is a shelf that feels useful, calm, and quietly personal — and that’s what makes the kitchen finally feel finished.

