

I used to stare at my kitchen and feel like something was missing. The counters were clean, the layout made sense, but the room felt cold and a little anonymous. It’s the kind of space that needs personality, not a renovation.
Adding greenery fixed that. It made the room feel lived-in, warm, and quietly rooted in nature without shouting for attention.
How to Decorate a Kitchen With Greenery
This is the method I use when a kitchen feels finished but flat. You’ll learn how to choose where green belongs, how to layer plants and materials, and how to keep it clean and balanced. The result is an organic, lived-in kitchen—think soft sage tones, warm wood, and tidy clusters of plants.
What You'll Need
- Potted herb starter kit, 6-pack (~$20–40)
- Matte ceramic planters in sage, set of 3 (~$30–60)
- Floating oak shelf, 36-inch (~$40–120)
- Butcher block cutting board, 18×12, walnut (~$40–150)
- Brass cabinet pulls, 10-pack (~$20–60)
- Hanging glass pendant light, clear globe (~$80–250)
- Terrazzo subway tile peel-and-stick backsplash, 10-pack (~$30–90)
- Textured linen tea towels, sage set of 4 (~$20–40)
Step 1: Pick one green anchor and commit

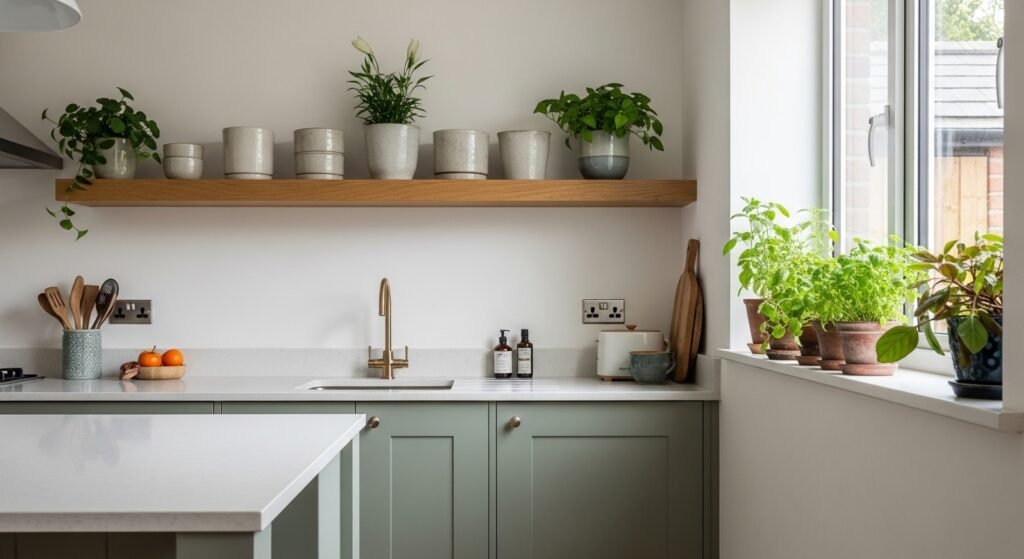
Start by choosing one place to be green. I usually pick the island or the lower cabinets. That single plane becomes the room’s story. It gives the eye a place to rest and prevents random, competing greens.
What changes is immediate: the kitchen feels grounded instead of floating. People miss that green reads like a neutral when it’s held to one strong surface. A common mistake is painting everything green. That flattens the room. Keep one anchor and let other greens be accents.
Step 2: Layer warm materials around the green
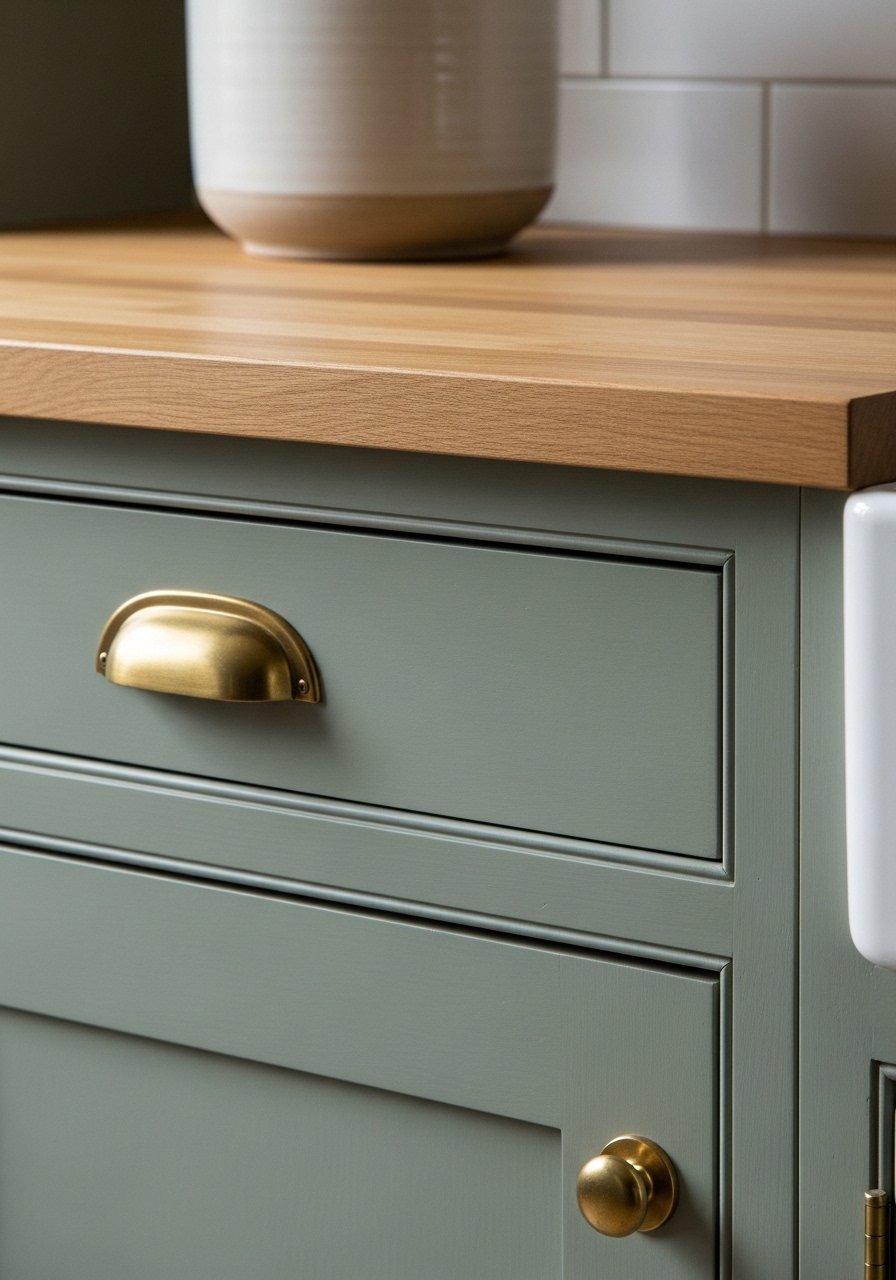
Once I have an anchor, I add warm materials. Wood counters, a butcher block board, and brass pulls stop a green from feeling cold. Warm textures give green a cozy, organic look—think olive or sage paired with oak.
Visually, the space shifts from “styled showroom” to “home.” The insight most people miss is how small metal finishes change the mood. The mistake? Sticking only to stainless and cool tones. If the green still reads crisp, add a wood surface or brass hardware to soften it.
Step 3: Place living plants for rhythm and purpose
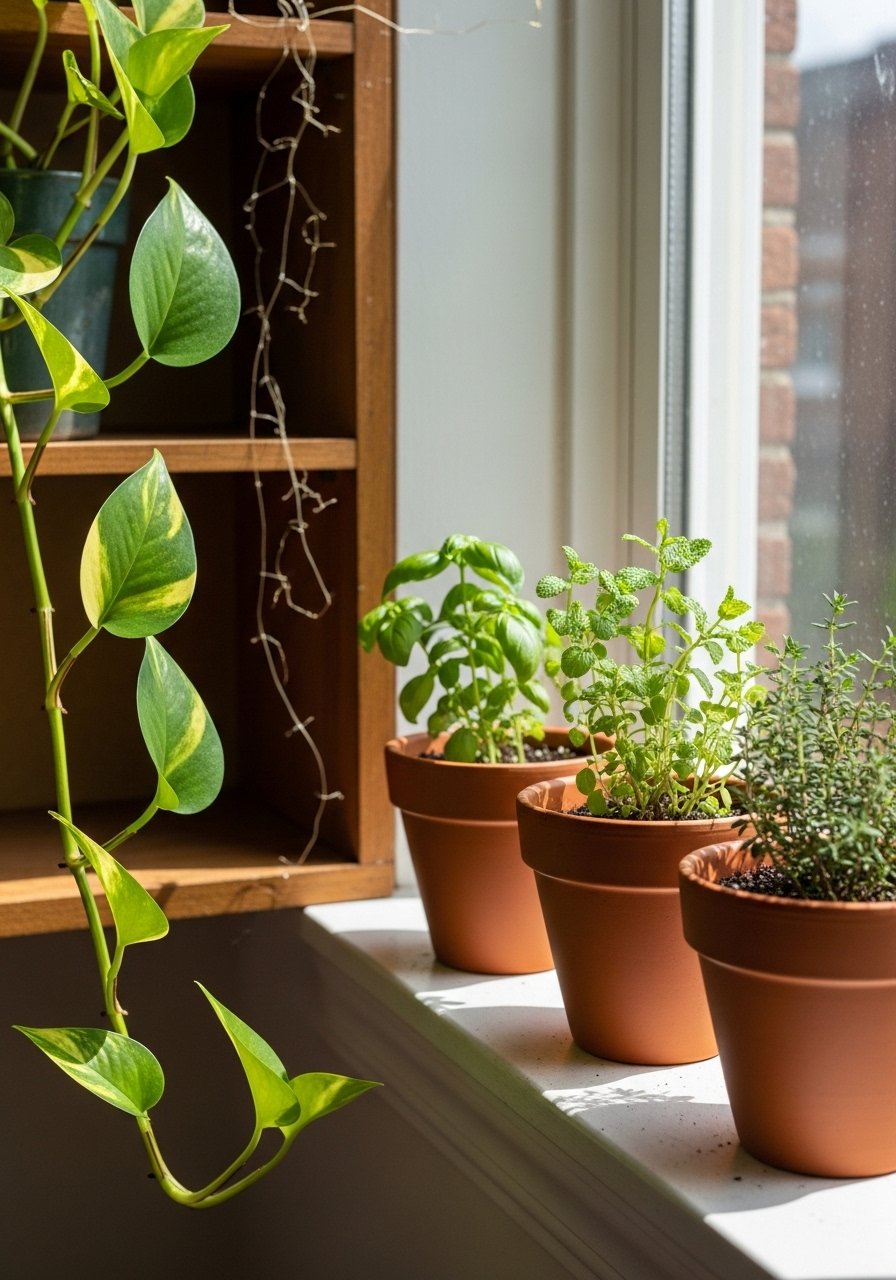
I put plants where they belong — where I cook, where light lands, where someone can touch them. A row of herbs on the sill, a trailing plant on an open shelf, and one statement plant on the island make the room feel intentional.
What you’ll notice is movement: leaves, shadows, small seasonal changes. People often over-plant counters. The better move is to cluster in odd numbers and leave breathing space. Avoid tiny pots scattered everywhere; they read cluttered. Think about task zones and let plants support them.
Step 4: Edit for balance and negative space

After adding plants and materials, I edit. I step back, look for repetition, and remove anything that competes with the green anchor. One shelf with three pieces, a counter with a single herb cluster, and one focal pendant keeps things calm.
Visually the kitchen becomes balanced. The insight is that less often reads richer. A common mistake is layering too many small objects because they “match” the palette. Keep negative space. That empty area around a plant makes it look deliberate, not accidental.
Step 5: Use small swaps to test and seasonally tweak
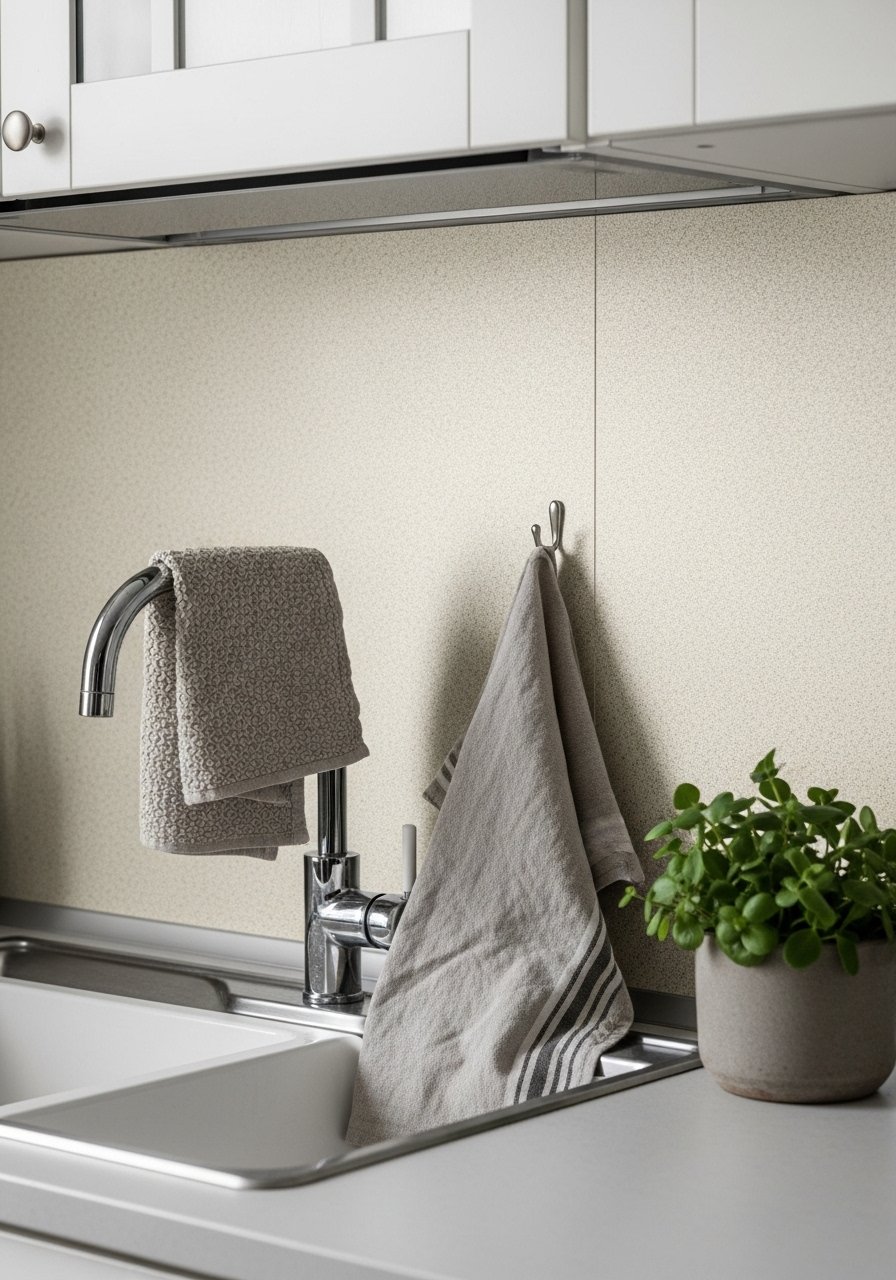
If you’re not ready to repaint or install cabinets, swap smaller things first. Try a peel-and-stick backsplash in a pistachio or terrazzo, change cabinet pulls to brass, or introduce linen towels in sage. These swaps give the same warmth without commitment.
What happens is you learn what green you love. The insight people miss is testing color in layers—textiles, hardware, tile—before jumping to cabinets. Avoid changing everything at once. Small, reversible changes tell you what to keep.
Common mistakes people make with green kitchens
I’ve seen the same errors again and again. First, using green as an accent everywhere so nothing reads as intentional. Second, matching only cool metals and ending with a stark room. Third, crowding counters with tiny pots.
Fixes I use:
- Commit to one anchor surface.
- Add one warm material: wood, butcher block, or brass.
- Edit plant placement and leave breathing room.
Adapting this look for small kitchens and renters
Small kitchens need unity. I like full-height muted green on one wall or the island to visually expand the space. If you rent, use peel-and-stick backsplashes, swap hardware, and add open floating shelves for plants instead of changing cabinets.
Practical tips:
- Use a single shelf above the sink for a plant trio.
- Choose matte, muted greens so the space reads calm rather than busy.
- Keep larger pots on the floor or open shelf to avoid overcrowding counters.
Mixing green with what you already own
Start with what you have. If your counters are warm wood, green will already feel right. If you own stainless appliances, introduce brass or aged metal in small doses to warm the palette. Textiles are the easiest place to nod to a green scheme—tea towels, rugs, or cushions.
A short checklist I use when mixing:
- Match one warm element to the green anchor.
- Group plants in odd numbers.
- Keep at least one neutral surface to avoid visual overload.
Final Thoughts
Start small and be deliberate. One green anchor, a wood detail, and a few plants will make your kitchen feel lived-in and calm. Change one small thing this weekend—swap pulls or hang a shelf—and live with it for a season.
If you want a low-commitment start, try linen tea towels in sage or a potted herb kit. They tell you more than a mood board ever will.

