

I kept stuffing small appliances into drawers and then wondering why the counters still felt cluttered and the room boxed in. I’ve stood in a kitchen where heavy uppers made the space feel dark and closed.
Open storage fixed that for me. It made the room lighter and let everyday things read as part of the decor.
How to Decorate a Kitchen With Open Storage
I’ll show the simple approach I use when a kitchen feels heavy or unfinished. You’ll learn how to pick the right wall, style one shelf line, and balance open with closed storage so the room reads warm and lived-in—think organic modern with warm wood accents, not messy.
What You'll Need
- Warm wood floating shelf, 36", white oak look (~$40–150)
- Slim metal window shelf, black, 24" (~$50–120)
- Glass pantry jar set, clear, 6-piece (~$20–50)
- Woven rattan basket set, small/medium, natural (~$25–60)
- White ceramic dinnerware set, 16-piece (~$40–120)
- Modular open cubby organizer, 4-cube, wood finish (~$60–200)
- Small potted herb kit, indoor, 3-pack (~$20–40)
- Marble-look floating shelf, single level, white (~$80–200)
Step 1: Pick the one wall to open so the kitchen feels lighter

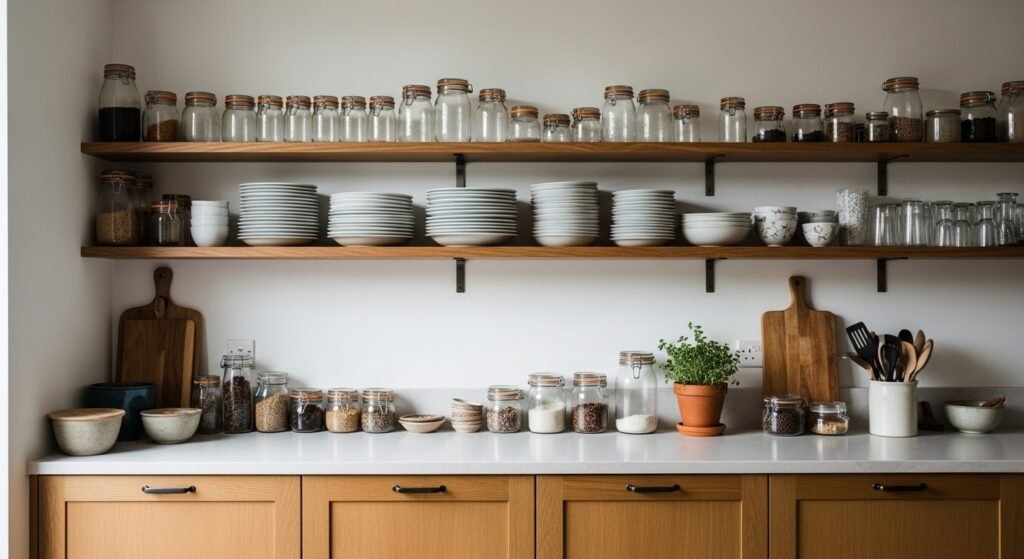
Start by choosing one wall to convert to open storage. I always pick a wall that affects light and flow—above the prep counter or near the sink—so the change actually makes the room feel airier. Visually, this pulls your eye up and creates breathing room where heavy uppers once boxed the space.
Most people miss aligning the shelves with work zones. If you don’t, the shelves look decorative but feel useless. Small mistake to avoid: don’t replace every upper cabinet at once; leaving some closed storage keeps things practical and calm.
Step 2: Begin with a single, horizontal shelf to test the look

I start with one straight shelf line—either warm wood or a marble-look shelf that echoes the counter. It shows the effect without committing the whole room. The visual change is immediate: you get a clean horizon that makes the backsplash and lighting read bigger and brighter.
One insight I rely on is matching the shelf material subtly to another element—counter, floor, or cabinet—to make the shelf feel intentional. A common mistake is overloading that first shelf. Keep it breathable; one row of plates, a jar, and a plant go farther than ten mismatched objects.
Step 3: Curate what stays out so shelves feel edited, not crowded
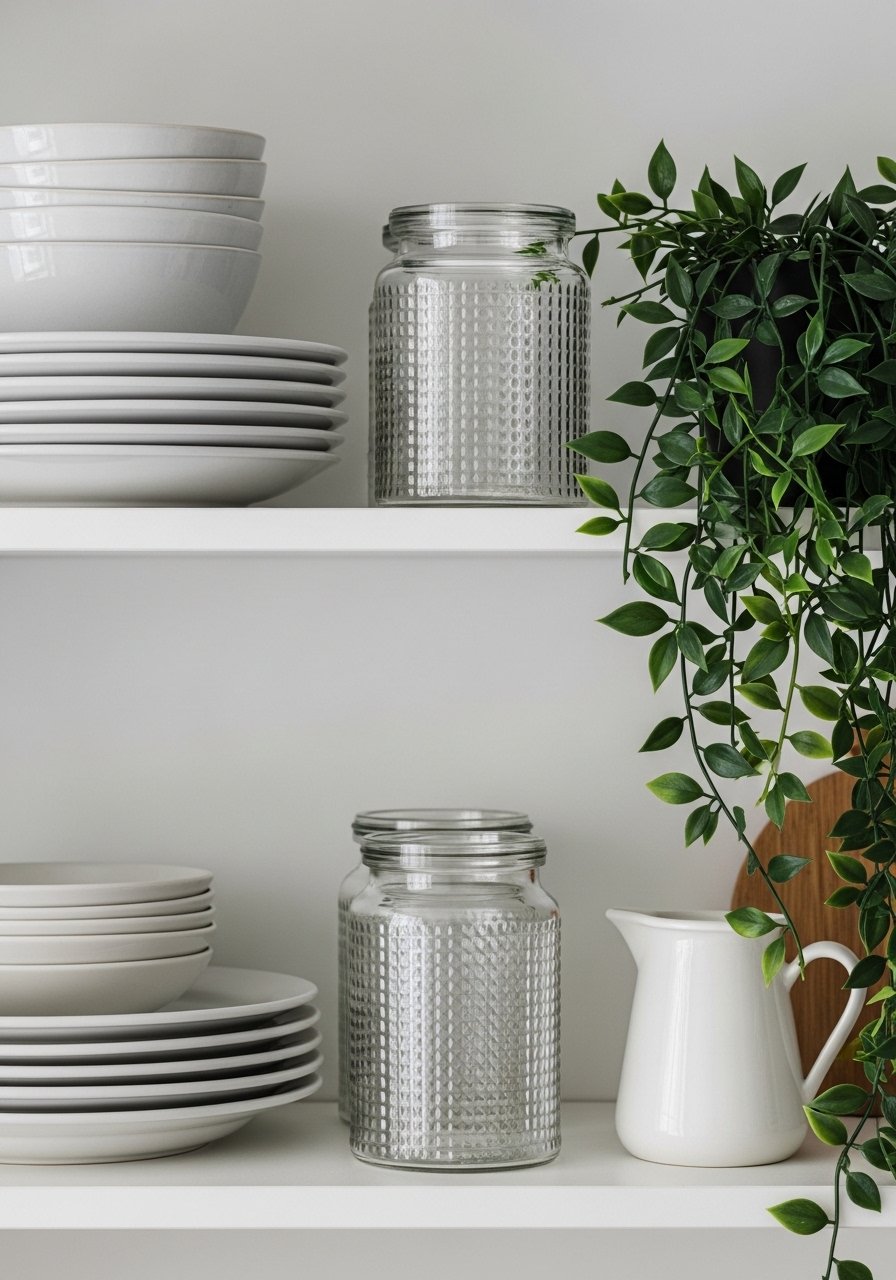
Styling is about editing. I put everyday plates and a couple of clear jars on the lower, reachable shelves and reserve one higher shelf for ceramics or a small display. Visually it reads as calm when items repeat—same plate color, two matching jars—so the eye rests.
People forget negative space; empty stretches between groups are as important as the objects. Mistake to avoid: piling every sentimental piece up there. If it’s not used or cohesive, tuck it away in a cubby or basket.
Step 4: Balance with closed storage and soft containers
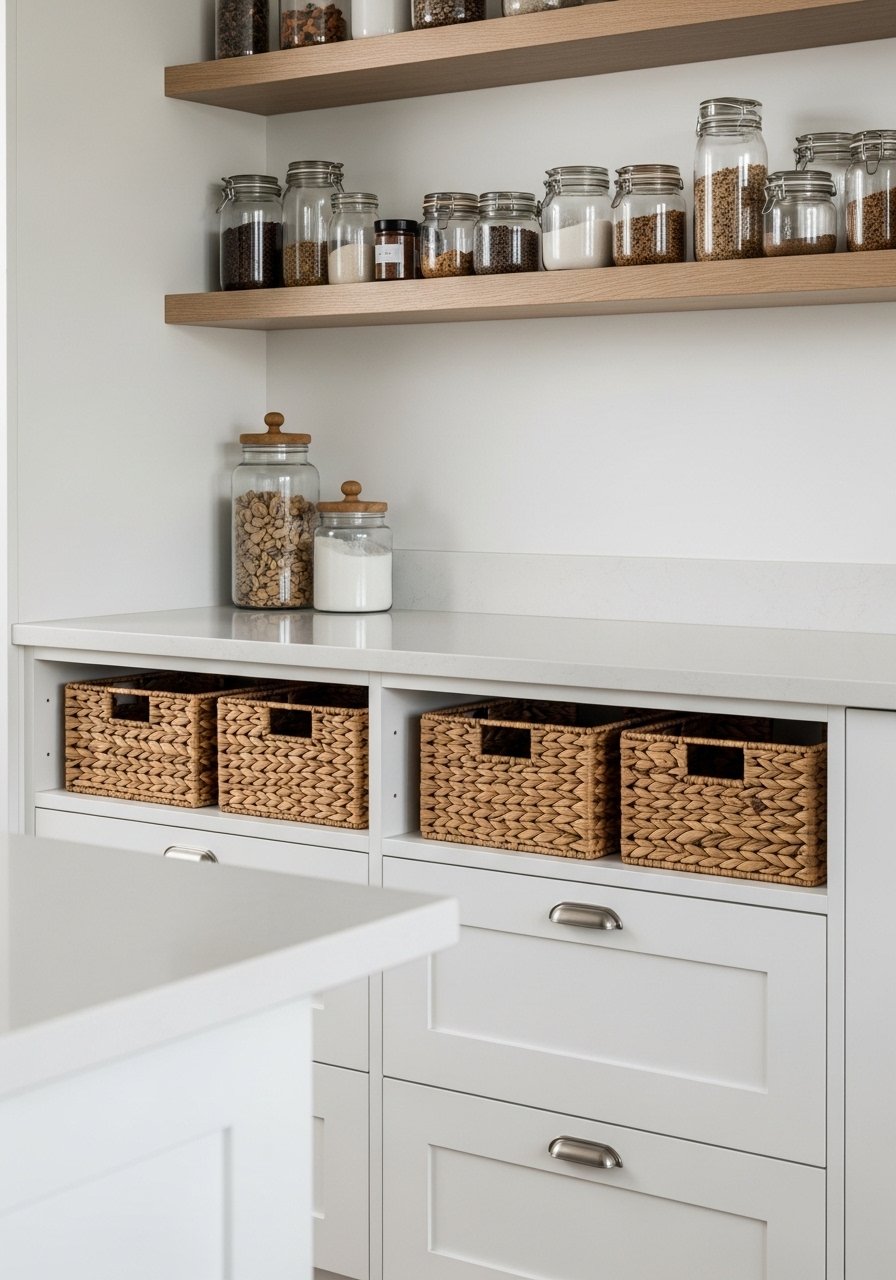
Open shelving looks best when it’s paired with places to hide the clutter. I keep lower drawers and at least one cabinet for small appliances and food storage. Woven baskets and modular cubbies are my go-to for hiding things while keeping texture in the mix.
One renter-friendly tip I use is a repurposed hutch or freestanding cubby—no wall holes, lots of charm. The mistake I see is going all-open: without some concealed storage, the kitchen quickly looks busy and chaotic.
Step 5: Style for daily use and easy upkeep
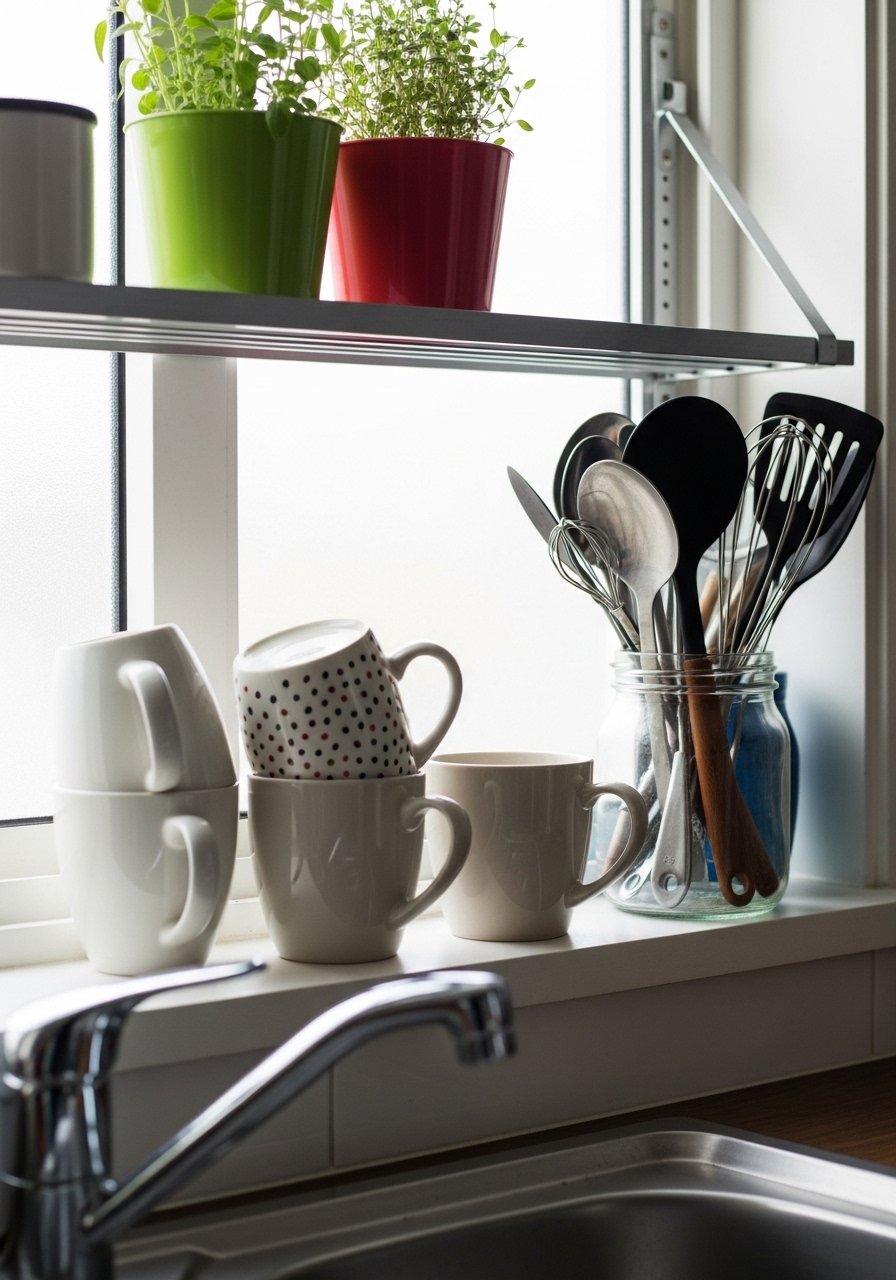
Think about reach and maintenance. I put oils, everyday mugs, and frequently used bowls on the lowest open shelf so I don’t battle the ladder every morning. Place herbs or plants where they get light—slim metal shelves across windows work great for that fresh, lived-in feel.
An often-missed detail is dust and fingerprints: I keep glassware upside down on a shelf or use jars with lids for pantry items. Avoid placing heavy or fragile items on thin floating shelves; it looks unstable and invites damage.
Common styling mistakes (and how I avoid them)
I’ve seen kitchens look busy because every shelf becomes a catch-all. Fix that by making a simple formula: two functional items (plates, jars), one textile (tea towel or small basket), and one personality piece (a vintage pitcher). Repeat that across shelves for rhythm.
- Mistake: Too many finishes. Stick to two or three materials (warm wood, white ceramic, clear glass).
- Mistake: No breathing room. Aim for 30–40% empty shelf space visually.
Open storage for small kitchens and rentals
Small kitchens benefit most from open shelves because they clear visual weight. I use shallow cubbies above the sink for plates and a single long shelf over the prep area to preserve headroom. Vertical, ceiling-height shelving also works if you have it—just reserve the top for items you rarely use.
For rentals, I look for freestanding options: a doorless hutch, a modular cubby, or leaning shelves. They give the same warm-wood, collected look without drilling into walls. Baskets are your friend here for hiding items.
Quick maintenance and family-friendly tips
Open shelving is honest—so plan for wear. I keep everyday plates in easy stacks and use lidded glass jars for pantry goods to cut dust. For homes with kids or pets, put breakables on higher shelves and use sturdier ceramics on the low ones.
- Wipe shelves weekly with a damp cloth.
- Rotate display items seasonally so cleaning stays light.
- Use baskets for snack bags and small items that would otherwise end up scattered.
Final Thoughts
Start with one shelf and live with it for a month. You’ll see what you reach for, what distracts, and where you want closed storage. A warm wood shelf is a small, low-commitment change that often unlocks the whole look.
Take your time editing. The goal is a kitchen that feels lighter and more intentional—comfortable, not formal.

